Tuesday, July 21, 2020

Grilled Shrimp Lettuce Wraps


Frozen shrimp has always been a go-to staple in my freezer--and especially so during the quarantine, shelter-in-place, days of late.  Besides going from frozen to thawed within minutes, there is something comforting about knowing that you've got seafood virtually on-demand and waiting to be transformed into as many delicious iterations as your imagination can muster.

So this past Sunday, after a morning walk, followed by an online worship service, and re-watching Hamilton (squeal!), my mind went to what's for dinner.  And in keeping with my already low-key Sunday vibes, I decided to keep it simple.

What resulted was simple in preparation, indeed, in that I had all of the ingredients on hand in my fridge, but by no means simple in final wow-appeal and delicious-ness.  Translation: it. was. so. good.


Grilled shrimp (I grilled my shrimp on my indoor smokeless grill for extra ease), lettuce leaves to serve as the bed and wrap, piquant scallions, juicy grape tomatoes, hothouse cucumber slices, and a punchy lime vinaigrette, made for one good 'til the last bite creation.  The lightness of the dish (perfect for Summer) x the big flavors made this an instant favorite.  It's a gorgeous meal-in-one that can double as appetizers or a main course, depending on whether you're hungry or hangry. :)

Enjoy--and join me in finding delight in the simple pleasures of...

Happy Eating!

Grilled Shrimp Lettuce Wraps
Ingredients:
Shrimp, peeled and deveined
Kosher Salt
Freshly Ground Pepper
Old Bay Seasoning
Worcestershire Sauce
Tabasco
Olive Oil
Lettuce leaves (Boston or Bibb, recommended)
Grape tomatoes, halved
Scallions, chopped (white and green parts)
Hothouse cucumber, thinly sliced
Lime Vinaigrette (recipe follows)
Flaked sea salt for garnish (optional)

Method:
Place shrimp in a bowl and season to taste with salt, pepper, Old Bay, Worcestershire, Tabasco and oil; toss ingredients to combine. Grill shrimp until just done about 2 minutes or so per side. While shrimp is grilling, prepare vinaigrette.  Once done, remove shrimp and drizzle with some of the vinaigrette.  Toss to coat and set aside.

Arrange lettuce, tomatoes, scallions, cucumber and shrimp on a platter.  Place remaining vinaigrette in a dish/bowl and add to platter.  Garnish with a light sprinkle of flaked sea salt to finish, if using.  To assemble, place cucumber, tomatoes, shrimp and scallions on lettuce leaf.  Garnish with a drizzle of vinaigrette to finish--and enjoy!

Lime Vinaigrette
Ingredients:
Juice of 1 lime
Teaspoon of Dijon mustard   
1/2 teaspoon of honey
Kosher salt and ground pepper to taste
1 Tablespoon of Extra Virgin Olive Oil  

Method:
Whisk together lime juice, mustard, honey, salt and pepper.  Drizzle in oil and whisk until emulsified and fully incorporated. (Cook's Note: I like my vinaigrette with a good acidic punch so I typically use less oil than is standard.  Feel free to modify with more oil, as desired.  And you can also double the original recipe for more vinaigrette. Store remaining vinaigrette in an airtight container in the refrigerator for up to a week.) 


SHARE:

Tuesday, September 3, 2019

{Green Goodness}: Kale and Apple Salad with Lemon Vinaigrette

Now that September is here, there is an obvious (if not annoying) pull by merchandisers, social media--everyone, it seems--to forget about the remaining weeks of Summer. And being one who is resistant, if not defiant, to give into the pumpkin spice spell before its time, I'm continuing my summer-ing ways until the very end. But that doesn't mean I won't give a slight nod to my favorite season in time for its arrival.


Here enters a fresh, good-to-you, good-for-you, kale salad that keeps on the light side of things (summer vibes, indeed), while showcasing crisp, green apples that point the way to the autumn eats just around the corner.  Crowned (or garnished) with freshly grated pecorino romano shavings and dressed with a punchy lemon vinaigrette, this salad is a veritable ode to the best of both seasons.

I whipped it up in sheer minutes last night and it seemed to be all gone in just as many minutes following.  It seemed to be, but not quite :), however there were no leftovers to relish today, so I'll absolutely be doing a "make, eat, repeat" until I can't anymore.  I think you'll feel the same once you make it--and who can blame us?

So go ahead and live out your remaining Summer days with a wink at Fall that makes for...

Happy Eating!

Kale and Apple Salad with Lemon Vinaigrette

Ingredients:
Fresh kale greens
1 Granny Smith apple (or apple of choice), sliced
1/3 cup of freshly grated pecorino romano (plus more for extra garnish)
1 large lemon
1/2 cup extra virgin olive oil
1 teaspoon dijon mustard
1 teaspoon honey
Kosher salt 
Freshly ground black pepper

Method:
Place greens in a large bowl, layer in apple slices and dress with vinaigrette (recipe to follow) and toss together to combine.  Sprinkle in cheese and toss again.  Serve on individual platings and finish with a final garnish of cheese.  Enjoy!

Lemon Vinaigrette
Add the juice of the lemon, dijon, honey, and salt and pepper to taste in a small bowl and whisk together.  In a slow stream, whisk in the olive oil until fully combined.  Enjoy. (Cook's Note: Vinaigrette can be made ahead and stored in the refrigerator in an airtight container for up to a week.)


SHARE:

Monday, August 5, 2019

Easy Meal Prep x Egg Muffins

After hearing quite a few success stories about the Keto diet over the last while, I recently grabbed a magazine at the local bookstore to learn more about this lifestyle--and to cop some recipes that I could begin incorporating into my eating regimen.

I haven't done a lot just yet in the way of adopting the lifestyle since I'm still in the "exploratory phase", but there were some fabulous recipes that immediately caught my eye and took away some of the mystery around what a Keto-friendly diet is really all about.

And it was the featured egg muffins that leaped off the page and made it to my kitchen first.  What drew me in?  The ease of preparation (like whisking up some eggs and layering them with delicious add-ins in muffin tins for a bake it and forget it done deal.)  With just an hour or so out of my Sunday afternoon to assemble and bake, which meant perfect timing for catching up on a couple of podcasts, it was likely as easy as meal prep goes. 

And we can't forget about the key takeaway of cooking: the taste!  These are delicious and the piquant onion flavor, coupled with the savory goodness from the dry-aged salami and cheese, felt like I was enjoying crust-less, mini quiches.  Some days they were breakfast and others they were lunch with a side salad thrown in. 

The final bonus is that they lend themselves well to freezing or storing in the refrigerator.  What meal-prep dreams are made of, no?

So whether you're a Keto devotee or not, these egg muffins will suit any quest for easy, healthy and delicious eats.  Try them and let me know your thoughts.

Happy Eating!

Egg Muffins

Ingredients:
2 scallions, finely chopped
5 oz. air-dried chorizo, salami or cooked bacon, chopped
12 eggs
6 oz. shredded cheese (your choice)
2 Tbsp. red or green pesto (optional)
Salt and pepper 

Method:
Preheat oven to 350 degrees F

Divide chopped scallions and meat and add equal amounts to bottom of each cup.  Whisk eggs with seasoning and pesto, if desired.  Add cheese; stir.

Pour egg mixture evenly into each cup.  Bake for 15-20 minutes, depending on size of muffin tin.  Let cool before wrapping in plastic and storing in fridge or freezer.  Enjoy!

Recipe courtesy of DietDoctor.com 
 
SHARE:

Thursday, February 21, 2019

{Self-Care x Pampering} ~ 5 Ways To Treat Yourself Well

Self-care can mean many things to as many people.  However, one thing is constant--it's necessary for actualizing our most fulfilled, balanced, and healthy selves.  Whether you're talking physical, mental, emotional, or spiritual, well-being, making time to care for yourself is essential.

One of the many ways that I spell self-love and self-care is through pampering!  Whether it's a trip to the spa, or special at-home rituals, a little pampering goes a long way to reinvigorating and uplifting us into our best selves.

Here are five of my favorite ways to indulge:

Drink to Life - with a 24-hour drink menu for the prettiest skin of your life. (Marie Claire)

Detox Your Skin - grab the secrets of five beauty bloggers as they spill the beans on the best ways to care for your skin from the inside-out. (Bloglovin')

Enjoy a Spa Day - at home! With these DIY spa treatments, your spa day is closer than ever. (Lulus)

Unplug - Going off the digital grid for an afternoon, a day, or more, can contribute immensely to a renewed outlook and a recharged mental state.  And fewer things can be more indulgent and nurturing when the world beyond beckons and your favorite app is only a touch away.

Rest Up - Sleeping in, afternoon napping, early bedtimes, anyone? Slowing down and prioritizing restfulness is the essence of self care and the side benefits are endless!

Sounds simple, right?  But if we're being completely honest, how consistent are we about actually doing it?  Let's make the days ahead the best they can be with a bit more self-love and self-care in action.

Happy Living!

P.S. How do you spell self-care?
SHARE:

Sunday, October 28, 2018

{What's For Dinner}: Stuffed Peppers with Quinoa and Italian Chicken Sausage


I've never had to overthink much when it comes to what I eat.  I often teasingly say that I'm an equal opportunity eater, meaning that I enjoy good food without discrimination.  However, lately, I've renewed my commitment to healthier fare to attain (and maintain) my personal health and fitness goals. 

Despite the bad rap that "healthy" foods can sometimes receive, nothing could be farther from the truth.  Sure, it might mean moderation when it comes to indulgences, as well as embracing our favorite foods prepared in slightly different ways (e.g. baked vs. fried), etc., but it does not have to mean absence of flavor and the scrumptious goodness that we desire--and deserve.

Last week I whipped up one of my favorite healthy dishes, that not only delivers scrumptious flavor bite after bite, but also happens to be a cinch to prepare.  Can we say, win-win?!  I grabbed some sweet peppers from the market and decided to transform them into a meal by stuffing them with a quinoa and Italian chicken sausage mixture. (So good!) They were received by happy mouths and tummies, mine included!, and will definitely be on future rotation in my cooking repertoire.

I'm excited for you to make them and enjoy the same satisfaction and....

Happy Eating!

Stuffed Peppers with Quinoa and Italian Chicken Sausage 

Serves 6
Ingredients:
6 sweet peppers
1 cup quinoa
1 lb. Chicken Italian Sausage
2 teaspoons tomato paste
1/2 cup tomato sauce
1 teaspoon dried oregano
Salt, to taste (optional)
Olive Oil
Shredded Cheese
Chopped scallions to garnish (optional)

Method:
Preheat oven to 400 degrees F.

Rinse and dry peppers, core to remove stem and seeds, and set aside in a baking dish.

Pre-heat a tablespoon or two of oil in a large skillet over medium-high heat.  Add sausage (removed from casings) and saute until browned and cooked through.  Set aside.

Cook quinoa according to package instructions. Drain through a sieve and add to skillet with sausage.  Add in tomato paste, tomato sauce, oregano and a light sprinkling of salt.  Over low heat, stir to combine all the ingredients and form a quinoa and sausage mixture. 

Lightly drizzle oil over peppers and spoon quinoa and sausage mixture into each one.  Sprinkle cheese on top of each and cover the baking dish with foil.  Bake for 25-30 minutes in the preheated oven or until peppers are tender.  

Remove from oven and garnish with scallions.  Serve hot and enjoy!


SHARE:

Friday, September 1, 2017

Labor-less Labor Day Eats x Atlanta Plugged In

Summer isn't over yet!! I want to (air) scream this every time I cite a mention of Fall food and flavors these days.  Don't get me wrong, I loveeee the Fall.  It's my favorite season, in fact, but I'm all about celebrating each season to its fullest--and that means relishing the final days of Summer.

Just as Memorial Day marks the unofficial start of Summer, Labor Day tends to mark the unofficial end of this sultry time of year.  And with Labor Day in mind (and on the horizon), I have to share a few, fun recipes to make your entertaining over the long weekend anything but laborious.  Think effortless!

If you follow me on social media (I'd love it if you did--see the easy 'connect' buttons in the right margin. Shameless plug. ;-) ), then you're likely aware that I had the awesome privilege of returning to my favorite, Atlanta Plugged In, earlier this week to share my tips and recipes for making the most of the holiday.


Now that you've watched the segment, I hope you're inspired to try these easy, delicious, and, yes, healthy dishes.  Win, win, win.


And to tie it all together with a big bow on top, I'm sharing a bonus "recipe" in the way of a super fun and effortless sip.  Because there's so much to cheers to and be thankful for.

Enjoy a delicious, effortless, and safe holiday weekend.

Happy Eating!

Peach Caprese Bites
Ingredients:
Fresh peaches, sliced into rounds
Fresh mozzarella, thinly sliced
Prosciutto, thinly sliced
Basil leaves
Flaked sea salt (optional)
Balsamic syrup, for garnish, (optional)

Method:
Arrange peaches, mozzarella, basil and prosciutto in stacks.  Sprinkle lightly with sea salt and drizzle balsalmic, if using.  Enjoy!

Roasted Shrimp and Pineapple Skewers
Ingredients:
Shrimp, peeled and deveined
Fresh pineapple
Old Bay Seasoning
Kosher Salt
Freshly ground black pepper
Olive Oil  
Brown sugar 
Cilantro
Fresh limes  

Method:
Preheat oven to 425 degrees F.

On a baking sheet, toss together shrimp, seasoning, a light sprinkling of salt, freshly ground pepper and olive oil.  Roast in preheated oven for 5-6 minutes.  Set aside.

On a separate baking sheet, toss together pineapple, brown sugar, salt, pepper and olive oil.  Roast for 15 minutes in preheated oven. (*Cook's Note: Shrimp and pineapple can be prepared a day ahead and served at room temperature, if preferred.)

Add roasted shrimp, pineapple and cilantro to skewers.  Garnish with more chopped cilantro and fresh lime juice.  Enjoy!

Watermelon with Chili-Spiced Salt
Ingredients:
Fresh watermelon slices or chunks
1 tablespoon kosher salt 
1/2 teaspoon chili powder 
1/2 teaspoon ground cumin
1/4 teaspoon cayenne pepper (or less, to taste)

Method:
Add salt and spices to a dish and stir well to combine.  Sprinkle over melon, serve and enjoy! (*Cook's Note: leftover salt can be stored in an airtight container in your pantry.)

Cotton Candy Sparkler
Ingredients:
Cotton candy
Sparkling drink of choice (cider, prosecco, champagne, etc.)

Method:
Pour sparkling beverage in glasses.  Top with cotton candy.  Toast and enjoy!     


SHARE:

Sunday, August 27, 2017

Mixed Fruit Green Smoothie Bowl

I'm back on my smoothie craze these days, after an unintentional hiatus.  Ever since I began making smoothies years ago, I've been relatively constant about indulging--especially during the Summer months when my frothy, icy concoctions bring a much needed (and healthier) cool down.  I can rely on them to give me a semblance of the tasty goodness that ahem, a milkshake, might otherwise offer.

I also happen to be intentionally focusing on 'cleaner' eating these days, and smoothies are an easy go-to for loading fruits, vegetables, and added nutrients into your eating regimen.  My current favorite is a mixture of fruit and greens--with all the same good to you, good for you, scrumptious-ness that I love.


And while I'm talking cleaner eating, my newest star ingredient is a Coconut-Almond Milk blend that I discovered at the market recently.  It's everything (cue: diary free, gluten free, soy free, non-gmo and sugar free).  Everything, right?  Annnd.... it's only 45 calories per serving and provides the perfect creamy, sweet goodness as the base of my smoothie.  I'll admit that I was dubious about displacing my usual juice + coconut water base, but this was love at first sip.

So in the spirit of sharing and caring, I'm sharing my easy, good to the last drop smoothie recipe-turned-smoothie bowl.  About the bowl effect, I love it because it allows me to layer in more goodness with the toppings of my choice (fruits, toasted coconut chips, and whatever else your heart and taste buds desire.)  Smoothie bowls also happen to be all the rave right now, so I had to jump in on the fun.

Here's to more healthy, yummy goodness in your breakfast and snack routines and always to...

Happy Eating!

Mixed Fruit Green Smoothie Bowl
Ingredients:
1 cup Coconut-Almond Milk Blend (or Almond Milk, if you can't find the blend)
3/4 cup frozen mixed fruit
1/2 banana
1 cup fresh baby kale mix (or other greens of choice)
1 tsp honey
Fresh berries, coconut chips to garnish (optional)

Method:
Add milk, frozen fruit, banana, greens and honey to a blender and blend to desired consistency.  (Note: if smoothie mixture needs extra liquid, add in a little water and continue to blend.)  Pour smoothie into a bowl, garnish with toppings and enjoy!

 
SHARE:

Monday, November 7, 2016

Sweet Potato Chowder

Hearty root vegetables are a staple in my cooler weather recipes.  And one that tends to be in heavier rotation and stand out from the crowd in my kitchen is the good to you, good for you sweet potato.  I mean, what's not to like love about this superstar ingredient?  With health benefits galore and the knack for tasting really good no matter how you fix it, I took my sweet potato affections to another level recently and decided upon a luscious, decadent Sweet Potato Chowder.

The delightful thing about this chowder is that it comes together easily (I love a good homemade soup, stew and chowder) and tastes quite good.  And here's the reason for that: it's flavored with curry, which lends both phenomenal taste and color, coconut milk, and has a slight (not overbearing in case you're dubious) hint of spicy kick from chipotle in adobo.  Combined with the sweet, hearty potatoes and other flavorings,  it's a chowder worth making and savoring again and again.

As the cooler weather and holiday season unfold, this is one dish you'll want in your repertoire for certain.  Go ahead and make it...and thank me later.

Happy Eating!

Sweet Potato Chowder
Ingredients:
5-6 large sweet potatoes, peeled and chopped
1 large onion, diced
2 garlic cloves, minced
2 tablespoons olive oil
2 tablespoons mild curry powder
1 chipotle pepper in adobo, diced
2 teaspoons kosher salt (plus more to taste, as needed)
1/2 teaspoon freshly ground black pepper
1 quart chicken broth
1 can coconut milk
Fresh parsley, chopped, for garnish (optional)
Sour cream (optional)

Method:
Heat oil in a large soup pot or dutch oven.  Add onion and cook until they begin to soften slightly (about 2-3 minutes).  Add in garlic and curry and cook until onions become softened and translucent (another 3-4 minutes).  Add in potatoes, chipotle, salt, pepper, broth and coconut milk.  Stir to combine well.  Bring to a boil, then reduce to a simmer for 20 minutes or until potatoes are fork tender. 

Ladle 3 cups of soup mixture into a blender and puree.  Add pureed soup back into pot, stir to combine and taste for seasoning.  Garnish with fresh parsley and a swirl of sour cream (optional).  Serve warm and enjoy!

 (Cook's Note: Recipe can be made ahead and stored in airtight container in the refrigerator for up to 24 hours before reheating and serving.) 

Adapted from Better Homes and Gardens
SHARE:

Tuesday, May 31, 2016

Grilled Caesar Salad with Homemade Caesar Dressing

This past weekend marked the unofficial start of the Summer season.  There were festivals, concerts and BBQs galore to soak in the beautiful weather and holiday weekend good vibes--and that means food (specifically what to eat) was never too far behind.

A family BBQ was on my agenda for Memorial Day and I contemplated what to contribute to the menu.  I briefly considered doing a dessert, but then decided to go in a different (but equally delicious) direction with a classic Summer staple: salad.  But not just any salad.  If it was going to be a salad that could hold its own among burgers and franks and sides and, yes, dessert, it had to be one that I was sure could deliver.   So I decided to dust off my my recipe for Grilled Caesar Salad with homemade Caesar dressing.  I fell in love with this salad years ago, and it was a hit at last year's Spring Pop-Up Cooking School, so it had already passed the taste test many times over.


There's nothing quite like making your food from scratch. The homemade effect is hard to beat and that couldn't be truer when it comes to homemade salad dressings.  Caesar dressing is especially wonderful with a bold, deeply savory and scrumptious flavor that can single-handedly elevate your classic Caesar Salad to other-worldliness-and when coupled with grilled, slightly charred greens, you'll never see this salad the same again.


Here's to a beautiful Summer filled with lots of Happy Eating!

Grilled Caesar Salad with Homemade Caesar Dressing

Ingredients:
2-3 tablespoons fresh lemon juice
1 garlic clove, peeled and finely minced
1 teaspoon Dijon mustard
1 teaspoon anchovy paste
1 teaspoon Worcestershire sauce
Few dashes of Tabasco (optional)
3 tablespoons grated Parmesan, plus extra for sprinkling
1/4 teaspoon kosher salt
1/4 teaspoon freshly ground black pepper
1 large egg yolk
1/2 cup extra virgin olive oil, plus extra for drizzling
Romaine hearts

Method:
Add the lemon juice, garlic, mustard, anchovy paste, Worcestshire, hot sauce (if using), egg yolk, salt, and pepper to a blender to combine.  With the blender on low, slowly drizzle in the olive oil to incorporate until dressing is thickened.  Remove dressing from blender and whisk in 3 tablespoons of Parmesan.  Set aside.

Heat a grill pan over medium-high heat.  Take romaine hearts and lightly drizzle with olive oil.  Grill, face-side down, for up to two minutes, or just until greens start to slightly wilt and char.

Greens can be served whole or chopped.  Add dressing and garnish with a sprinkling of fresh Parmesan.  Enjoy!     


SHARE:

Monday, March 7, 2016

Pasta Primavera

This past weekend looked and felt like Spring.  And as much as I endeavor to enjoy each season fully, I can't deny that it made me wish for winter to hurry along so that the milder, sun-kissed days could settle in for good.

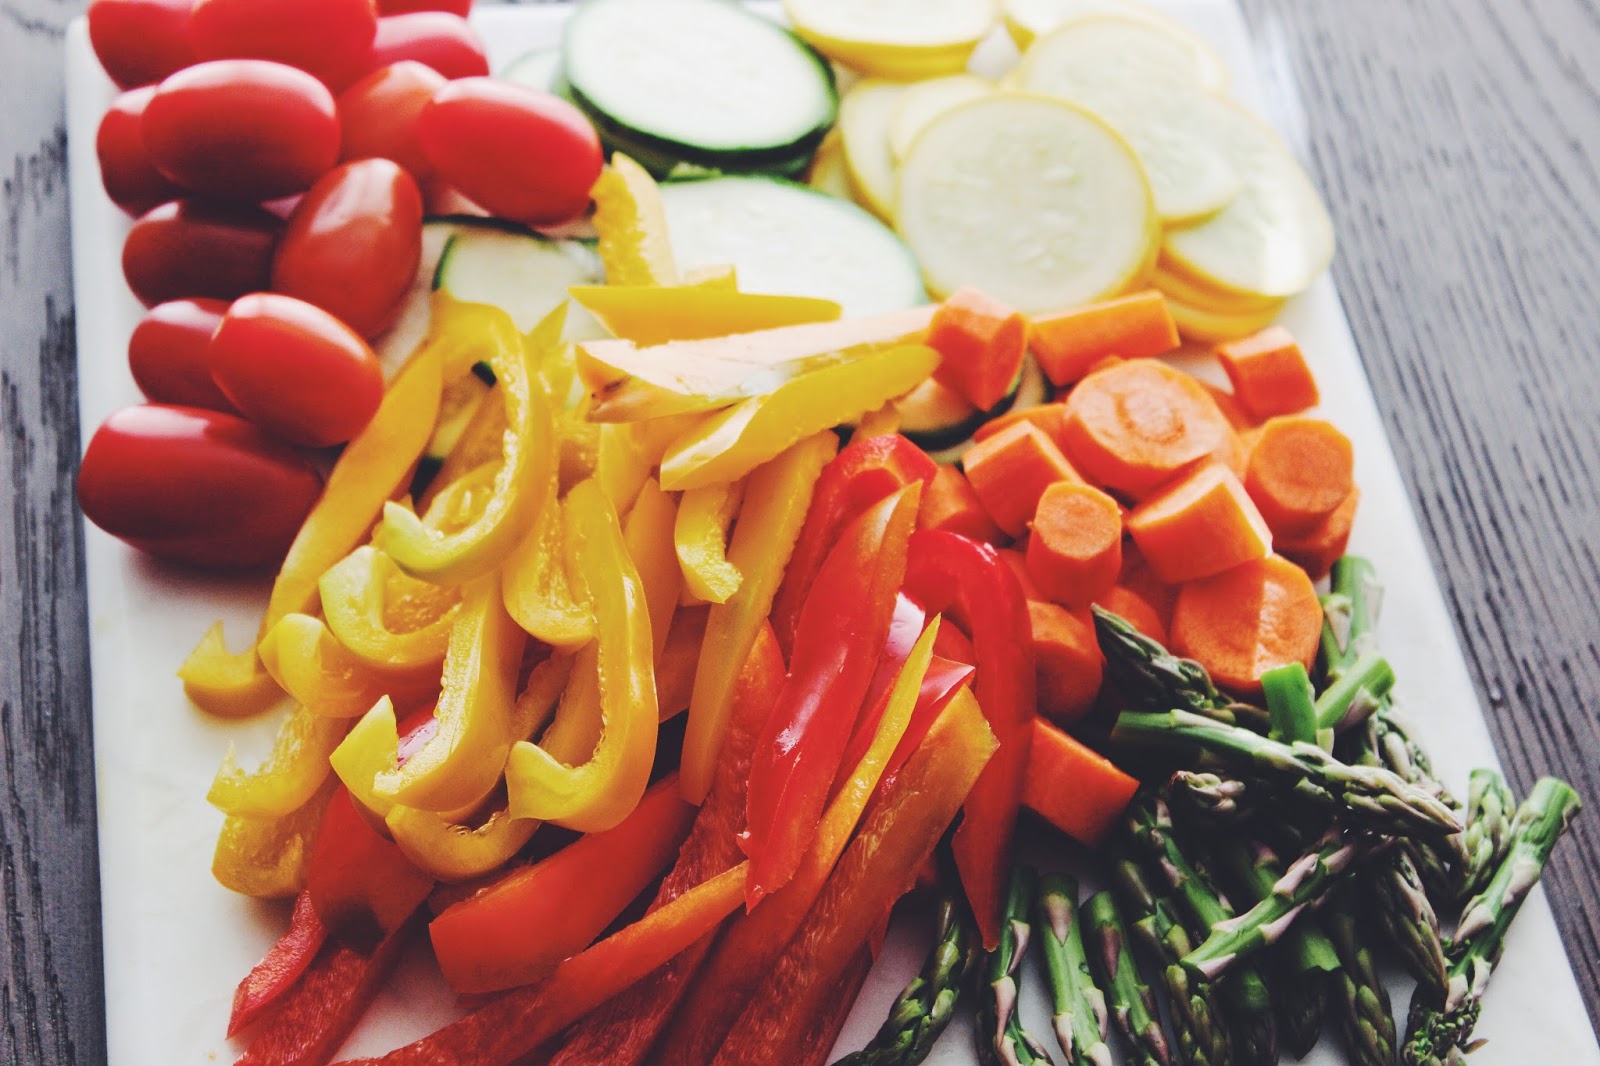
The infectious nature went beyond the weather and drifted into my kitchen--and the result was my favorite rendition of Pasta Primavera ("Spring Pasta" in Italian).  My take abandons the typical cream-laden dish and instead serves up bountiful fresh, vibrant vegetables that stand deliciously on their own.  Accents of Italian dried herbs, sun dried tomatoes and Parmesan infuse extra decadence--and robust flavor--that makes for a dish you'll want to savor throughout Spring--and beyond.


This dish was a hit at my Spring Pop-Up Cooking School last year--and I trust you'll find it to be a welcomed addition to your spring eating repertoire.

Happy Eating!

Pasta Primavera
Ingredients:
1 lb. linguine (or pasta of choice)
3 garlic cloves, minced
1 onion, diced
1 tablespoon Herbs de Provence
1 bunch of asparagus tips
1 zucchini, sliced
1 yellow squash, sliced
3 carrots, peeled and chopped
1/3 cup sun dried tomatoes in oil, chopped
1 red bell pepper, sliced
1 yellow bell pepper, sliced
1 pint cherry tomatoes
Kosher salt
Freshly ground black pepper
1/4 cup olive oil
Grated Parmesan, to taste

Method:
Heat olive oil over medium-high heat in a large skillet or saute pan.  Add onions to the pan and season lightly with salt and pepper.  Saute until they begin to soften and become translucent, about 4 minutes.  Add in garlic and herbs an saute for another minute.  Add in vegetables, except the cherry and sun dried tomatoes, and season lightly with a sprinkling of salt and pepper.  Cook until the vegetables begin to soften and become tender, about 7-10 minutesRemove mixture from pan and pour into a large bowl.  Stir in sun dried and cherry tomatoes and set aside.

Meanwhile, as the vegetables are cooking, bring a large pot of water to a boil and season liberally with salt.  Add in pasta to boiling, salted water and cook according to package instructions.  Drain pasta and reserve pasta water.

Pour pasta into bowl with vegetables and toss to combine, adding in reserved pasta water to moisten, as needed.  Taste for seasoning and garnish generously with Parmesan.  Serve and enjoy!    
Recipe adapted from Giada de Laurentiis 
SHARE:

Friday, January 15, 2016

{Put an Egg on It}: Recipes, Cooking Techniques & More!

Herbed Baked Eggs
Welcome to the wonderful world of eggs!  Boiled. Baked. Scrambled. Poached. Frittatas. Omelets. (Okay, by now you get the picture.)  The incredible, edible egg is indeed one versatile and mouth-watering star ingredient fueling some of our most delicious dreams. 

I, for one, have taken to incorporating them into my diet more since the new year debuted (the boiled variety is a favorite for protein-fueled breakfasts and snacking).  But did you ever consider that when it comes to preparing them, technique is involved?  Well, there is.  And today's post is dedicated to all the egg-noshing, technique, and etiquette savvy, that I can muster.  If you're like me, you'll soon be saying, 'put an egg on it!'. 

Recipes ~

Herbed Baked Eggs are one of my absolute favorite ways to indulge.  Easy, yet elegant, they're even great for entertaining (think brunch).  For more ways to indulge, here are 44 (yes, 44) additional recipes to keep your egg recipe rotation in high gear.

Technique ~ 

What every good cook needs, but admittedly sometimes lacks, is the skill to pull off the runny, poached egg, light and fluffy omelet, and immaculate golden yolk that boiled eggs are made of.  If that's someone you know ;), then help is here.  These tips and tricks will have your egg game strong before you can say, 'what's for breakfast?'.

Etiquette ~ 

And once all the "work" is done, all that's left is the eating, right?  Well, before you do, make sure you know exactly how to eat them.  My quick and fun dining tutorial will equip you in no time.

Now... on to Happy Eating!


SHARE:

Tuesday, September 22, 2015

Summer's Best: Heirloom Tomato Gazpacho with Toasted Breadcrumbs

The final day of Summer has arrived.  As we say farewell to the season that's served us well on the food, travel, entertaining and fashion fronts, I couldn't think of a more apropos dish to savor than a fresh, vibrant, chilled gazpacho.  And not just any gazpacho--but one with juicy, colorful, seasonal, creme dela creme, heirloom tomatoes.  It's all the goodness of a traditional tomato gazpacho--turned up a notch.

This soup couldn't be easier to bring together and delivers both rich flavor and great texture from the vegetables. (I consider it a vegetable garden in a bowl.)  And I'll add that it was a hit at last Summer's Pop-Up Cooking School, so you can't go wrong.

If you're looking for that one final taste of Summer that's worth savoring, this. is. it.

Happy Eating!

Heirloom Tomato Gazpacho with Toasted Breadcrumbs
Ingredients:

3-5 heirloom tomatoes
1 hothouse cucumber
1 sweet bell pepper, cored and seeded

½ red onion
1 jalapeno pepper, seeded
3 garlic cloves, minced
3 cups tomato juice
¼ cup red wine vinegar
¼ cup, plus two tablespoons, extra virgin olive oil
1 tablespoon Worcestershire sauce
Juice of ½ lime
2 teaspoons kosher salt, plus more for breadcrumbs
Freshly ground black pepper to taste
Baguette or other crusty bread (for breadcrumbs)

Method:
 
For the Gazpacho:
Roughly chop the cucumber, bell pepper, tomatoes, jalapeno and red onion into 1-inch cubes. Put each vegetable separately into a food processor fitted with a steel blade and pulse until it is coarsely chopped. Do not over process!

After each vegetable is processed, combine them in a large bowl and add the garlic, tomato juice, vinegar, oil, salt, pepper, lime and Worcestershire. Mix well and chill before serving.  


For the Breadcrumbs:
Slice bread into 1-inch cubes.  Heat two tablespoons of oil in a medium skillet.   Toss in cubes and begin to sauté until golden brown and season with salt and pepper. 

Before serving, garnish the gazpacho with the toasted breadcrumbs.  Enjoy!

 
SHARE:

Wednesday, January 28, 2015

Chicken and Vegetable Soup


The Winter season is definitely alive and well, as evidenced by the recent snow storms and arctic-like chill taking place.  Right behind the priority of staying safe and warm, typically comes the desire for warm, comforting fare that will perfectly knock off the chill and make cabin-fever something to be relished rather than dreaded.  And here enters the perfect cold weather antidote to fit the bill:  my (no recipe) Chicken and Vegetable Soup.

The best things in life can sometimes, quite actually, be the easiest--and most delicious.  And this soup proves that with a bit of pantry and refrigerator foraging, that couldn't be any truer.  Gathering up staples that you've likely got on hand to assemble a quick, easy and satisfying soup, is just what the doctor ordered when good, fast, comfort food is on the agenda.  Canned beans, broth, fresh veggies, seasonings, spices, and a store-bought rotisserie chicken, combine to give you home-cooked goodness--without having much of anything to cook. 

A quick heat through to warm and flavor the broth and ingredients (I like my veg to remain crisp, so I don't simmer for very long) takes sheer minutes and you're off to "homemade" soup heaven to keep that winter chill at bay.

I chose a favorite pantry staple of cannellini beans and fresh vegetables including fennel, carrots, red bell pepper and jalapeno.  The shredded chicken, seasonings and spices (cumin, dried oregano, salt and pepper) rounded it out and made for a flavorful broth turned soup-base.  For the finish, I added a spritz of fresh lemon juice, fennel fronds and jalapeno peppers (optional).


Happy Eating!
SHARE:

Wednesday, December 10, 2014

Cranberry-Orange Smoothie


Cranberries.  Orange.  If you're like me, these words conjure up notions of delicious holiday fare from luscious cranberry sauce and hand pies to one of my favorite combinations of these classic flavors, cranberry-orange scones.  And now I've discovered yet another delicious (and healthier) combo of these flavors that's also a nice balance to the decadent fare that's the norm during the holiday season: Cranberry-Orange Smoothies.

Frozen cranberries and bananas (I like the frothy effect of frozen fruit), combined with orange juice, low-fat milk and honey, makes for one refreshingly good (and good for you) drink.

Happy Sipping!

Cranberry-Orange Smoothie
Recipe adapted from The Daily Meal

Ingredients:
¾ cup orange juice
1 cup of frozen cranberries
1 cup milk (or non-dairy substitute)
1 banana, frozen and quartered
2 teaspoons of honey (or agave nectar)
  
Method:
Combine ingredients in blender (add liquids first).  Blend until smooth and enjoy!


SHARE:

Wednesday, August 27, 2014

Oven-Roasted Mussels


Steamed...grilled...in savory tarts--just a few of the ways I enjoy preparing (and feasting on) mussels.  For a slight twist, I added oven-roasting to the list this past weekend. Filling my favorite cast-iron skillet with the mussels and their accompanying marinade (aka bread-sopping goodness) of tomatoes, garlic, white wine, olive oil, chili flakes, parsley, salt and pepper, and returning minutes later to perfectly scrumptious fare, cemented this as a definite keeper in my repertoire. 

Easy to prepare, elegant, and worth the savor, mussels remain one of my favorite seafood gems.


Happy Eating!

Oven-Roasted Mussels
Recipe courtesy of the New York Times

Ingredients:
3 1/2 pounds black mussels
2 tablespoons extra virgin olive oil
2 to 4 garlic cloves (to taste), minced
1/2 cup dry white wine
1 pound roma tomatoes, seeded and finely chopped
1/4 to 1/2 teaspoon red pepper flakes
1/4 cup minced flat-leaf parsley
Salt and freshly ground pepper to taste 

Method:
Preheat the oven to 400 degrees. Clean the mussels. Inspect each one carefully and discard any that have opened (if some are partly open, tap them with your finger, and if they close back up they are O.K.) or have cracked shells. Place in a large bowl, fill the bowl with cold water and rinse several times, swishing the mussels around in the water, pouring out the water and refilling. Clean the shells, if necessary, with a brush or the end of one of the mussels, and pull out the beards – the hairy attachments emerging from the shells. Do not do this until just before cooking, or the mussels will die and spoil. 

Combine all of the ingredients in a large bowl and toss with the mussels. Refrigerate for 10 minutes.

Arrange the mussels, pointed ends up, in a single layer in a cast iron skillet and/or a heavy baking dish. Spoon the marinade left in the bowl over the mussels and place in the preheated oven. Bake for about 10-15 minutes, until most of the mussels have opened.  Remove from the heat and discard any mussels that have not opened.  Serve and enjoy!
 
 
SHARE:

Sunday, August 10, 2014

{Cool Down}: Cantaloupe-Basil Granita


I love being a Southern girl, there's no disputing that--and with the exception of two unforgettable stints away (one in Spain and another in Washington, D.C.), I've always called the South home.  So after a literal lifetime of hot, humid summers, one might think that adjusting is no big deal.  To that, I'd have to say think again.  With each passing summer, I'm no more adjusted and always seeking ways to chill out--literally!

Besides beaches, pools, and all the air-conditioning that I can amass, my favorite way to bring the chill factor to my summer days and nights is through the world of cold treats.  And icy, refreshing granita perfectly fits the bill.  Wonderfully versatile, granita can take on practically any flavor profile and serves well as a casual treat, or as an elegant dessert finish to a meal.  

I recently indulged with a Cantaloupe-Basil granita from Williams-Sonoma.  The luscious melon and fragrant basil, accented with a hint of lime, served up just the sweet cool down I was craving.  Now it's your turn to grab a spoon and indulge!

Happy Eating!

Cantaloupe-Basil Granita
From Williams-Sonoma

Ingredients:
30 fresh basil leaves
1/4 cup (2 fl. oz./60 ml) fresh lime juice
2/3 cup (5 oz./155 g) sugar
1 ripe cantaloupe (about 4 lb./2 kg)
 
Method:
Coarsely chop 20 basil leaves; set the remaining 10 leaves aside. In a small nonreactive saucepan, combine the lime juice, sugar and 2 Tbs. water and bring to a simmer over medium-high heat. Simmer, swirling occasionally, until the sugar is dissolved, about 2 minutes. Remove from the heat, stir in the chopped basil, cover and let steep for 15 minutes.

Meanwhile, halve the cantaloupe and scoop out and discard the seeds. Cut  off the rind and then cut the flesh into 1-inch (2.5-cm) cubes.

Strain the basil mixture through a fine-mesh sieve into a blender. Add half  of the melon cubes and pulse a few times, then puree until smooth. Add the remaining melon cubes and pulse a few times, then add the reserved whole basil leaves and puree until the mixture is smooth. Pour the mixture into a 13-by-9-by-2-inch (33-by-23-by-5-cm) glass baking dish. Cover with plastic  wrap, place on a rimmed baking sheet and place in the freezer.

After 1 to 1 1/2 hours, check the granita. When the mixture starts to freeze around the edges of the dish, stir it with a fork, then return the dish to the freezer.  Stir the granita with the fork every 45 minutes or so, until the mixture is completely frozen into icy grains and the texture is fluffy, 2 to 3 hours longer.

Spoon the granita into bowls and serve right away. (The granita is best when eaten within 2 days. If it becomes very hard and dry in the freezer, let it stand at room temperature for 10 to 15 minutes before serving.) Serves 8.
 
 
SHARE:
© D.M.R. Fine Foods. All rights reserved.
MINIMAL BLOGGER TEMPLATES BY pipdig