Thursday, December 23, 2021

Merry Christmas + Homemade Biscuits


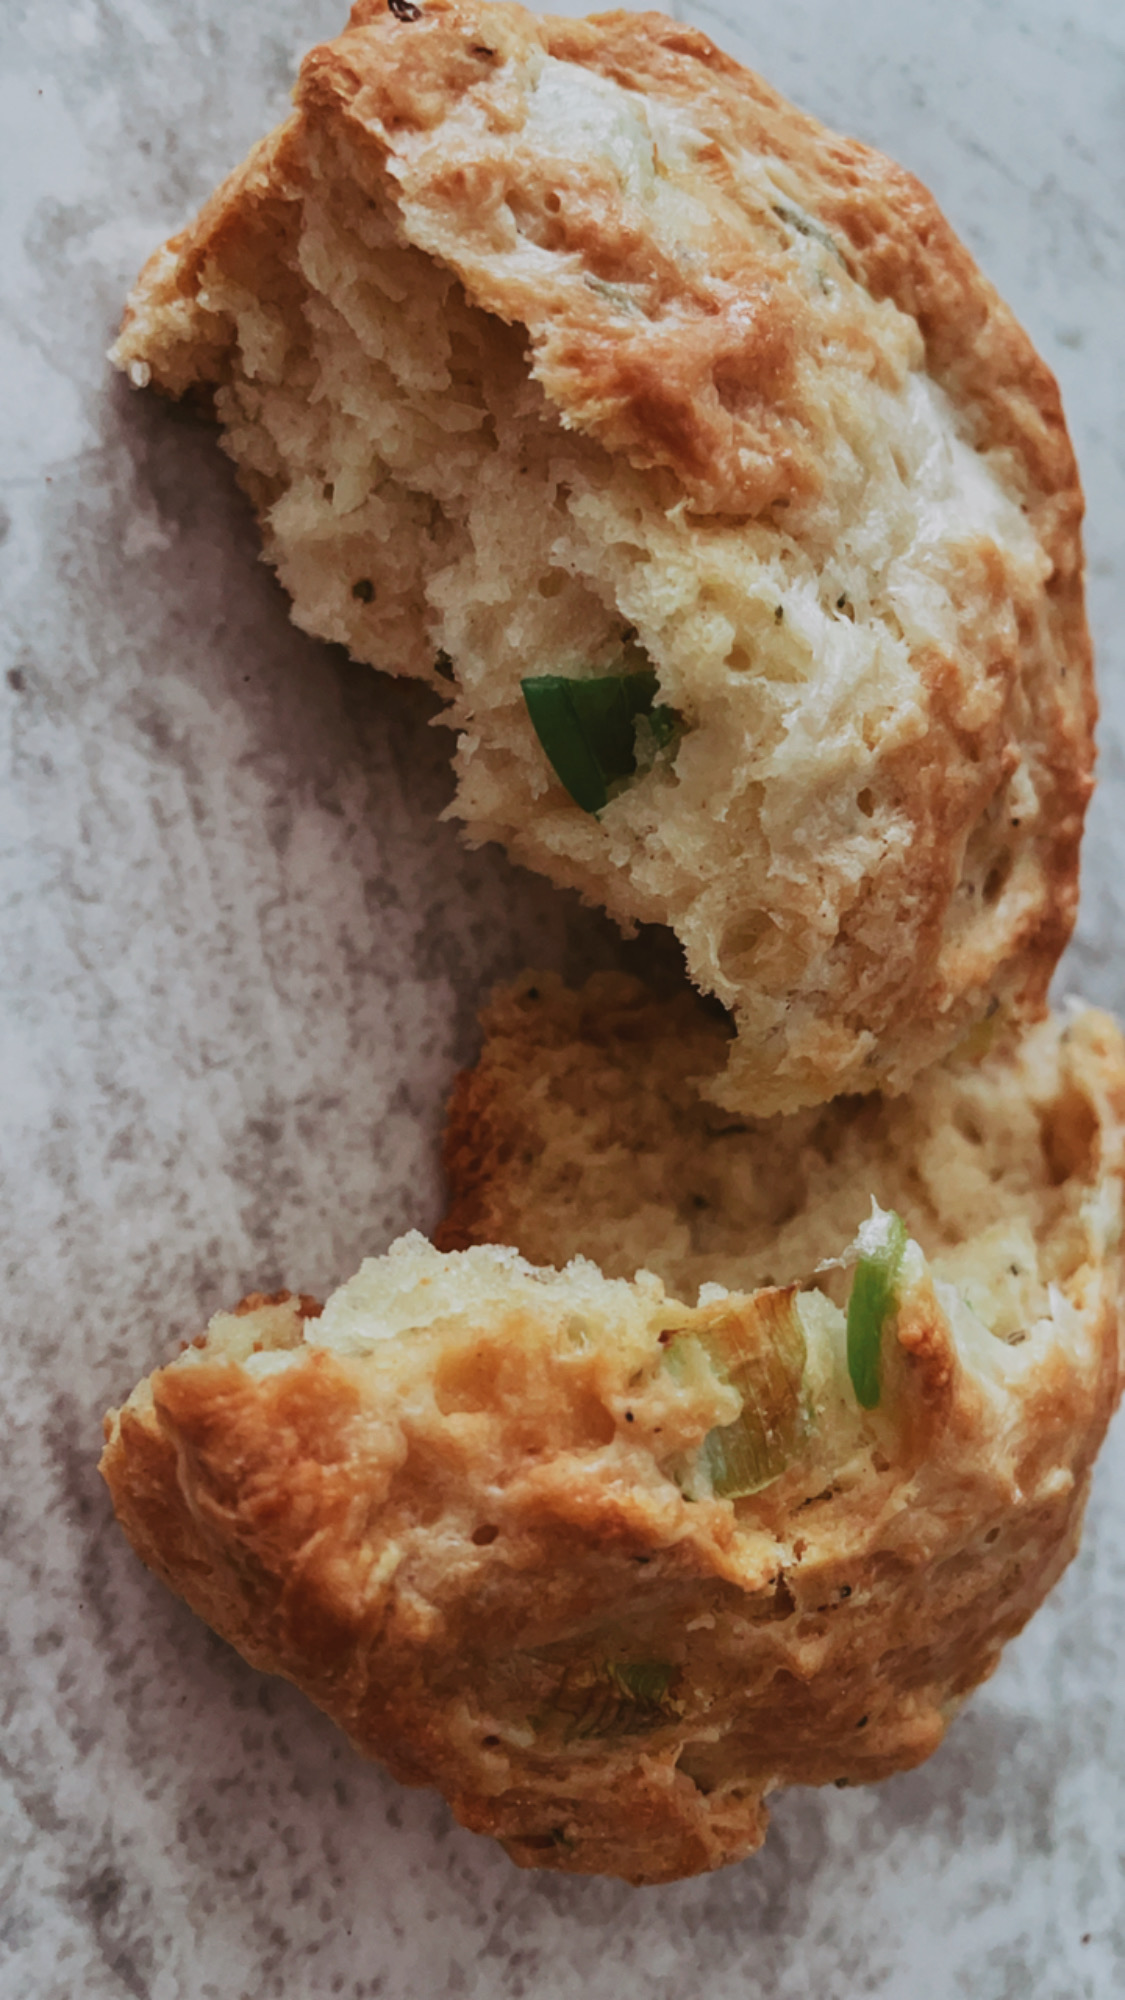
Holidays and baking go hand-in-hand for me, so this past Sunday, I decided to slow down and finally bake homemade biscuits.  Yummy, right?!  

They truly were, with a savory, herbaceous twist, that makes them great for devouring morning, noon or night (i.e. for breakfast, brunch or dinner).  So with that said, I wanted to share the recipe with you in case you decide to follow my lead and bring them to your holiday eating repertoire.  

I'd actually been eyeing these since I saw the recipe in my November issue of Bon Appetite magazine, so it felt good to finally bring them to life in my kitchen. I'm so thrilled to say that they didn't disappoint.  To the contrary, they came out wonderful--with beautiful layers (the hallmark of a great biscuit, no?) and are easy to bring together.


I baked a few to enjoy and photograph for the blog :) and froze the rest of the batch for homemade biscuits on demand, whenever the notion--or craving--hits.  

So whenever you decide to bake them, I hope you experience the same Happy Eating.

Blessings for a Merry Christmas!

xx, Dawn

Stuffing Biscuits 


SHARE:

Wednesday, March 14, 2018

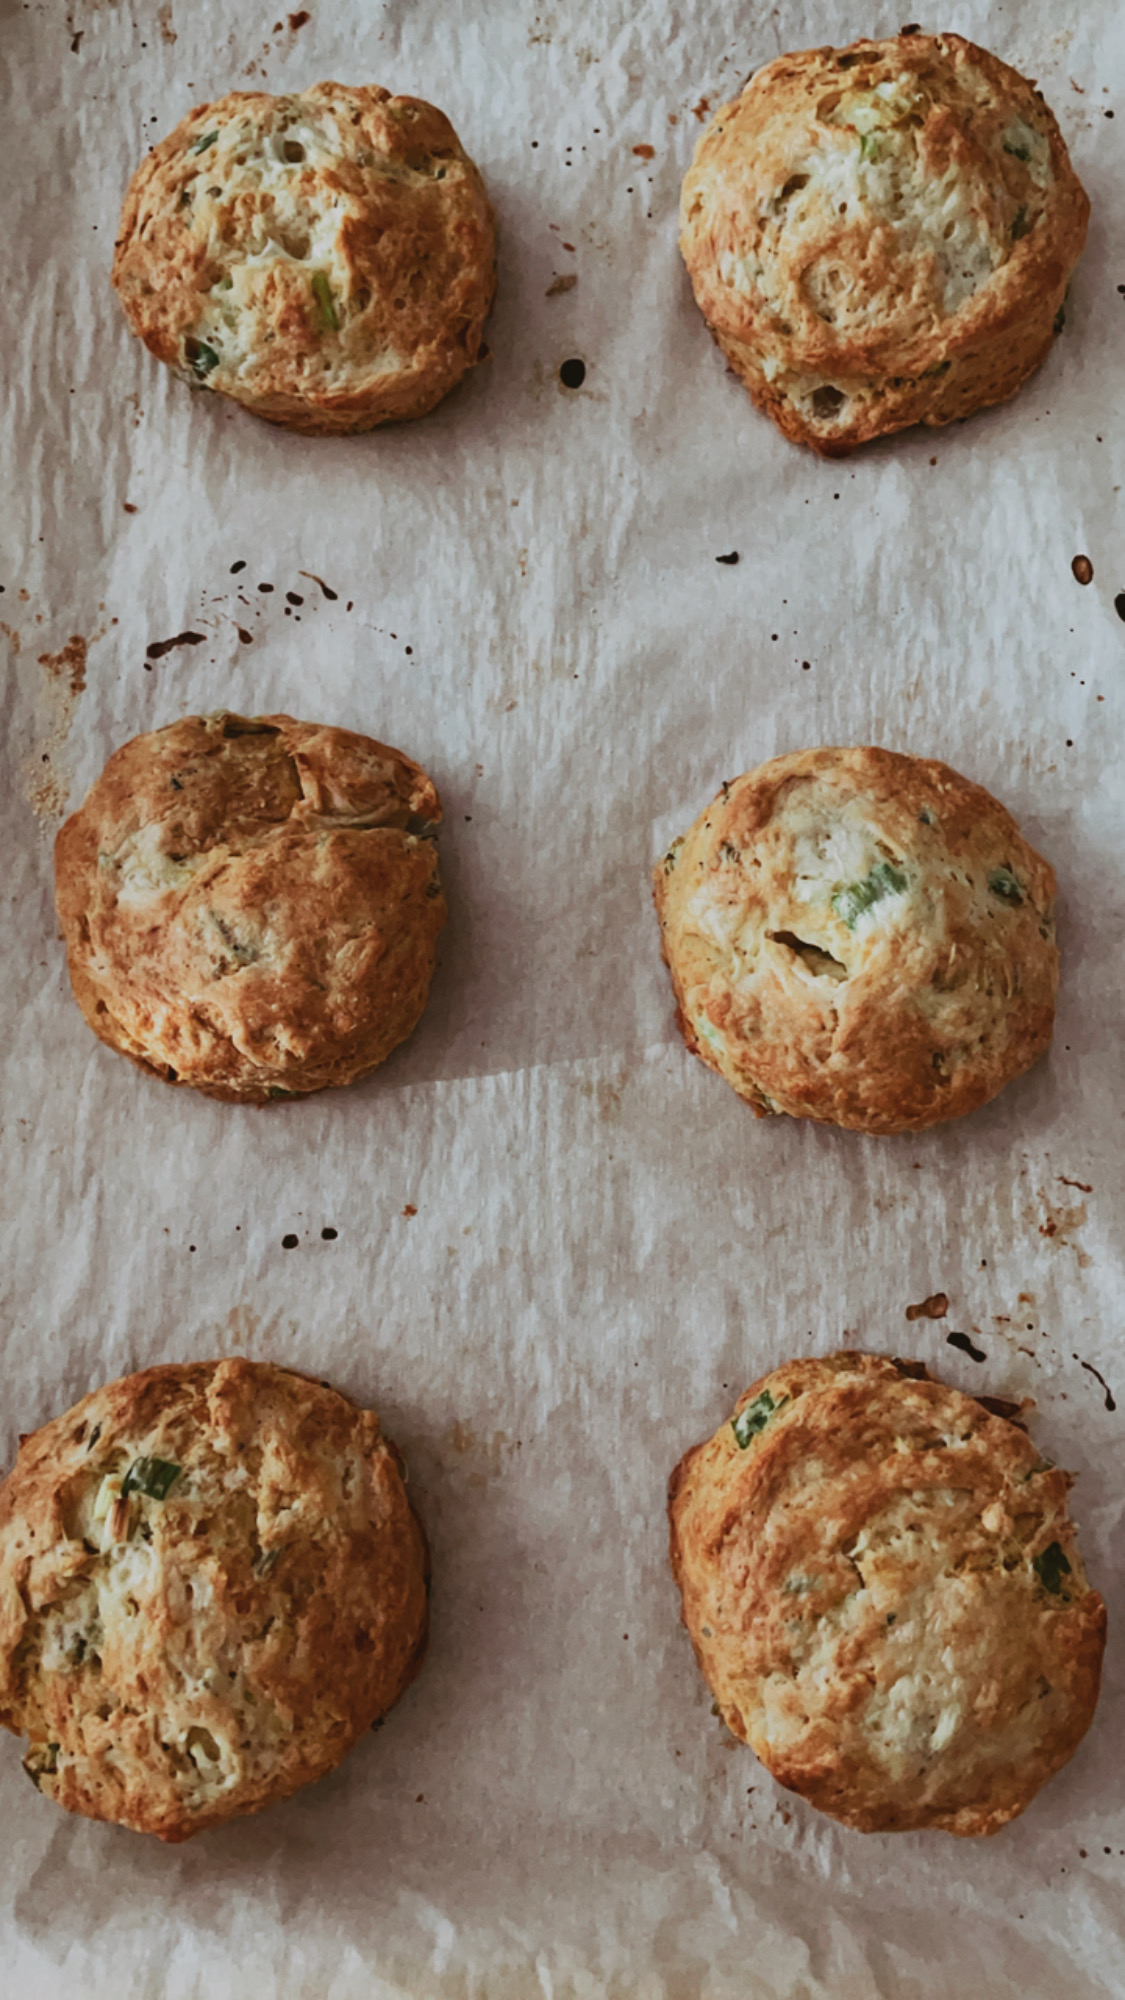
Butternut Squash Galette

Life has been on the busier side lately, so I've been away longer than usual here on the blog.  And if I had to be away, I'm glad to share that it's been a "good" busy spell.  Some exciting (but admittedly time-infringing) work to produce a second-to-none International Women's Day event on last Friday was fulfilled to my deep satisfaction.  Then there are other areas of my life that have shared my attention and focus like vacation planning (priorities, right?), along with ministry and plain 'ole adulting!


When I finally checked IWD off the list last week, I exhaled and my thoughts soon turned to "what's next" here.   And the what's next is a savory galette that wins all the awards for delicious, elegant, seasonal--and easy--fare!

I was spurred along to finally bake a Butternut Squash Galette (which has been on my baking agenda for the months prior that I've bought and stored butternut squash in my pantry) when Monday's windy spell collided with extra sunshine (translate energy) from the daylight savings turn.  And within the hour, a flaky, rustic vegetable tart--accented with tangy, herbed goat cheese (so good!)--was ready to be consumed.

I normally make a tried and true pastry dough, but because I was eager to crank out this too-long delayed delicacy, I opted for one of my all time favorite shortcuts: puff pastry.  And I have to say, the crispy flakiness has me thinking this was the best move after all.

I sliced my squash in thin rounds for a beautiful layering effect I wanted to achieve, seasoned them with olive oil, salt, pepper, herbs de provence and maple syrup, then baked them off to a tender, almost caramelized, doneness.  Then I rolled out my chilled dough, smeared on some goat cheese, layered the squash on top and folded the dough to encircle all the goodness.  A brush of egg wash and sprinkle of flaked sea salt on the dough to finish was all that stood between the tart and the hot oven.

Despite the amazing ease of bringing this dish together, its casual elegance shines through.  It's perfect as a hearty appetizer or served with a side or two for lunch or dinner.

So here's to less busy-ness (for now anyway :) ) and more....

Happy Eating!

Butternut Squash Galette
Ingredients:
1 medium-sized butternut squash
Olive oil
Salt (Kosher and Flaked Sea Salt)
Freshly Ground Black Pepper
Herbs de Provence
Maple Syrup
Herbed Goat Cheese
1 Puff-Pastry Sheet
1 egg, beaten

Method:
Preheat oven to 425 degrees F.

Peel squash and slice into thin rounds.  Toss squash with oil, kosher salt, pepper, herbs and maple syrup (all ingredients measured to taste.)  Spread evenly on a baking sheet and roast in preheated oven for 20-25 minutes, until cooked and slightly browned.

Remove squash from oven and set aside.  Lower oven temperature to 400 degrees F.    

Roll out pastry into a round and smear softened goat cheese in the center, being sure to leave a border.  Layer squash onto pastry and fold edges of pastry up to enclose the ingredients.  Brush the pastry with egg wash and sprinkle with flaked sea salt.  

Place tart on baking sheet and bake for 20-25 minutes until pastry is golden brown.  Remove from oven, slice and enjoy! 


SHARE:

Monday, January 30, 2017

Curry Chicken Pot Pie + BHM Virtual Potluck

Food, family and memories have always gone hand-in-hand for me.  From the earliest age, I can trace the family gatherings, sleepovers, holiday celebrations, and Sundays at my grandparents' home, in particular, to special meals and favorite dishes.

Chicken pot pie was one of those dishes that typically represented a quick weeknight meal (the frozen variety, to be clear) or, even more fun, a sleepover with my cousins at my grandparents, with my grandmother superbly strategizing on how to feed the lot.  It was an easy 'go-to' to satiate our hungry little bellies, and we loved it--largely because it represented family and love and shared memories.

Those memories continue to linger all these years later and recently inspired me to make a Curry Chicken Pot Pie (equally as perfect for a weeknight or feeding a crowd) that brings back all the comfort and delight that the little frozen pies, in the mini aluminum pans, provided years before.

In a similar spirit of personal history and tradition, this post is a part of a Black History Month Virtual Potluck among 28 black food bloggers from around the world, celebrating the undeniable place that food has always held within our culture and contributions to American history at large.  As Black History Month launches on February 1st, you can anticipate a new recipe from a participating blogger for each day of the month, culminating in a one-of-a-kind (and scrumptious) food journey!  See the full list of fellow bloggers below to take in the amazing recipes.

So here's to family, childhood memories, tradition...and Happy Eating!

Curry Chicken Pot Pie
Ingredients:
1 lb. boneless, skinless chicken breast, cubed
4 carrots, peeled and chopped
1 large onion, chopped
1 cup frozen green peas
1 3/4 cup chicken broth
2/3 cup coconut milk
2 teaspoons mild curry
1/3 cup unsalted butter
1/3 cup all-purpose flour
1 teaspoon kosher salt, plus more to taste as desired
1/2 teaspoon freshly ground black pepper, plus more for garnish
1 puff pastry sheet, thawed
1 egg, beaten
Flaked sea salt (optional)

Method:
Preheat oven to 425 degrees F.

Place chicken and carrots in a 2 quart saucepan and bring to a boil.  Cook for 12-13 minutes.  Add peas and cook for an additional 3 minutes.  Remove from heat, drain and set aside.

Melt butter in a large saucepan and saute onion over a medium-high heat until soft and translucent.  Stir in flour, kosher salt, 1/2 teaspoon pepper, curry, and cook to combine.  Stir in broth and coconut milk and simmer (stirring throughout to avoid sticking) until thickened.  Taste for seasoning and adjust, as needed.

Place chicken mixture in the bottom of a 2-quart round dish and pour curry mixture over the top.

Roll out pastry sheet and layer over the top of the baking dish.  Brush with egg wash and sprinkle with flaked sea salt (if using) and more ground pepper.  Make slits in the pastry to allow the steam to escape while baking.

Place baking dish in the oven and bake for 30-35 minutes until pastry is golden brown.  Remove, serve hot and enjoy!

BLACK HISTORY MONTH VIRTUAL POTLUCK


SHARE:

Wednesday, December 7, 2016

{Tis the Season}: D.M.R. Fine Foods Holiday Pop-Up Shop!

At the risk of sounding slightly (or majorly) cliche, it's the most wonderful time of the year.  The holiday season is uniquely one of the most special times of the year--for all the right reasons.  Connecting with friends and family.  Savoring wonderful tastes.  Celebrating new and old traditions, alike.  And that's where my excitement truly shifts into gear...because my 3rd annual Holiday Pop-Up Shop promises to deliver on them all.

SAVE THE DATE and make plans to join me on Saturday, December 17, 2016, from 12-4p.m. EST at the fabulous Pottery Barn in Lenox Square for a time to remember!  Come out and experience festive, holiday cheer, while tasting, savoring and shopping my small-batch, artisan holiday sweets and treats.  From sweet to savory, there will be something for everyone.  Our goodies are wonderful as hostess gifts, for your holiday menus, and for plain 'ole noshing!

It promises to be a deliciously fun afternoon--and, as always, I can't wait to see you there!

Happy Eating and Happy Holidays!

D.M.R. Fine Foods Holiday Pop Up Shop
Venue Details:
Pottery Barn
Lenox Square Mall
3393 Peachtree Road NE
Atlanta, GA 30326
404.812-9726

SHARE:

Monday, November 21, 2016

{Savory & Sweet}: Herb-Truffle + Honey-Cinnamon Compound Butters

If you know me, then you know how I feel about a good compound butter.  Over the weekend, I decided to whip up two varieties--one sweet and one savory--to add extra flair and flavor to my holiday tables.  And what resulted were insanely good butters that will have you feigning long after the holidays have come and gone.

On the savory side, I took to my pantry for truffle salt (because it's the holidays, you know), and garlic, then I rounded up some fresh Italian herbs to create a decadent Herb-Truffle Butter.  This delicacy will take your turkey, chicken, roasted veggies, popcorn, and more, over the top with bold, savory goodness.

On the sweet side of things, I went for the warmth of cinnamon, coupled with the floral sweetness of honey, for a Honey-Cinnamon Butter that will make you forget what you did with your pancakes, waffles, french toast, muffins, baked sweet potatoes, and then some, before it came along. 

Easy to make and wonderful for sharing, these compound butters are the perfect special touches to your holiday fare.

Happy Eating!

Herb-Truffle Butter
Ingredients:
1 stick (4 oz.) unsalted butter, room temperature
1 garlic clove, minced
1/2 teaspoon truffle salt
1/4 teaspoon freshly ground pepper
Medley of fresh basil, rosemary and thyme, chopped  

Method:
In a small bowl, combine butter, herbs, salt, garlic and pepper.  Place on parchment paper and roll up into a log.  Refrigerate, or freeze, to firm.  Serve and enjoy!

Honey-Cinnamon Butter  
Ingredients:
1 stick (4 oz.) unsalted butter, room temperature
3 tablespoons honey
1/2 teaspoon ground cinnamon 
1/4 teaspoon salt
Splash of vanilla extract

Method:
In a small bowl, combine butter, honey, vanilla, cinnamon, and salt.  Place on parchment and roll up into a log.  Refrigerate, or freeze, to firm.  Serve and enjoy!

(Cook's Note: Butters can be stored in freezer and refrigerator.)   
SHARE:

Monday, January 25, 2016

Rosemary-Thyme Cornbread Madeleines

I'll be honest.  There was a moment (or two or three) when I wondered if any semblance of a real winter would ever surface.  70+ degree temps through Christmas bode less than favorably for this Southern girl who longed for the more characteristically cooler weather that winter dreams are made of.  (And to finally be able to sport my new coat that I snagged in eager anticipation of some serious stylin' and profilin'.) :)

And then there was this past weekend.  Winter decided to dust off any remaining cobwebs from last year and finally make its entrance--accompanied by a blizzard effect in some parts of the country, and a milder, yet welcomed, cold snap in my parts.  Fleeting snowflakes made for warm and cozy inclinations, including whipping up some chicken soup for the soul--and baking a batch of homemade, herbed cornbread madeleines.  Life was as it should be.

Starting with my trusted cornbread recipe, I gave a savory twist to these delicacies--replete with fresh rosemary and thyme--and the yield was just as scrumptious as my sweet renditions.  And just as gorgeous.  Although the temps have already begun their ascent back to milder days of yore, I'll continue to relish my soup and cornbread combo--made all the better in the beautiful little package of madeleines.  

Happy Eating!

Rosemary-Thyme Cornbread Madeleines
Ingredients:
1 stick (8 ounces) unsalted butter
1 1/2 cups yellow cornmeal
1 cup flour
1/3 cup sugar
1 tablespoon baking powder
3/4 teaspoon kosher salt
1 1/2 cups milk
2 large eggs 

2 teaspoons fresh rosemary, finely chopped
2 teaspoons fresh thyme, finely chopped
Heavy drizzle of honey (optional)

Special Equipment: Madeleine Baking Pan

Instructions:

Preheat the oven to 400 degrees F.  Grease and flour the baking pan.  Melt the butter in a small saucepan, pour the butter into a large bowl and set aside to cool.

In a medium bowl, add the cornmeal, flour, sugar, baking powder, and salt, and stir to combine. To the large bowl, add the milk, eggs and honey (if using). Toss in the dry ingredients and stir until just combined.

Spoon the batter into a madeleine pan(s) using a tablespoon measure.  Bake for 15-20 minutes, until madeleines are light brown and the edges are browned (don't overbake!).  Remove to a cooling rack and allow to cool for 10 minutes.  (Repeat as often as necessary with remaining batter.) Serve warm and enjoy!


SHARE:

Tuesday, November 25, 2014

Rosemary Popovers

If you're looking to bring some simple, homemade goodness to your table, then homemade popovers is a great way to go.  I baked some over the weekend, adding in fresh rosemary for an extra savory touch.  It was my first time--and a good excuse for putting my popover pan to use, although you don't need one to make these.  A muffin pan will also suffice in yielding warm, delicious popover goodness.

Happy Eating!


Rosemary Popovers
Recipe courtesy of Williams-Sonoma

When making popovers, its important to use a pan that absorbs heat well. The batter needs a burst of heat to convert the moisture to steam, which causes the batter to expand and pop over the sides. When perfectly cooked, popovers emerge with crispy brown exteriors and moist, almost hollow centers.


Ingredients:

2 eggs  
1/4 tsp. salt 
1 cup milk 
2 Tbs. unsalted butter, melted 
1 cup all-purpose flour 
1 1/2 Tbs. very finely chopped fresh rosemary 
1/2 Tbs. very finely chopped fresh flat-leaf parsley


Method:


Butter a popover pan or the wells of a 12-well muffin pan.

In a bowl, lightly whisk together the eggs and salt. Stir in the milk and butter. In another bowl, stir together the flour, rosemary and parsley. Add the flour mixture to the egg mixture, whisking until just blended. Do not over beat.

Fill each cup about half full and place the pan in a cold oven. Set the oven temperature to 425ºF and bake for 20 minutes. Reduce the temperature to 375ºF and bake until the popovers are golden, 10 to 15 minutes more. They should be crisp on the outside. Quickly pierce each popover with the tip of a small knife to release the steam. Return the popovers to the oven for 2 minutes for further crisping, then remove and serve immediately.
 
SHARE:

Sunday, October 12, 2014

{Star Ingredient} -- Balsamic Done Savory and Sweet


Balsamic vinegar is a wonder.  Its tangy brightness, characteristic of vinegars, generally, and undeniable sweet notes, make it a versatile, star ingredient that should be resident in every gourmand's kitchen.  And while I first became acquainted with the savory, more traditional, ways of bringing balsamic into my cuisine, I have long since welcomed its ability to elevate and transform sweeter offerings into something truly special.

Today's post offers the best of both worlds, serving up easy, yet indulgent, recipes that will leave you forever convinced about why this pantry staple is a star ingredient, indeed. 

Balsamic Chicken

On the savory end, I'm sharing a recipe for Balsamic Chicken that will steer you away from the "we're having chicken again" doldrums. And for my sweet take, a little balsamic goes a long way.  Starting with the best aged balsamic I can find, it stars as the perfect finish and accent to luscious, roasted pears.  While these dishes are a cinch to pull together, they equally score as courses elegant enough for special occasions.  So whether you're in the mood for sweet, savory, or both, balsamic will give you something to relish.


Balsamic Roasted Pears

Happy Eating!

Balsamic Chicken

Ingredients:
1.5-2 lbs. skin-on, bone-in chicken thighs
1/2 cup balsamic vinegar
2 tablespoons honey
2 tablespoons low-sodium soy sauce
4 cloves garlic, minced
1/2 teaspoon red chili flakes
Kosher salt
Freshly ground black pepper
Freshly parsley, roughly chopped (optional)

Method:
Season chicken with salt and pepper and place in a resealable bag.

In a small bowl, add vinegar, honey, soy, garlic and chili flakes, stirring or whisking to combine.   Pour marinade over chicken and reseal bag.  Massage chicken with marinade to coat well and place in the refrigerator for at least two hours or up to overnight.

Preheat oven to 350 degrees F.  Remove chicken from bag and place chicken on a foil-lined baking sheet, skin side down.  Bake for 30-35 minutes.  Reserve marinade.

Turn on broiler and turn chicken skin side up.  Place chicken under the broiler for 3-5 minutes or until the skin becomes crisp, keeping a close eye on it. 

Pour the marinade into a small saucepan and bring to a boil.  Stir frequently and allow sauce to cook until reduced and thickened.  Brush sauce over cooked chicken and garnish with fresh parsley, if using.  Serve and enjoy!
Recipe adapted from Just a Taste
 

Balsamic Roasted Pears

Ingredients:
Bosc pears, halved and cored
Brown sugar
Butter
Aged balsamic
Ice cream

Method:
Preheat oven to 350 degrees F.

Place pears in a baking dish, flesh side up.  Place a pat of butter in the hollow of each pear half, where the core once was.  Sprinkle brown sugar over the pears (as much as you please).  Place pears in heated oven and bake for 30 minutes, until pears are tender.

Remove pears from oven and place over ice cream.  Finish with a generous drizzle of balsamic over the ice cream and pears.  Serve and enjoy!


SHARE:

Friday, October 3, 2014

Gourmet Popcorn {4 Ways!}


In the world of snacks, there are few that rank higher on my list than popcorn.  I can barely resist being anywhere near the stuff and not indulging.  And I won't even mention what happens each time I enter the concession area of a movie theater (whether I've eaten just before arrival or not).  Let's just say I never leave empty-handed.  Yes, it's like that.

For me, popped corn is wonderfully scrumptious on its own, with a bit of salt (and maybe hot sauce--don't judge me), and needs little more to be enjoyed.   But on the occasion that you're looking to "doctor it up", elevating it from simple bar snack status to something rather unforgettable, an easy gourmet touch is all you need.

From sweet, to savory, and beyond, there's no end to the flavor combinations to be had.  I'm sharing four of my favorites to get you started with scrumptious snacking and....

Happy Eating!

Gourmet Popcorn
When going for "top-shelf" popcorn snacking, I prefer to start by popping my own corn kernels (vs. microwaving).  It's quick and easy and can be done in a matter of minutes on the stove-top or with an air-popper.  I recommend using a neutrally flavored oil like canola, sunflower, or vegetable, and following the packaging instructions for perfectly popped corn!

Cinnamon-Sugar 

1/4 cup sugar
1/2 tablespoon cinnamon
Pinch of salt
Popcorn

Stir or whisk together the sugar, cinnamon and salt.  Sprinkle desired amount over (freshly popped) popcorn and enjoy! Store any extra sugar in an air-tight container.

Garlic-Butter

6 tablespoons unsalted butter, melted
2 tablespoons garlic powder
Generous sprinkling of salt
Popcorn

Stir garlic powder and salt into just-melted butter and drizzle over popcorn. Enjoy!

Chocolate-Nut Mix

1/3 cup chocolate chips 
1/3 cup nuts (almonds, peanuts, cashews, etc.)
Popcorn

Add chocolate and nuts to popcorn and toss to combine.  Enjoy!

Buttered Toffee 

Toffee Sauce
Popcorn

Drizzle toffee over popcorn and toss to coat.  Enjoy!


SHARE:

Friday, February 28, 2014

Mini Sausage Rolls

Puff pastry has been in my life a lot recently.  You may recall these chocolate croissants that served up a bit of sweet goodness not too long ago.  And now--just a little while later--I'm back again with a savory rendition of this most loved star ingredient.  A small, elegant, scrumptious rendition that makes for the perfect appetizer, snack or cocktail bite--sausage in puff pastry, to be exact.  


I started with my favorite Italian sausage and encased it in the flaky, buttery puff pastry dough, accented with a smear of dijon mustard (for extra kick) and a sprinkling of fresh herbs (for extra joie de vivre--and color!).  Sealed and crowned with flaked sea salt and freshly ground pepper, they were baked off to golden, succulent perfection and soon devoured--I mean savored bite by bite. :)

Great things often come in simple and small packages, and these mini sausage rolls more than measure up. 

Happy Eating!

Mini Sausage Rolls

Recipe courtesy of Lorraine Pascale

(Cook's Note: I "free-styled" a bit by using my sausage of choice, adding dijon, using herbs I had on hand, etc., and didn't stress too much about the exact measurements of the dough.  It's an easy recipe that lends itself to your creativity, so have fun, and I'm sure the results will show!)


SHARE:

Thursday, January 23, 2014

Sweet Potato Chips


Eating your vegetables has become easier and easier it seems.  From juices to soups to stir-frys, and beyond, it's not the daunting (or less palatable) undertaking it once was.  And when you can find a way to spin them into a savory snack, like baked chips, you're really onto something.

I happen to really enjoy roasting my vegetables into crispy, seasoned chips for snacking, and I'm currently on a kale and sweet potato rotation (so good!).  But you don't have to stop there.  Give whatever vegetables you have on hand a go as a delicious snack when you're craving a savory bite.  You'll likely become as hooked as I am, but that's a good thing, I promise.

Happy Eating!

Baked Sweet Potato Chips
Ingredients:
Sweet Potatoes, peeled and thinly sliced (Tip: carefully using a mandoline to get thin, uniform slices makes quick work of this)
Olive Oil
Herbs de Provence
Kosher Salt
Freshly Ground Black Pepper

Method:
Preheat oven to 350 degrees F.

Place potato slices on a baking tray and drizzle with olive oil.  Season liberally with herbs de provence, salt and pepper and toss to combine and coat the slices.  Bake until lightly browned and crispy, about 20-25 minutes.  Serve and enjoy!


SHARE:

Monday, March 21, 2011

Mussel-Artichoke Tart

Mussel-Artichoke Tart
Most people who know me know that Marcus Samuelsson is one of my favorite chefs.  Having had the pleasure of meeting and (briefly) cooking with him, as well as feasting on his signature cuisine, have all made for life-time memories that I'll cherish and provided great inspiration for me as a food lover.

After adding his latest cookbook, New American Table, to my cookbook collection, the first recipe I made was the Mussel-Artichoke Tart.  From the homemade buttery tart shell to the decadent mussels, and everything in between, it was love at first bite--and every bite thereafter.

The recipe comes together nicely, however you'll want to allow yourself ample time to allow the tart dough to chill (about an hour and a half total) before filling or baking. 

Get ready to add a new favorite to your repertoire! 

Happy Eating!


Mussel-Artichoke Tart
8 Servings (Makes One 10-inch Tart)

Ingredients:
2 tomatoes cut into quarters
5 tablespoons olive oil, plus more for the sheet pan
1/2 teaspoon crushed red pepper flakes
One 14-ounce can artichoke hearts cut into 1/4-inch thick slices
3 red onions, sliced
4 garlic cloves, chopped 
2 cups canned crushed tomatoes
1 1/2 teaspoons sugar
1/2 teaspoon dried oregano
2 poblano chiles, seeds and ribs removed and chopped
Juice of 2 lemons
1/2 teaspoon salt
1/2 teaspoon freshly ground black pepper
Buttery Tart Shell (see recipe below)
1 pound fresh buffalo mozzarella cut into 1/4-inch-thick slices (*you can replace the mozzarella with creamy goat cheese for an equally delicious tart)  
One 6 1/2-ounce can preserved mussels
4 basil leaves torn into small pieces
1 cup baby arugula

1. Preheat oven to 2oo degrees F.  

2. Place the quartered tomatoes on a lightly oiled sheet pan.  Drizzle with 2 tablespoons of the olive oil and sprinkle with the red pepper flakes.  Bake for 1 hour, or until the tomatoes are dried and wrinkled.  Set aside.  Increase the oven temperature to 450 degrees F.

3. To prepare the filling, heat 2 tablespoons of the olive oil in a large saute pan over high heat.  Add the artichokes and saute until golden brown and crispy, about 2 minutes on each side.  Remove the artichokes with a slotted spoon and transfer to paper towels to drain excess oil.

4. Using the same pan, add the remaining 1 tablespoon olive oil and heat over medium heat.  Add the onions and garlic and saute until onions are translucent, about 4 minutes.  Stir in the crushed tomatoes, sugar, oregano, and chiles.  Reduce the heat to low and simmer for 20 minutes, stirring occasionally.  Stir in the lemon juice, salt, and pepper and simmer until the filling begins to thicken, another 20 minutes.

5. To assemble the tart, spread the tomato mixture over the bottom of the prebaked tart shell.  Cover with a layer of mozzarella slices and arrange the artichokes and oven-dried tomatoes on top.  Bake until the mozzarella is golden and begins to bubble, about 20 minutes.  Remove from the oven.

6. Place the mussels on top of the tart and sprinkle with the basil and arugula.  Let sit for 5 minutes before cutting into wedges to serve.

Buttery Tart Shell
(Makes One 10-inch Tart Shell)

Ingredients:
1 1/4 cups unbleached all-purpose flour
1/4 teaspoon salt
8 tablespoons (1 stick) cold unsalted butter
2 tablespoons ice water, or more as needed
1/4 cup freshly grated Parmesan cheese

1. To make the dough by hand, combine the flour, salt, and Parmesan in a large bowl.  Using your fingertips, a pastry cutter, or two knives, cut the butter into the flour until the mixture resembles coarse meal.  Add the water, stirring with a fork just until the dough starts to come together.  If necessary, add a little more water, about 1 teaspoon at a time.  To make the dough in a food processor, combine the flour and salt in the processor and pulse once or twice to mix.  Cut the butter into 1-inch pieces, scatter the pieces over the flour, and pulse just until the mixture resembles coarse meal.  Add the water, pulsing just until the dough starts to come together.  If necessary, add a little more water, about 1 teaspoon at a time.

2.  Turn the dough out onto a sheet of plastic wrap and shape it into a disk.  Wrap it in plastic and refrigerate for at least 1 hour hour before rolling.

3. On a lightly floured work surface, roll out the dough to a 12 1/2-inch round.  Fit the round into a 10-inch fluted tart pan with a removable bottom, being careful not to stretch the dough.  Trim the edges of the dough.  Refrigerate for 30 minutes before filling or baking.

4. Preheat the oven to 375 degrees F.  To prebake the tart shell, line the tart shell with parchment paper and fill it with dried beans, uncooked rice, or pie weights.  Bake for 15 minutes, then remove the parchment and weights.  Sprinkle with Parmesan cheese.  Bake for another 8 to 10 minutes, or until golden brown.  Let cool on a wire rack.


SHARE:
© D.M.R. Fine Foods. All rights reserved.
MINIMAL BLOGGER TEMPLATES BY pipdig