Friday, September 11, 2020

Baked Doughnuts, Two Ways: Cinnamon Sugar and Vanilla Glazed

Don't ask, because I don't have a good answer. And if you're wondering, yes, I'm referring to the question I've posed to myself many times over as many years: how have I not made doughnuts yet?  Despite my continual cooking and baking for years, somehow this confectionery delight had escaped my kitchen.

Until last weekend.

I finally added doughnut pans to my kitchen arsenal (a part of the original dilemma) and determined that baking homemade doughnuts would make for a leisurely Sunday afternoon in the kitchen.  And so this doughnut story was born.

And like the other things I make with love, these did not disappoint and left me doing the happy dance we all have been known to do when good eats are involved and your vision comes to life.  Not only was I thrilled with how easy they were to whip up (all of the ingredients are pretty much kitchen staples), but I genuinely found them delicious and very much able to hold their own against the more popular (and unquestionably scrumptious) fried variety. 


Because who could dare argue with cinnamon and nutmeg infused doughnuts crowned with cinnamon sugar and vanilla glaze coatings?  Who? :)  Not I--and I'm pretty sure not you, either, once you make these.  In fact, I'm counting on you baking the wheels off of your newly crowned favorite dessert.

Although I recommend consuming them when they're still warm (we all know the obsession hot doughnuts have been known to stoke) for the ultimate in homemade doughnut revelry, you can store them in an airtight container for a day or two and still enjoy them all the same.  If you need more reassuring, I took a dozen-plus to a gathering the following day and they were received with happy mouths and tummies. 


So while there's no suitable answer to my original question of what took me so long, now that I've taken the plunge, there's no turning back.  I'm counting on you joining me, because friends don't let friends bake (and eat) alone. 😉

Happy Eating!

Baked Doughnuts

Ingredients:

2 cups of all-purpose flour

1 1/2 cups of sugar

2 eggs, beaten

1 1/4 cups of milk

2 tablespoons melted brown butter

2 teaspoons baking powder

1/2 teaspoon salt

1 teaspoon ground cinnamon

1/2 teaspoon ground nutmeg

2 teaspoons vanilla extract  


For the Toppings:

Cinnamon Sugar

4 tablespoons butter, melted 

1/2 cup sugar

1/2 teaspoon cinnamon

Vanilla Glaze

1/2 cup confectioner's sugar

1-2 tablespoons milk

1/2 teaspoon vanilla extract

Special Equipment:

2 doughnut baking pans 

Method:

Preheat the oven to 350 degrees F.  Spray baking pans and set aside. Melt 2 tablespoons of butter until golden brown and let cool. (Cook's Note: it will go quickly so be careful not to burn it!)

Combine the flour, sugar, baking powder, cinnamon, nutmeg and salt in a bowl.  In a separate bowl, whisk together the milk, melted butter, eggs and vanilla extract.  Stir the wet ingredients into the dry ingredients until they are combined.

Spoon the batter into the prepared baking pans and bake for 15-18 minutes, or until a tester comes out clean.  Allow the doughnuts to cool for five minutes, then tap the pan to loosen, and turn them out onto a baking rack set over a lined sheet tray.

Cinnamon Sugar Coating: Melt the 4 tablespoons of butter while the doughnuts are cooling. Combine the cinnamon and sugar into a small bowl. Make a half dozen cinnamon sugar doughnuts by dipping the doughnuts in the butter and then coating with the cinnamon sugar. Set on the baking rack to set.

Vanilla Glazed Coating: Whisk together the confectioner's sugar, milk and vanilla extract.  Dip the doughnuts in the glaze to coat and set on the baking rack to set. 

(If you have leftover batter like I did, repeat!)

Serve warm or store in an airtight container--and enjoy!


SHARE:

Tuesday, December 24, 2013

Hazelnut and Cranberry Biscotti

The holiday season and baking go hand-in-hand.  I started baking (and catering) quite a bit during this time of year several years ago, and it has never gone out of style.  It's a wonderful time of year, indeed, for creating and sharing delicious, festive bites like Biscotti.  

Biscotti means "twice-baked" in Italian and the technique of baking them twice yields the crunchy, delectable cookie we all know and love.  Toasted hazelnuts, dried cranberries and orange zest combine to form a truly scrumptious cookie that's perfect for breakfast (dunking in coffee and tea, preferred -:)), snacking, or as a light dessert course.  

However you decide to indulge, you're sure to enjoy this sweet creation and loads of...Happy Eating! 

Hazelnut and Cranberry Biscotti
Ingredients:
1/2 cup (4 oz.) unsalted butter, at room temperature
3/4 cup sugar
2 large eggs
2 teaspoons vanilla extract
1 3/4 cup all-purpose flour
1/2 teaspoon baking powder
1/2 teaspoon ground cinnamon
1/4 teaspoon salt
1 cup hazelnuts, toasted, skinned and coarsely chopped
1/2 cup dried cranberries
1 teaspoon grated orange zest

Method:
Preheat oven to 350 F. 

Place hazelnuts on a baking sheet and toast in the preheated oven for 8 to 10 minutes.  If still in the skin, remove the skin, chop and set aside.

In a large bowl, using an electric mixer on high speed, cream the butter until fluffy and pale yellow.  Add the sugar and continue beating to combine.  Add the eggs one at a time, beating well on low speed after each addition.  Beat in the vanilla on low speed until blended.

Sift together the flour, baking powder, cinnamon, and salt.  Gradually add the flour mixture to the egg mixture and mix on low speed.  Mix or stir in the hazelnuts, cranberries, and orange zest until evenly distributed.  The batter should be very soft.

Turn the batter out onto a generously floured work surface and divide in half.  With well-floured hands, transfer one-half onto a parchment lined baking sheet and shape into a log about 12 inches long and 1 1/2 inches thick.  Place on one side of the baking sheet and repeat with the remaining batter, leaving at least 4 inches between the logs.  (They'll spread as they bake.)

Bake the logs until the edges are golden, about 25-30 minutes.  Transfer the pan to a wire rack and let the logs cool for 10 minutes.  Using a serrated knife, cut the logs, still on the pan, on the diagonal into slices 1/2 wide.  Carefully turn the slices on their sides and return them to the oven.  (If you run out of room, use an additional baking sheet.)

Bake until the edges are golden, about 10 minutes longer.  Let cool completely on the pans on wire racks.  Store in an airtight container.
Recipe adapted from Williams-Sonoma 

SHARE:

Wednesday, November 7, 2012

Foodie Vocabulary: Blind Baking

MarthaStewart.com
As we nestle into Fall more and more, and the holiday season inches nearer, baking takes center stage in most kitchens.  And when we're talking crusts (for pies, tarts and the like), it's oh so essential that they be crumbly, crispy, flaky--and well, near perfect.  Without question, it's one of my favorite things about any pie I've ever enjoyed.  And have you ever swooned over a pie with a soggy crust?

So if you take your crust indulgences seriously, too, you'll be glad to know that there's a simple and effective technique that will leave your crusts sitting pretty--and ready for a scrumptious filling every time: blind baking. 

Blind baking is the method of partially, or completely, baking a crust without the filling.  Before the baking begins, the crust is lined with parchment paper, to help prevent puffing and shrinking sides, then weighted down with uncooked rice or dried beans.  (You'll want to gently push the 'weights' up against the sides of the parchment to prevent it from falling.)  Finally, bake off the crust in a hot oven, remove the weights and continue with your recipe instructions.  Sounds easy enough, right?  If you'd still like a bit more instruction on the technique, however, here it is.

Now that you've got it down, you must try your hand at mastering a great crust with the following sweet and savory recipes from Martha Stewart and Marcus Samuelsson; then leave me a comment on this post or drop me a line on my Facebook page telling me your thoughts on this technique and what you have planned on the baking horizon.

Mile-High Pumpkin Pecan Pie

Mussel-Artichoke Tart

Happy Eating!
SHARE:

Thursday, April 21, 2011

Pastry Chef's Baking Tips

If you've ever asked questions like, "what constitutes a bad egg?" or "my recipe calls for cake flour, but I only have all-purpose, what to do?", then you're not alone.  In the world of baking, often equated to a science, there is no dearth of "do's and don'ts".  And because each "rule" is significant to the final outcome, you don't want to side-step or break any.  Like a typical science project, one false step could cost you dearly.

So, not to worry, your help has arrived.  These pastry chef tips, courtesy of Williams-Sonoma, will answer some of your most pressing baking questions and put you on the road to baking rockstardom!


Now....start your ovens and, of course, Happy Eating! 

Pastry Chef's Baking Tips
  • If you are unable to find cake flour, you can substitute all-purpose flour.  It is heavier, however, so you need to adjust the amount.  Use 3/4 cup sifted all-purpose flour plus 2 tbsp. cornstarch for every 1 cup cake flour.
  • To test if butter is at room temperature, lightly press on it with a clean fingertip.  If it leaves an imprint, the butter is ready to use.
  • If you are unsure about the freshness of your eggs, put them in a bowl of cold water.  If the eggs sink to the bottom and lie on their sides, they are fresh.  If they float or stand on one end, the eggs are at their prime.
  • To bring cold eggs up to room temperature quickly, put whole eggs in a bowl of lukewarm water (hot water might cook them) for 30 minutes.
  • If tiny egg shell fragments fall into the bowl of egg whites or yolks, use an emptied shell to scoop up the fragments, which will readily cling to the shell.  This technique is more effective than using your fingers or a spoon or knife tip.
  • Salt helps to bring out the flavors in sweet baked goods.
  • Cream of tartar is used in angel food cakes primarily to stabilize the egg whites, but it also lowers the pH of the batter, resulting in a whiter crumb.
  • A dark pan absorbs heat more readily than a light-colored one and can cause delicate cakes to overbrown.  If using a dark pan, watch the cake closely as it bakes.  You may need to reduce the oven temperature or shorten the baking time.
  • Don't open the oven door during the first 15 minutes of baking any cake.  Changes in the air pressure or temperature can prevent the cake from rising properly.
  • If the parchment paper used to line the pan sticks to the bottom of the cake, dip a pastry brush in warm water and lightly brush the paper.  The water should loosen it, making it easier to remove without damaging the cake.
  • To protect the top of a cheesecake when covering it for chilling, invert a large plate over the top of the pan before wrapping in plastic wrap.   
SHARE:

Thursday, November 19, 2020

Pumpkin Spiced Bundt Cake


So my recent baking spree continues.  And this time I’m leaning into an uber moist and scrumptious (truly, truly) Pumpkin Spiced Bundt Cake.  Honestly speaking, if calories and such were simply a figment of the imagination, I’d be baking around the clock.  Because…dessert! :)  But alas, reality bites at times, so I try to do myself the favor of not having too many sweet, homemade delicacies on hand.


Still, the desire to bake (for the first time this year, I realized) a pound cake in my beautiful bundt pan outweighed any aforementioned caution. ;)  And last Sunday made way for joyous moments dedicated to baking (and relishing) this delicious confection.


While I take my pumpkin spice indulgences on the lighter side, the pumpkin helps to make this one of the moistest cakes you’ll ever taste, with a gorgeous color, to boot, and coupled with the warm, flavor-full spices, it goes down nice and easy, bite after bite after bite.  And maybe a little too easily in my case; but hey, we have to take our pleasures as they come, no?


So not one to keep a great thing (especially a great recipe) to myself, I’m sharing this in time for your very own baking indulgence to celebrate Fall, the holidays, or simply continuing to survive the “wonder” that is 2020.  No matter the reason, you’ll be so glad you baked this cake.  And you’ll be overwhelmed with….


Happy Eating!


Pumpkin Spiced Bundt Cake


Ingredients:

3 cups all-purpose flour

2 ¼ cups of sugar

1 can (15 oz.) pumpkin

3 eggs, room temperature

2 teaspoons baking soda

1 cup canola oil

½ teaspoon salt

1 teaspoon cinnamon

1 teaspoon allspice

1 teaspoon pumpkin pie spice

¼ teaspoon ground nutmeg

1 teaspoon vanilla extract

Confectioner’s sugar


Method:

Preheat oven to 350° F.


Grease cake pan liberally (I used cooking spray) and set aside.


In a medium bowl, whisk together flour, salt, baking soda, and spices.  Set aside.


In a stand-mixer, combine the sugar and oil until well blended (2-3 minutes).  Blend in eggs one at a time, incorporating each fully, before adding the next.  Add in vanilla and blend further.  Add in flour mixture, alternating in batches with the pumpkin until all ingredients are blended in.


Pour batter into prepared cake pan and bake in heated oven for 60-65 minutes, or until a cake tester inserted in the center comes out clean, with no crumbs.


Let the cake rest and cool for 10-15 minutes before inverting onto a plate or wire rack.  Dust (I used a small mesh strainer) the cake with as much confectioner’s sugar as desired—and enjoy!

SHARE:

Wednesday, September 18, 2013

The Perfect Mix: Chocolate Chip and Sea Salt Cookies

The mix of sweet and salty flavors is about as close to perfection as you can get.  And it has become one of my favorite flavor profiles for everything from brownies to caramels, ice cream, cookies and more.

In fact, I decided to elevate this classic recipe for chocolate chip cookies by adding my favorite sea salt, Fleur de Sel, which adds a perfectly salty under note that lingers on your tongue--in a very good way.  Each time I've baked a batch over the last year, I've made them this way--and there's no turning back.  Scrumptiously sweet and salty, chocolate chips and sea salt, have become the new standard.  And it's the perfect mix!

Enjoy and tell me what are some of your favorite flavor combinations in the comments section below.

Happy Eating!

Chocolate Chip and Sea Salt Cookies

Ingredients: 
1 1/3 cups all-purpose flour
1/2 teaspoon baking powder
1/2 teaspoon baking soda
1 teaspoon Fleur de Sel (or other sea salt), plus more for sprinkling
1/2 cup unsalted butter, at room temperature
1/2 cup granulated sugar
1/2 cup firmly packed light brown sugar
1 large egg
1 teaspoon vanilla extract
1 cup milk chocolate chips

Method:
Preheat the oven to 350 F.   

Sift together the flour, baking powder, baking soda and salt into a bowl and set aside.

Cream together the butter and sugar until fluffy and pale yellow, using an electric mixer.  Add the granulated and brown sugars and continue beating until the mixture is no longer gritty when rubbed between your fingers.  Add the egg and vanilla and beat on low speed until blended.  (Remember to scrape down the the sides of the mixing bowl, as needed.)

Add the flour mixture to the butter mixture and mix on low speed or stir with a wooden spoon just until blended.  Add the chocolate chips, mixing or stirring until just blended.

Using a small ice cream scooper, or a rounded tablespoon, scoop and drop the dough onto baking sheets lined with parchment paper, spacing the cookies about 2 inches apart.

Bake the cookies until golden brown around the edges, about 15 minutes.  When done, sprinkle the tops of the cookies with more fleur de sel.  Let the cookies cool briefly on the baking pans on wire racks before transferring them to the racks to cool completely.  Enjoy!
Recipe adapted from Williams-Sonoma


SHARE:

Saturday, July 30, 2022

Zucchini Muffins


Summer squash and zucchini have made their way back to center stage in my kitchen of late, showing up to the table in mostly savory preparations, as I endeavor to enjoy more of the season’s bounty.  But my fondness for the scrumptious zucchini muffins and zucchini bread I enjoy on occasion turned my affections in that direction recently—and moist, delicious zucchini muffins finally came to life in my kitchen.


It was the perfect way to indulge a weekend morning.  Grating the fresh zucchini, bringing the ingredients together with a few flicks of the wrist, filing the muffin tins, baking them off in the hot oven, reminding myself to be patient while they cooled, and finally—finally—enjoying the fruit of my labor.  Simple pleasures that never get old in my world.


So if you don’t have a garden with zucchini sprouting up (I don’t), grab a few the next time you’re at the market and bake a batch or two.  Bonus: zucchini are in season and cooking and baking with the freshest, seasonal ingredients always yield the best (read: tastiest) results.  Not to mention that they’re more economical in-season, too. 


They’re perfect as a quick breakfast, a snack, for dessert, or any way you want to enjoy them.  Vegetables never tasted so good :), or yielded more…


Happy Eating!


Zucchini Muffins


Ingredients:

2  large eggs, room temperature

1 1/3 cup sugar

2 teaspoons vanilla extract

3 cups grated zucchini

1 cup vegetable oil

2 3/4 cups all-purpose flour

1 teaspoon baking soda

1 teaspoon baking powder

1/4 teaspoon kosher salt

2 teaspoons cinnamon

1 teaspoon ground ginger

1/2 teaspoon nutmeg


Method:

Preheat the oven to 350 degrees F.


In a large bowl, beat the eggs.  Mix in the sugar and vanilla extract. Stir in the grated zucchini and the oil. In a separate bowl, mix together the flour, baking soda, baking powder, spices and salt.


Stir the dry ingredients into the zucchini mixture (be careful not to overmix!)


Prep your muffin pan with paper muffin cups or grease generously.  Use a spoon, ice cream scooper or small measuring cup to fill the cups up completely.


Bake until the muffins are golden brown or a tester comes out clean (about 20-30 minutes, depending on the oven). Remove from the oven and cool in the pan on a wire rack for about five minutes.  Remove from the muffins from the muffin pan and cool them another 20 minutes on the rack.  Eat and enjoy!


P.S. Muffins can be stored in the freezer for up to two months. 


Recipe adapted from Simply Recipes  

SHARE:

Thursday, April 2, 2015

Raspberry-Ricotta Cake


The trifecta of berries, baking and dessert seems to have made its way into my kitchen chronicles again recently.  I know I've been sharing a bit along these lines lately, but can you blame me?  Well, if I told you that this latest confection came together in just over an hour (baking time included), you would surely understand why I just had to share.

I discovered the recipe in my March issue of Bon Appetit and knew I would be baking it soon.  And why not?  It's quick, easy (you don't even need a mixer), and delivers up a moist, sweet, berrylicious bite that's ideal for a last minute dessert--or, as in my case, a just because treat.


  Springtime, berries, cake and the joy of baking.  What could be better?

Happy Eating! 

Raspberry-Ricotta Cake
Recipe courtesy of Bon Appetit

Ingredients:
Nonstick vegetable oil spray
1 1/2 cups all-purpose flour
1 cup sugar
2 tsp. baking powder
3/4 tsp. kosher salt
3 large eggs
1 1/2 cups ricotta
1/2 tsp. vanilla extract
1/2 cup (1 stick) unsalted butter, melted
1 cup frozen raspberries (or blackberries), divided

Method:
Preheat oven to 350 F.  Line a 9"-diameter cake pan with parchment paper and lightly coat with nonstick spray.  Whisk flour, sugar, baking powder and salt in a large bowl.

Whisk eggs, ricotta and vanilla in a medium bowl until smooth; fold into dry ingredients just until blended.  Then fold in butter, followed by 3/4 cup of raspberries, taking care not to crush berries.  Scrape batter into prepared pan and scatter remaining 1/4 cup raspberries over top.

Bake cake until golden brown and a tester inserted into the center comes out clean, 50-60 minutes.  Let cool at least 20 minutes before unmolding.

Do Ahead: Cake can be made 2 days ahead.  Store tightly wrapped at room temperature.   
SHARE:

Thursday, June 30, 2022

The Creamiest, Dreamiest Classic Cheesecake


When you’ve been away from one of your happy places, even for great reasons like celebrating family milestones and traveling, such as my recent hiatuses away from home two weekends in a row, it feels oh so good when you’re back—in full force.


I speak of me and my kitchen.  Specifically, creating beautiful, scrumptious food in my kitchen.


So taking several hours last Sunday to indulge in baking was a welcomed return.  The recipe of choice was a dreamy cheesecake recipe by Dorie Greenspan, that I happened upon in the New York Times Cooking archives, during my search for inspiration.  And not only did I thrill and delight myself with the finished masterpiece—I finally checked baking a cheesecake off of my epicurean ‘to do’ list.


Can you believe it?! I’d never made a cheesecake before then.  


I grew up eating my mom’s beloved cheesecake pie (a lighter version of full-on cheesecake) and have otherwise eaten my fair share of cheesecakes over the years.  But baking one myself?  Not until last Sunday.  And I’m so glad I did.  In fact, I’m already dreaming up other flavor variations and nuances for future baking escapades.  


Nothing was spared with this all-in, high crust (humble brag), cream cheese x heavy cream, delicacy.  (I opted for all heavy cream for my first go ‘round, but sour cream and heavy cream, or all sour cream, can also work beautifully, I’m sure.)  Still, my instincts were spot on for me and the creamy, cheese-cakey bite after bite I was seeking.


For a final finish, a.k.a garnish, I decided to add some macerated summer berries for a bit of color and extra goodness. (Totally optional, however, because this baby stands very well on her lonesome.)


I have to admit that I was so proud of my labor of love when I finally went in for the ‘unfolding’ from the springform pan and to take my first bite.  Did I mention, you’ve got to be ready to commit, because it’s a 7.5 hour endeavor—at minimum (chill down time, included.)  Mine was longer because I took the overnight chill down route. But It. Was. Worth. It.  The technique is evident as you go through the recipe—but when you’re in pursuit of unforgettable, too good to be true, results, don’t sweat the technique. ;)


I invite you to make it for yourself, family, friends, enemies that you want to convert to friends, lol!, and anyone else you want to delight (or impress) and spread the joy of baking that’s guaranteed to indulge…


Happy Eating!


Classic Cheesecake

Ingredients:

Crust:

1 3/4 cups graham cracker crumbs

3 tablespoons sugar

Pinch of salt

1/2 stick unsalted butter, melted


Cheesecake:

2 lbs. cream cheese, room temperature

1 1/3 cups sugar

1/2 teaspoon salt

2 teaspoons vanilla extract

4 large eggs, room temperature

1 1/3 cups heavy cream


Method:

  1. To make the crust: Butter a 9-inch springform pan — choose one that has sides that are 2 3/4 inches high (if the sides are lower, you will have cheesecake batter left over) — and wrap the bottom of the pan in a double layer of aluminum foil.
  2. Stir the crumbs, sugar and salt together in a medium bowl. Pour over the melted butter and stir until all of the dry ingredients are uniformly moist. (You can do this with your fingers.) Turn the ingredients into the springform pan and use your fingers to pat an even layer of crumbs along the bottom of the pan and about halfway up the sides. Don’t worry if the sides are not perfectly even or if the crumbs reach above or below the midway point on the sides. Put the pan in the freezer while you heat the oven. (The crust can be covered and frozen for up to 2 months.)
  3. Center a rack in the oven. Heat the oven to 350 degrees and place the springform on a baking sheet. Bake for 10 minutes. Set the crust aside to cool on a rack while you make the cheesecake.
  4. Reduce the oven temperature to 325 degrees.
  5. To make the cheesecake: Put a kettle of water on to boil.
  6. Working with a stand mixer, preferably fitted with the paddle attachment, or with a hand mixer in a large bowl, beat the cream cheese at medium speed until it is soft and creamy, about 4 minutes. With the mixer running, add the sugar and salt and continue to beat for another 4 minutes or so, until the cream cheese is light. Beat in the vanilla. Add the eggs, one by one, beating for 1 full minute after each addition — you want a well-aerated batter. Reduce the mixer speed to low and stir in the sour cream and/or heavy cream.
  7. Put the foil-wrapped springform pan in a roasting pan that is large enough to hold the pan with some space around it.
  8. Give the batter a few stirs with a rubber spatula, just to make sure that nothing has been left unmixed at the bottom of the bowl, and scrape the batter into the springform pan. The batter will reach the rim of the pan. (If you have a pan with lower sides and have leftover batter, you can bake the batter in a buttered ramekin or small soufflé mold.) Put the roasting pan in the oven and pour enough boiling water into the roaster to come halfway up the sides of the springform pan.
  9. Bake the cheesecake for 1 hour 30 minutes, at which point the top will be browned (and perhaps cracked) and may have risen just a little above the rim of the pan. Turn off the oven’s heat and prop the oven door open with a wooden spoon. Allow the cheesecake to luxuriate in its water bath for another hour.
  10. After 1 hour, carefully pull the setup out of the oven, lift the springform pan out of the roaster — be careful, there may be some hot water in the aluminum foil — and remove the foil. Let the cheesecake come to room temperature on a cooling rack.
  11. When the cake is cool, cover the top lightly and refrigerate for at least 4 hours, although overnight is better.
  12. {Baker's Tips}:
  13. At serving time, remove the sides of the springform pan — you can use a hairdryer to do this — and set the cake on a serving platter.
  • Serving: The easiest way to cut cheesecake is to use a long, thin knife that has been run under hot water and lightly wiped. Keep warming the knife as you cut slices of the cake.
  • Storing: Wrapped well, the cake will keep for up to 1 week in the refrigerator or for up to 2 months in the freezer. It’s best to defrost the still-wrapped cheesecake overnight in the refrigerator.

Recipe courtesy of NYT Cooking 


SHARE:

Saturday, February 7, 2015

Maple and Black Pepper Glazed Bacon


So everything's better with bacon?  Well, if that's really the truth (and it is), then what do you say for MAPLE AND BLACK PEPPER glazed bacon?!  I'll let you happily ponder that for a moment...and while you're at, go ahead and grab a baking pan and rack, the star ingredient, some maple syrup, and freshly ground black pepper--and get ready to indulge in the perfect bite (read: sweet-salty-spicy-all-in-one).  


I don't do (pork) bacon very often, admittedly, but when looking to bring an extra special touch to the table, this recipe is worth the extra indulgence.  Pair with pancakes, or any of your favorite breakfast and brunch bites--or even serve as an indulgent appetizer course for "can't get enough" noshing.  

No matter how you slice serve it, it's guaranteed to please and evoke...Happy Eating!

Maple and Black Pepper Glazed Bacon

Ingredients: 
1/2 lb. thick cut bacon
Maple Syrup
Freshly Ground Black Pepper

Method:
Preheat oven to 400 degrees F.

Place a baking rack over a baking pan and place bacon on rack in a single layer.  Roast bacon in preheated oven for 15-20 minutes, until it begins to crisp. 

Remove pan from oven and brush bacon on each side with the syrup and sprinkle with pepper.  Return pan to oven and continue to roast for another 3-5 minutes until crisped through.  Remove from oven and serve immediately.  Enjoy!

(Cook's Note: If you don't have a baking rack, place bacon on a baking pan in a single layer.  Before adding the syrup and pepper, remove bacon and drain the excess fat from the pan.  Also allow bacon to drain on paper towels for a couple of minutes before serving to blot any additional fat.)

   
SHARE:

Friday, September 4, 2015

Summer's Best: Crispy Flatbread with Figs, Blue Cheese & Prosciutto

Holiday weekends call for good food, among other things.  Perfectly crisp and delicious homemade flatbread, topped with slightly warmed fresh figs, barely melted blue cheese and salty prosciutto is a party perfect bite--requiring little fuss--that should be on your menu agenda.

The freshly baked flatbread is probably the easiest homemade dough you'll ever make--and the rest is gravy from there, as you assemble the fig, cheese and prosciutto toppings.  Oh, and I can't forget that impeccable finishing touch of a drizzle of good quality honey.

With only a few days remaining in Summer, there's no time to waste in enjoying the remainder of the season's bounty.  And bringing sweet, juicy figs to the table is the perfect way to indulge!

Happy Eating!

Crispy Flatbread with Figs, Blue Cheese & Prosciutto
Ingredients:
  • 1 3/4 cups unbleached all-purpose flour
  • 1 teaspoon baking powder
  • 3/4 teaspoon salt
  • 1/2 cup water
  • 1/3 cup olive oil plus more for brushing
  • Flaky sea salt such as Maldon
  • Fresh figs, halved
  • Blue Cheese (Roquefort recommended)
  • Prosciutto, thinly sliced
  • Honey, for drizzling
Method:
Preheat oven to 450°F with a heavy baking sheet on rack in middle.

Stir together flour, baking powder, and salt in a medium bowl. Make a well in center, then add water and oil and gradually stir into flour with a wooden spoon until a dough forms. Knead dough gently on a work surface 4 or 5 times.

Divide dough into 3 pieces and roll out 1 piece (keep remaining pieces covered with plastic wrap) on a sheet of parchment paper into a 10-inch round (shape can be rustic; dough should be thin).

Lightly brush top with additional oil and sprinkle with sea salt. Slide round (still on parchment) onto preheated baking sheet and bake for about 6 minutes.  Remove from oven and top with blue cheese, prosciutto and figs. Return to oven and bake for an additional 5 minutes, until pale golden and browned in spots.

Transfer flatbread (discard parchment) to a rack to cool, then make 2 more rounds (1 at a time) on fresh parchment (do not oil or salt until just before baking).  Drizzle with honey to finish and enjoy!
Flatbread recipe adapted from Epicurious.com.


SHARE:

Sunday, November 8, 2020

{Easy Fall Baking}: Apple Crisp


There’s something about Fall that turns up my love for baking.  If I had to put a pulse on it, I’d say it’s the cooler, crisp weather coupled with warm and cozy fare that gets me every time.  Oh, and apple season.

Since forever, apples have been one of my favorite fruits, so it’s a no-brainer that combining them with scrumptious flavors like fragrant spices and citrus make them a star-ingredient in my kitchen.  From tarts, to crostatas, apples and baking are a winning combination for me.


As much as that is true, it was somewhat ironic that I had never baked an apple crisp until this past weekend.  I say ironic because it was a favorite dessert treat growing up.  In fact, I was introduced to apple crisp as a part of the occasional dessert round-up for my school lunches, and although I found most of the lunches to be not so great, and happily farmed mine off to my eager classmates (my mom didn’t appreciate that, lol!), apple crisp was one of the few dishes (along with peanut butter cookies, pizza and burgers) that elicited excitement.  Sounds like a child’s palette, no?


Despite having a grandmother who turned the apples from the apple tree in my grandparents' backyard into decadent homemade apple pies that food dreams are made of, I still fell for those little servings of apple crisp on the lunch trays. And this past weekend, I revived those childhood memories and tastes in my own kitchen, discovering, to my delight, that apple crisp will always do it for me.  (I baked a peach crisp over the summer that was addictively good, so I was biding my time for apple season to finally arrive, so I could recreate the goodness all over again.)


Beyond the memories and delicious indulgence, the ease in which this dessert comes together makes it star-worthy.  With the toss of a few ingredients, it’s oven-ready and primed to be baked to perfection with the bonus of that “something delicious is baking aroma” wafting through your kitchen. 


Served hot from the oven, topped with ice cream for extra decadence (yes, please!), it’s baked perfection in a dish and the best kind of…


Happy Eating!


Apple Crisp


Ingredients:

¾ cup flour

¼ cup light brown sugar

½ teaspoon salt

½ cup plus 2 tablespoons granulated sugar

8 tablespoons (1 stick) unsalted butter, cold, and diced into cubes

1 cup old-fashioned rolled oats

3 lbs. apples (I prefer Granny Smith)

2 tablespoons lemon juice

2 teaspoons cinnamon


Method:

Preheat oven to 375° F.


In a large bowl, mix together the flour, brown sugar, salt, 1 teaspoon cinnamon, and 2 tablespoons granulated sugar.  Cut butter into flour, using a pastry blender or two knives, until mixture is the texture of coarse meal.  Add oats and use your hands to toss and squeeze mixture until large, moist clumps form.  Place in freezer to chill while you prepare the apples.


In another large bowl, toss apples with lemon juice, 1 teaspoon cinnamon, and ½ cup granulated sugar.  Transfer to a 2-quart baking dish and sprinkle with the oat topping mixture.  Place in preheated oven and bake until golden and bubbling, 55 to 65 minutes.  Let cool slightly before serving—and enjoy!


Recipe adapted from Martha Stewart

SHARE:

Tuesday, December 15, 2015

Citrus Pound Cake

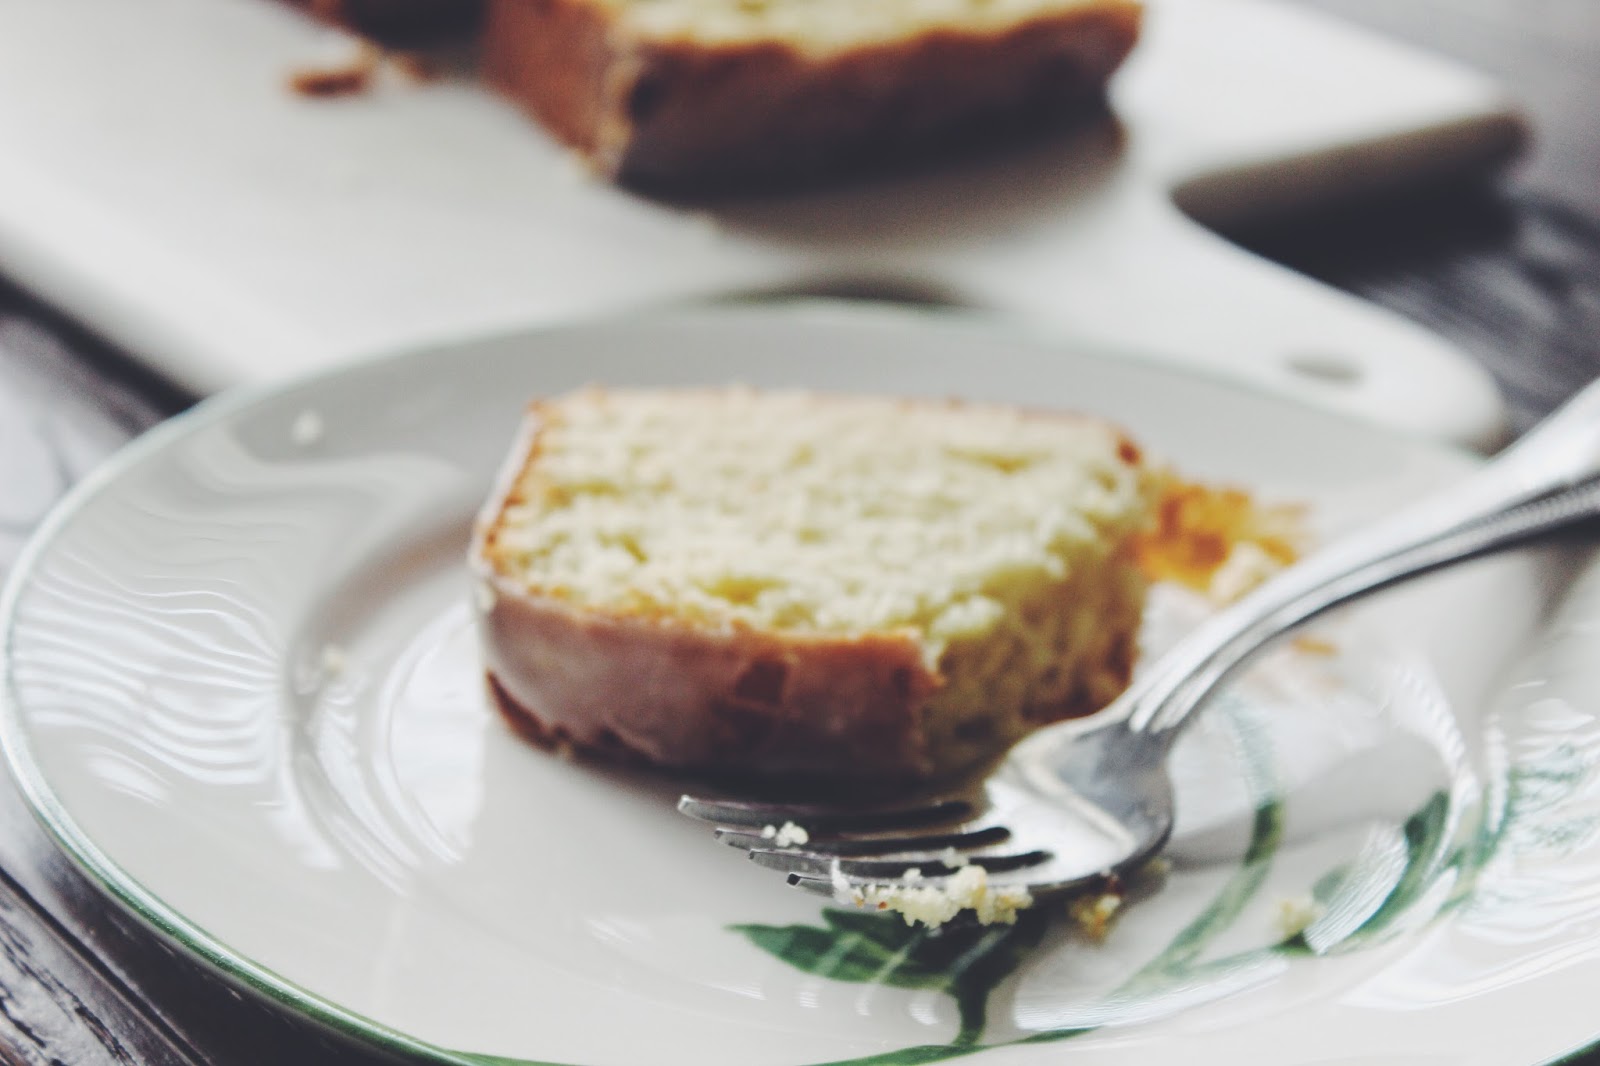
I spent my recent Sunday afternoon drinking in the fading sunshine... and baking a cake.  It wasn't the fancier variety of cake that may immediately come to mind.  But one equally special, all the same--and for all the right reasons.  Reasons like a beautiful, moist crumb, and wave upon wave of citrus infusion.  From zest and juice, to syrup and glaze, there was no mistaking the bright flavors and under notes that have made this cake a personal favorite for many years now.  I especially love it during the holidays when a little something extra special is the order of the day. And slice after decadent slice proves perfectly special.


Rather than go my more traditional route of lemon only (lemon pound cake is a wonder), I decided to mix things up a bit more and combine the flavors of grapefruit, orange and lemon.  Did I say this was a citrus pound cake?  And it's one of the most addictive desserts (or breakfasts, if you eat cake for breakfast.  I do.)  The absolute best part, however, is that it yields two cakes--one for savoring and one for sharing (or freezing until you're ready to indulge your sweet tooth all over again).

There's really not much left to say, other than you have to bake it.  And thank me later.

Happy Eating!

Citrus Pound Cake
Ingredients:
1/2 lb. (2 sticks) unsalted butter, room temperature
2 1/2 cups sugar, divided
4 large eggs, room temperature
Grated zest of one grapefruit, one orange and two lemons
3 cups flour
1/2 teaspoon baking powder
1/2 teaspoon baking soda
1 teaspoon salt
3/4 cup of citrus juice (combination of 1/4 cup each of grapefruit, orange and lemon), divided
3/4 cup buttermilk, room temperature
1 teaspoon vanilla extract

For the glaze:
1 1/2 cups confectioner's sugar
2 tablespoons citrus juice

Method:
 
Preheat the oven to 350 degrees F. Grease and flour 2 (8 1/2 by 4 1/4 by 2 1/2-inch) loaf pans. Line the bottoms with parchment paper.

Cream the butter and 2 cups sugar in the bowl of an electric mixer fitted with the paddle attachment, until light and fluffy, about 5 minutes. With the mixer on medium speed, add the eggs, 1 at a time, and the citrus zest.

Sift together the flour, baking powder, baking soda, and salt in a bowl. In another bowl, combine 1/4 cup citrus juice, the buttermilk, and vanilla. Add the flour and buttermilk mixtures alternately to the batter, beginning and ending with the flour. Divide the batter evenly between the pans, smooth the tops, and bake for 45 minutes to 1 hour, until a cake tester comes out clean.

Combine 1/2 cup sugar with 1/2 cup citrus juice in a small saucepan and cook over low heat until the sugar dissolves. When the cakes are done, allow to cool for 10 minutes. Remove the cakes from the pans and set them on a rack set over a tray or sheet pan; spoon the lemon syrup over them. Allow the cakes to cool completely.

For the glaze, combine the confectioners' sugar and the citrus juice in a bowl, mixing with a wire whisk until smooth. Pour over the tops of the cakes and allow the glaze to drizzle down the sides.  (Cook's Note: If freezing the cakes, don't apply glaze until you are ready to serve.) Enjoy!   

Recipe adapted from Ina Garten


SHARE:
© D.M.R. Fine Foods. All rights reserved.
MINIMAL BLOGGER TEMPLATES BY pipdig