Thursday, July 8, 2021

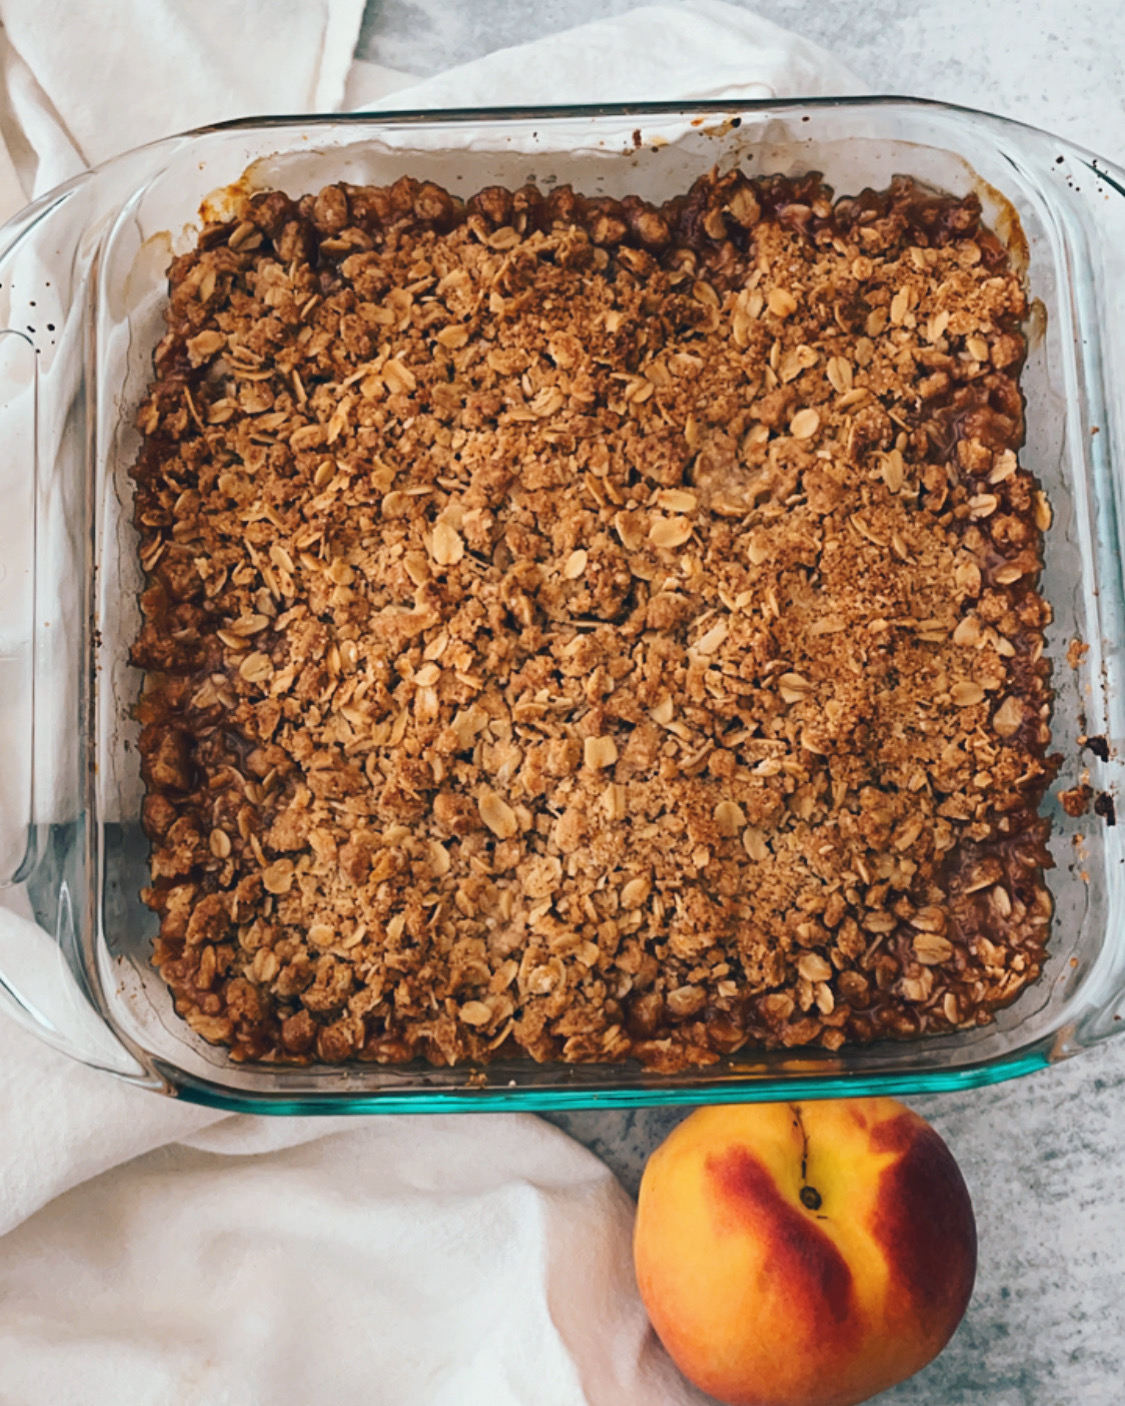
Peach Crisp


I feel as if I blinked and we entered a whole new season—and the second half of 2021.  In the words of the gifted songstress, Anita Baker, “It’s been so long…I’m missing you baby.” And it’s good to be back. 


As seasons go, I’m also glad to be back to one of my favorites—for seasonal produce.  And as the 2nd half of this year goes, I’m believing it will be better, healthier, calmer, safer and more of what we all need (individually and collectively.). My faith remains on ‘go’ and my gratitude remains in flow. (Did I just rhyme?!)


Speaking of produce, few compare to Summer’s bounty.  From (my favorite) stone fruit—bring on all the peaches, plums, cherries, and more!—to luscious watermelon, sweet corn and perfect tomatoes, I can never get enough.  Until the Fall season forces me to do so, at least.  And as one who’s tried indulging my passion out of season, I don’t recommend it.  So while we have Summer, we should definitely make the most of it and indulge.  Deal?


If you’re with me, even slightly, then I have a dessert that’s sure to please and become a recurring favorite in your Summer baking repertoire.  While you know my love for apple crisp, making it with peaches (still in awe that last Summer was my first time doing it) is as delicious and satisfying, with the bonus of coming together easily, as a Summer dessert should.


So without further adieu, take your Summer to new heights with a dessert that's guaranteed to induce...


Happy Eating!


Peach Crisp


Ingredients: 

¾ cup flour

¼ cup light brown sugar

½ teaspoon salt

½ cup plus 2 tablespoons granulated sugar

8 tablespoons (1 stick) unsalted butter, cold, and diced into cubes

1 cup old-fashioned rolled oats 

5-6 peaches

2 tablespoons lemon juice

1/2 teaspoons cinnamon


Method: 

Preheat oven to 375° F.


In a large bowl, mix together the flour, brown sugar, salt,  cinnamon, and 2 tablespoons granulated sugar.  Cut butter into flour, using a pastry blender or two knives, until mixture is the texture of coarse meal.  Add oats and use your hands to toss and squeeze mixture until large, moist clumps form. Place in freezer to chill while you prepare the peaches.


In another large bowl, toss peaches with lemon juice and ½ cup granulated sugar. Transfer to a 2-quart baking dish and sprinkle with the oat topping mixture.  Place in preheated oven and bake until golden and bubbling, 55 to 65 minutes.  Let cool slightly before serving—and enjoy!


SHARE:

Sunday, November 8, 2020

{Easy Fall Baking}: Apple Crisp


There’s something about Fall that turns up my love for baking.  If I had to put a pulse on it, I’d say it’s the cooler, crisp weather coupled with warm and cozy fare that gets me every time.  Oh, and apple season.

Since forever, apples have been one of my favorite fruits, so it’s a no-brainer that combining them with scrumptious flavors like fragrant spices and citrus make them a star-ingredient in my kitchen.  From tarts, to crostatas, apples and baking are a winning combination for me.


As much as that is true, it was somewhat ironic that I had never baked an apple crisp until this past weekend.  I say ironic because it was a favorite dessert treat growing up.  In fact, I was introduced to apple crisp as a part of the occasional dessert round-up for my school lunches, and although I found most of the lunches to be not so great, and happily farmed mine off to my eager classmates (my mom didn’t appreciate that, lol!), apple crisp was one of the few dishes (along with peanut butter cookies, pizza and burgers) that elicited excitement.  Sounds like a child’s palette, no?


Despite having a grandmother who turned the apples from the apple tree in my grandparents' backyard into decadent homemade apple pies that food dreams are made of, I still fell for those little servings of apple crisp on the lunch trays. And this past weekend, I revived those childhood memories and tastes in my own kitchen, discovering, to my delight, that apple crisp will always do it for me.  (I baked a peach crisp over the summer that was addictively good, so I was biding my time for apple season to finally arrive, so I could recreate the goodness all over again.)


Beyond the memories and delicious indulgence, the ease in which this dessert comes together makes it star-worthy.  With the toss of a few ingredients, it’s oven-ready and primed to be baked to perfection with the bonus of that “something delicious is baking aroma” wafting through your kitchen. 


Served hot from the oven, topped with ice cream for extra decadence (yes, please!), it’s baked perfection in a dish and the best kind of…


Happy Eating!


Apple Crisp


Ingredients:

¾ cup flour

¼ cup light brown sugar

½ teaspoon salt

½ cup plus 2 tablespoons granulated sugar

8 tablespoons (1 stick) unsalted butter, cold, and diced into cubes

1 cup old-fashioned rolled oats

3 lbs. apples (I prefer Granny Smith)

2 tablespoons lemon juice

2 teaspoons cinnamon


Method:

Preheat oven to 375° F.


In a large bowl, mix together the flour, brown sugar, salt, 1 teaspoon cinnamon, and 2 tablespoons granulated sugar.  Cut butter into flour, using a pastry blender or two knives, until mixture is the texture of coarse meal.  Add oats and use your hands to toss and squeeze mixture until large, moist clumps form.  Place in freezer to chill while you prepare the apples.


In another large bowl, toss apples with lemon juice, 1 teaspoon cinnamon, and ½ cup granulated sugar.  Transfer to a 2-quart baking dish and sprinkle with the oat topping mixture.  Place in preheated oven and bake until golden and bubbling, 55 to 65 minutes.  Let cool slightly before serving—and enjoy!


Recipe adapted from Martha Stewart

SHARE:

Thursday, January 17, 2019

Apple Crostata

It's hard to argue that buttery, homemade pie crust, topped with apples coated in cinnamon, sugar, orange zest and more, isn't some of the best noshing around.  So much so, that when I prepared that delight, also known as an Apple Crostata, on Thanksgiving morning, it never made it to the Thanksgiving dinner dessert line-up!

Beyond being truly irresistible (you'll bear witness for yourself once you make it), the recipe scores bonus points for the ease in which it comes together, making it ideal for a last minute dessert option with major wow appeal.  It's no secret that fruit crostatas are some of my favorite things to bake (and devour!), and I've long loved this recipe, which hails from one of my biggest food inspirations, Ina Garten (aka The Barefoot Contessa). 

I shared the fruits of my Thanksgiving baking labor, along with some of the morning-of behind the scenes action, but decided it would only be truly fair if I also shared the recipe so that you can make it, too.  So, at last, here it is--in all of its can't-get-enough goodness and perfection for endless....

Happy Eating!

Apple Crostata

 
SHARE:

Friday, September 1, 2017

Labor-less Labor Day Eats x Atlanta Plugged In

Summer isn't over yet!! I want to (air) scream this every time I cite a mention of Fall food and flavors these days.  Don't get me wrong, I loveeee the Fall.  It's my favorite season, in fact, but I'm all about celebrating each season to its fullest--and that means relishing the final days of Summer.

Just as Memorial Day marks the unofficial start of Summer, Labor Day tends to mark the unofficial end of this sultry time of year.  And with Labor Day in mind (and on the horizon), I have to share a few, fun recipes to make your entertaining over the long weekend anything but laborious.  Think effortless!

If you follow me on social media (I'd love it if you did--see the easy 'connect' buttons in the right margin. Shameless plug. ;-) ), then you're likely aware that I had the awesome privilege of returning to my favorite, Atlanta Plugged In, earlier this week to share my tips and recipes for making the most of the holiday.


Now that you've watched the segment, I hope you're inspired to try these easy, delicious, and, yes, healthy dishes.  Win, win, win.


And to tie it all together with a big bow on top, I'm sharing a bonus "recipe" in the way of a super fun and effortless sip.  Because there's so much to cheers to and be thankful for.

Enjoy a delicious, effortless, and safe holiday weekend.

Happy Eating!

Peach Caprese Bites
Ingredients:
Fresh peaches, sliced into rounds
Fresh mozzarella, thinly sliced
Prosciutto, thinly sliced
Basil leaves
Flaked sea salt (optional)
Balsamic syrup, for garnish, (optional)

Method:
Arrange peaches, mozzarella, basil and prosciutto in stacks.  Sprinkle lightly with sea salt and drizzle balsalmic, if using.  Enjoy!

Roasted Shrimp and Pineapple Skewers
Ingredients:
Shrimp, peeled and deveined
Fresh pineapple
Old Bay Seasoning
Kosher Salt
Freshly ground black pepper
Olive Oil  
Brown sugar 
Cilantro
Fresh limes  

Method:
Preheat oven to 425 degrees F.

On a baking sheet, toss together shrimp, seasoning, a light sprinkling of salt, freshly ground pepper and olive oil.  Roast in preheated oven for 5-6 minutes.  Set aside.

On a separate baking sheet, toss together pineapple, brown sugar, salt, pepper and olive oil.  Roast for 15 minutes in preheated oven. (*Cook's Note: Shrimp and pineapple can be prepared a day ahead and served at room temperature, if preferred.)

Add roasted shrimp, pineapple and cilantro to skewers.  Garnish with more chopped cilantro and fresh lime juice.  Enjoy!

Watermelon with Chili-Spiced Salt
Ingredients:
Fresh watermelon slices or chunks
1 tablespoon kosher salt 
1/2 teaspoon chili powder 
1/2 teaspoon ground cumin
1/4 teaspoon cayenne pepper (or less, to taste)

Method:
Add salt and spices to a dish and stir well to combine.  Sprinkle over melon, serve and enjoy! (*Cook's Note: leftover salt can be stored in an airtight container in your pantry.)

Cotton Candy Sparkler
Ingredients:
Cotton candy
Sparkling drink of choice (cider, prosecco, champagne, etc.)

Method:
Pour sparkling beverage in glasses.  Top with cotton candy.  Toast and enjoy!     


SHARE:

Sunday, August 27, 2017

Mixed Fruit Green Smoothie Bowl

I'm back on my smoothie craze these days, after an unintentional hiatus.  Ever since I began making smoothies years ago, I've been relatively constant about indulging--especially during the Summer months when my frothy, icy concoctions bring a much needed (and healthier) cool down.  I can rely on them to give me a semblance of the tasty goodness that ahem, a milkshake, might otherwise offer.

I also happen to be intentionally focusing on 'cleaner' eating these days, and smoothies are an easy go-to for loading fruits, vegetables, and added nutrients into your eating regimen.  My current favorite is a mixture of fruit and greens--with all the same good to you, good for you, scrumptious-ness that I love.


And while I'm talking cleaner eating, my newest star ingredient is a Coconut-Almond Milk blend that I discovered at the market recently.  It's everything (cue: diary free, gluten free, soy free, non-gmo and sugar free).  Everything, right?  Annnd.... it's only 45 calories per serving and provides the perfect creamy, sweet goodness as the base of my smoothie.  I'll admit that I was dubious about displacing my usual juice + coconut water base, but this was love at first sip.

So in the spirit of sharing and caring, I'm sharing my easy, good to the last drop smoothie recipe-turned-smoothie bowl.  About the bowl effect, I love it because it allows me to layer in more goodness with the toppings of my choice (fruits, toasted coconut chips, and whatever else your heart and taste buds desire.)  Smoothie bowls also happen to be all the rave right now, so I had to jump in on the fun.

Here's to more healthy, yummy goodness in your breakfast and snack routines and always to...

Happy Eating!

Mixed Fruit Green Smoothie Bowl
Ingredients:
1 cup Coconut-Almond Milk Blend (or Almond Milk, if you can't find the blend)
3/4 cup frozen mixed fruit
1/2 banana
1 cup fresh baby kale mix (or other greens of choice)
1 tsp honey
Fresh berries, coconut chips to garnish (optional)

Method:
Add milk, frozen fruit, banana, greens and honey to a blender and blend to desired consistency.  (Note: if smoothie mixture needs extra liquid, add in a little water and continue to blend.)  Pour smoothie into a bowl, garnish with toppings and enjoy!

 
SHARE:

Friday, July 28, 2017

{Toast With This!}: Strawberry Spritzer

Enduring the Summer heat is a lot more bearable when you're sipping on a cool, effervescent and refreshing drink that boasts the season's bounty.  And with that in mind, I recently added another favorite to my mocktail repertoire.

Inspired by my love for homemade everything, I set about to create a strawberry puree, accented with a hint of fresh lime juice.  And can I just tell you--it was sooo good.  (Like, spoonfuls in the middle of the day, straight from the container, kind of good. Don't judge me.)  From there, the possibilities became endless for how to make the most of the berry-licious concoction.

Freeze into sorbet.  Spoon over ice cream.  Make into a seasonal spritzer.  The latter of these was my immediate go-to, but the other options are still very much alive.

And this "non-recipe", recipe of sorts, couldn't be easier to pull off--or transform with additional or alternate flavors.  One technique x endless options = happy cooking at its finest.

So cheers to more of Summer's luscious flavors...and to Happy Sipping!

Strawberry Spritzer
Ingredients:
1 lb. fresh strawberries, hulled and halved
Juice of 1/2 lime, plus more to garnish as desired
1/2 cup sugar
Club soda
Ice Cubes

Method:
Place strawberries in a blender or food processor and blend into a puree.  Strain puree through a fine mesh sieve.

Add in sugar and lime juice and stir well to combine.  Store in an airtight container for 8-12 hours or overnight to chill mixture.

Mix together 1/4 cup of puree and 3/4 cup of club soda.  Pour over ice, serve and enjoy!

Recipe adapted from Bon Appetit 


SHARE:

Friday, March 31, 2017

Cherry Upside-Down Cake

There will always be certain foods and tastes that whisk me right back to my childhood.  And upside-down cake--of the pineapple variety--is one.  While it was never a staple in my family's baking repertoire, I was always delighted when I happened upon a well executed (or otherwise) taste of this unconventional cake.  Unconventional in my childhood meant sans frosting.  And with cooked fruit.  The only cake in my confectionery world that hit those marks back then was my mom's Christmas Fruit Cake (and, shhh... I was never really a fan.)  Still, the sweet and caramelized pineapple atop decadent, sponge-like cake worked for me.

Fast forward a "few" years, and I happened upon a recent cherry rendition via Bon Appetit.  A one bowl wonder, and the memories of upside-down cake indulgence of days gone by, fueled my resolve to bake. this. cake.  And I'm so glad I did.

A leisure Sunday afternoon provided the perfect backdrop for abandoning myself to the tasks of prepping, baking, "unmolding" (fingers were crossed!), and finally tasting this gem of a dessert.  The sweet, dark cherries, accented with hints of citrus, and the buttery, melt-in-your-mouth cake made for a great pairing--and not too few cake, coffee, cake, tea, cake rotations in the days since.

Frozen cherries worked fine, so there's virtually no hassle in assembling your ingredients and getting down to baking business.  Add it to your baking agenda--and your memories will soon thank you, also.

Happy Eating!

Cherry Upside-Down Cake
  

SHARE:

Wednesday, October 5, 2016

Apple Tarts

Something about the Fall season has stirred up my desire for baking more recently.  I bought an adorable cake pan a couple of weeks ago and was feeling the urge to put it to use almost instantly.  Apple season is in full bloom, so I was seeking inspiration for a cake recipe that would deliciously showcase the fruit.  But, a curious thing happened, and my cake dreams were eclipsed by perfect, little apple tarts. 

Starting with one of my favorite short-cut ingredients, puff pastry, I piled apples coated with the warm flavors of cinnamon and allspice, and brightened with orange zest and juice, on top with child-like anticipation of the goodness that was about to unfold.  A few extra touches later, the tarts were in the oven to bake to golden perfection.   A dusting of confectioner's sugar, along with a scoop of ice cream to finish, make these easy, yet elegant, tarts one of the best additions to your seasonal eating repertoire. 

Happy Eating!

Apple Tarts

Ingredients:
2 large, firm baking apples (Granny Smith is my preference), peeled, cored and sliced into wedges
1 sheet frozen puff pastry, thawed
Zest of an orange
2 teaspoons freshly squeezed orange juice
1/4 teaspoon cinammon
1/8 teaspoon allspice
Sugar, for sprinkling
1 tablespoon butter, cut into pieces
1 large egg
Flour (for surface)
Confectioner's sugar (for dusting)
Ice cream, optional

Method:
Preheat oven to 425 degrees F.  Line a baking sheet with parchment and set aside.

Toss apples, cinnamon, allspice, zest, juice and a bit of sugar to fully coat apples and set aside.  Roll out puff pastry on a lightly floured surface into a long rectangle.  Cut in half crosswise and then cut each half to make a total of four squares.  Transfer dough to the baking sheet and prick with a fork in several places.

Pile apples in the center of each square and dot fruit with butter.  Beat egg and 1 teaspoon water in a small bowl and brush pastry with egg wash.  Fold up the edges around the apples, leaving the center open.  Press along the folded edges to lightly seal.  Brush outside of pastry with egg wash and sprinkle with more sugar.  Let chill in freezer 10 minutes.

Bake tarts until puff pastry is golden, 15-20 minutes.  Reduce oven temperature to 350 degrees and continue to bake until pastry is deep golden brown and apples are tender, 15-20 minutes.  Enjoy! (Note: Tarts can be baked up to 6 hours ahead. Store uncovered at room temperature.)

Recipe adapted from Bon Appetit


SHARE:

Wednesday, November 25, 2015

Homemade Applesauce

I'm an apple lover, so apple "anything"--pie, crisps, tarts, candy (you get the picture)--has always been a welcomed part of my eating repertoire.  Applesauce is no exception and, in fact, has been a favorite since my earliest childhood memories.


While I've done my fair share of apple dishes over the years, last year's Thanksgiving dinner was the first time I decided to make homemade applesauce.  Where had I been all this time?  It was every bit as scrumptious and satisfying as I anticipated--pairing beautifully with my roasted porkloin--and easier than most apple creations that come through my kitchen.  It was clear: this recipe was a keeper.

As wonderful, seasonal dishes go, this is one that belongs in your fall/holiday repertoire, for sure.  I like the mix of sweeter red and tarter green apples, but you can use whatever you like--or happen to have on hand.  Although simple, it's a stunner of a dish with the taste to match.

Happy Eating!

Homemade Applesauce

Ingredients:
4-6 lbs. of apples, peeled, cored and cut into slices
1 cup apple cider
Juice of a lemon
1/2 cup light brown sugar
Heaping teaspoon of cinnamon
Pinches of allspice and nutmeg

Method:
Combine all ingredients into a large pot and cook over a medium-high heat, stirring occasionally to prevent sticking/scorching, about 25 minutes.

Once apples have softened and begun to dissolve/melt, remove from heat and blend to desired texture and consistency with an immersion blender or in a food processor.  Serve warm or chilled--and enjoy!

Recipe adapted from The Pioneer Woman
SHARE:

Monday, August 24, 2015

Summer's Best: Peach Cobbler

It's amazing to realize that we're a stone's throw from the end of Summer.  I love the Fall season and can't deny that I'm eagerly anticipating a respite from the heat and humidity that overhangs this time of the year.  However, there are some things about Summer that I will absolutely miss long after the air-conditioned days and al fresco nights are no more.  And the season's bounty is one of them.  In my (humble) opinion, one of the absolute best things about Summer is the vibrant, seasonal food that makes its mark on our culinary landscapes.


Stone fruit fits squarely into that mix, and my undisputed favorites remain peaches, plums, and nectarines.  Whether grilled, roasted, fresh, or transformed into other-worldly ice cream, crumbles, tarts, cobblers, jams, pies, and more, they count as little jewels of which I rarely get enough.  And yesterday afternoon was another example of unabashed indulgence.

Perfectly crisp, yet ripe, fragrant peaches made their way from the market, into my kitchen, into my oven, and finally into my mouth and tummy, for one satisfyingly good peach cobbler.

I plan to relish every delicious moment of the remaining weeks of Summer and invite you to join me--starting with this scrumptious cobbler, of course.

Happy Eating!

Tell me: What are some of your favorite Summer things, foods, and experiences?  Leave a comment below to share!

Peach Cobbler
Ingredients:
6 large peaches, peeled and cut into thin wedges
1/4 cup sugar
1 tablespoon fresh lemon juice
1 teaspoon cornstarch

For the biscuit topping:
1 cup all-purpose flour
1/2 cup sugar
1 teaspoon baking powder
1/2 teaspoon salt
3/4 stick cold, unsalted butter, cut into small pieces
1/4 cup boiling water

Method:
Cook peaches:

Preheat oven to 425 degrees F.  Toss peaches with sugar, lemon juice and cornstarch in a 2qt. non-reactive baking dish and bake in the middle of the oven for 10 minutes.

Making topping while peaches bake:

Stir together flour, sugar, baking powder and salt.  Blend in butter with fingertips or a pastry blender until mixture resembles course meal.  Stir in water until just combined.

Remove peaches from oven and drop spoonfuls of topping over them. Bake in the middle of oven until topping is golden, about 25 minutes.  (Topping will spread as it bakes.)  Enjoy!
Recipe courtesy of Epicurious


SHARE:

Tuesday, September 2, 2014

{Savor the Season}: Summer Fruit Crostata

Summer Fruit Crostata
Now that Labor Day has passed, the official wind-down of Summer has begun.  But before bidding it a formal farewell, I plan to savor it a bit longer.  After all, the tastes of Summer are some of the brightest and most refreshing--and deserve to linger for as long as absolutely possible.

Stone fruits and berries happen to be some of my favorite summer indulgences.  Known to frequently devour them on their very own, I had no qualms recently in taking things up a notch by bringing them together with homemade, buttery pastry to yield one scrumptious dessert (and next day breakfast).  Summer Fruit Crostata, to be exact.


Perfectly ripened and sweet peaches and plums, along with sweet-tart blackberries, were my fruits of choice for this scrumptious, yet amazingly simple and rustic, treat.  I love crostatas and this time around decided to substitute my go-to apple version with what's freshest and in season now.  Summer. Fruit. Pastry.  Three little words that yielded delight with each bite--and made this Summer one that I'll always savor.

Happy Eating!

Summer Fruit Crostata

Ingredients:
For the pastry (makes 2 crostatas):
2 cups all-purpose flour
1/4 cup granulated or superfine sugar
1/2 teaspoon kosher salt
1/2 pound (2 sticks) cold unsalted butter, diced
6 tablespoons (3 ounces) ice water
 
For the filling (makes 1 crostata):
1 pound firm ripe peaches, peeled
1/2 pound firm ripe black plums, unpeeled
1/2 pint fresh blackberries
1 tablespoon all-purpose flour
1 tablespoon granulated sugar
1/4 teaspoon grated orange zest
2 tablespoons freshly squeezed orange juice

Method:
For the pastry:

Place the flour, sugar, and salt in the bowl of a food processor fitted with a steel blade. Pulse a few times to combine. Add the butter and toss quickly (and carefully!) with your fingers to coat each cube of butter with the flour. Pulse 12 to 15 times, or until the butter is the size of peas. With the motor running, add the ice water all at once through the feed tube. Keep hitting the pulse button to combine, but stop the machine just before the dough comes together. Turn the dough out onto a well-floured board, roll it into a ball, cut in half, and form into 2 flat disks. Wrap the disks in plastic and refrigerate for at least 1 hour. If you only need 1 disk of dough, the other disk of dough can be frozen.

Preheat the oven to 450 degrees F. Line a baking sheet with parchment paper.

Roll the pastry into an 11-inch circle on a lightly floured surface. Transfer it to the baking sheet.
 
For the filling:

Cut the peaches and plums in wedges and place them in a bowl with the blackberries. Toss them with the tablespoon of flour, tablespoon of sugar, the orange zest, and the orange juice. Place the mixed fruit on the dough circle, leaving a 1 1/2-inch border.  Gently fold the border of the pastry over the fruit, pleating it to make an edge.

Bake the crostata for 20 to 25 minutes, until the crust is golden and the fruit is tender. Let the crostata cool for 5 minutes, then use 2 large spatulas to transfer it to a wire rack. Serve warm or at room temperature. 
Recipe adapted from Ina Garten
SHARE:

Thursday, July 4, 2013

The Ultimate Berry Trifle

"This is a showstopping dessert that practically makes itself." Those are the words used to introduce this dessert in Tyler Florence's cookbook, Tyler's Ultimate (a gem in my cookbook collection), setting the reader's expectations for a treat that is unforgettable.  And from the first time I made it years ago until now, I can attest that it's no exaggeration of terms.

My enthusiasm for this dessert, first and foremost, and as it is with all the recipes I return to again and again, is its absolute scrumptious taste.  Like in the mouth-watering, can't wait to take another bite kind.  A mixed berry trifle, it showcases three of Summer's star berries at their peak, and combined with luscious cake and lemon cream, every bite is a mingling of sweet and slightly tart flavors that sing in your mouth.  And I'm not exaggerating.

Another reason this dessert is so stellar is because of the ease with which it comes together.  Trifles lend themselves to an assembly of ingredients, without any heavy lifting.  And when it comes to producing a showstopping dessert, that's rare (and golden).  

Macerating the berries with a little sugar and lemon juice and whipping up sweetened cream and combining with lemon curd to make a scrumptious lemon cream is as complicated as it gets.  So, not complicated at all, really.  The result is a beautiful, layered medley of cream, cake and berries--the ultimate in good eats. 

Happy Eating!

Recipe: The Ultimate Berry Trifle
SHARE:

Saturday, June 2, 2012

Blueberry Pancakes with Orange Essence

Whether you're talking breakfast, brunch--or breakfast for dinner--pancakes are the perfect course for delicious noshing.  Most often, I enjoy them simply prepared with some real maple syrup on the side for frequent drizzling.  However, when I have my favorite blueberries on hand (fresh or frozen), I bring them to the party to make the patty cakes even more special--and scrumptious.

And whether I'm enjoying them with, or sans, my favorite fruit, these days I can't resist adding in an under note of orange that brings a bright, yet subtle, orange "essence" to the pancakes.  This is my humble attempt at recreating the distinct flavor that I encountered years ago while vacationing in St. Barths, an exquisite Caribbean island in the French West Indies.  

My first morning there, I ordered the pancakes for breakfast, and what I was served was unlike any other pancake I'd ever tasted.  The only way I knew how to describe what I was tasting was that it tasted as if the chefs had infused the batter with orange goodness--and I loved it!  Needless to say, I ordered pancakes everyday for the rest of my stay.

I don't indulge as often these days, but on the occasions that I do, I like to bring the same goodness to the table.  This recipe is a quick and simple tribute to special touches that can make all the difference--and create lasting foodie memories.

Happy Eating!

Blueberry Pancakes with Orange Essence

Ingredients:
Recipe for 1 batch of pancakes from your favorite pancake mix
1/2 cup blueberries
1/2 teaspoon orange blossom water
1/4 teaspoon vanilla extract
Butter
Confectioner's sugar for dusting 
Maple syrup for serving, optional

Method:
Preheat a griddle or large skillet to medium high heat.

Prepare pancake batter according to package instructions and add in the orange blossom water, vanilla and blueberries, being careful not to over mix the batter.  Allow the batter to stand for 1-2 minutes.

While the batter is resting, add butter to the preheated griddle and allow to melt and coat the surface evenly. (Cook's Note: this will give you deliciously crispy edges, while also adding flavor.)

Once the butter has melted, add the batter in 1/4 cup measures for each pancake.  Cook until golden brown on one side (about 2 minutes), then flip and cook until browned on the other side, about 1 additional minute.  Remove from the griddle, dust with confectioner's sugar, serve with maple syrup, if using, and enjoy!


SHARE:
© D.M.R. Fine Foods. All rights reserved.
MINIMAL BLOGGER TEMPLATES BY pipdig