Monday, March 21, 2011

Mussel-Artichoke Tart

Mussel-Artichoke Tart
Most people who know me know that Marcus Samuelsson is one of my favorite chefs.  Having had the pleasure of meeting and (briefly) cooking with him, as well as feasting on his signature cuisine, have all made for life-time memories that I'll cherish and provided great inspiration for me as a food lover.

After adding his latest cookbook, New American Table, to my cookbook collection, the first recipe I made was the Mussel-Artichoke Tart.  From the homemade buttery tart shell to the decadent mussels, and everything in between, it was love at first bite--and every bite thereafter.

The recipe comes together nicely, however you'll want to allow yourself ample time to allow the tart dough to chill (about an hour and a half total) before filling or baking. 

Get ready to add a new favorite to your repertoire! 

Happy Eating!


Mussel-Artichoke Tart
8 Servings (Makes One 10-inch Tart)

Ingredients:
2 tomatoes cut into quarters
5 tablespoons olive oil, plus more for the sheet pan
1/2 teaspoon crushed red pepper flakes
One 14-ounce can artichoke hearts cut into 1/4-inch thick slices
3 red onions, sliced
4 garlic cloves, chopped 
2 cups canned crushed tomatoes
1 1/2 teaspoons sugar
1/2 teaspoon dried oregano
2 poblano chiles, seeds and ribs removed and chopped
Juice of 2 lemons
1/2 teaspoon salt
1/2 teaspoon freshly ground black pepper
Buttery Tart Shell (see recipe below)
1 pound fresh buffalo mozzarella cut into 1/4-inch-thick slices (*you can replace the mozzarella with creamy goat cheese for an equally delicious tart)  
One 6 1/2-ounce can preserved mussels
4 basil leaves torn into small pieces
1 cup baby arugula

1. Preheat oven to 2oo degrees F.  

2. Place the quartered tomatoes on a lightly oiled sheet pan.  Drizzle with 2 tablespoons of the olive oil and sprinkle with the red pepper flakes.  Bake for 1 hour, or until the tomatoes are dried and wrinkled.  Set aside.  Increase the oven temperature to 450 degrees F.

3. To prepare the filling, heat 2 tablespoons of the olive oil in a large saute pan over high heat.  Add the artichokes and saute until golden brown and crispy, about 2 minutes on each side.  Remove the artichokes with a slotted spoon and transfer to paper towels to drain excess oil.

4. Using the same pan, add the remaining 1 tablespoon olive oil and heat over medium heat.  Add the onions and garlic and saute until onions are translucent, about 4 minutes.  Stir in the crushed tomatoes, sugar, oregano, and chiles.  Reduce the heat to low and simmer for 20 minutes, stirring occasionally.  Stir in the lemon juice, salt, and pepper and simmer until the filling begins to thicken, another 20 minutes.

5. To assemble the tart, spread the tomato mixture over the bottom of the prebaked tart shell.  Cover with a layer of mozzarella slices and arrange the artichokes and oven-dried tomatoes on top.  Bake until the mozzarella is golden and begins to bubble, about 20 minutes.  Remove from the oven.

6. Place the mussels on top of the tart and sprinkle with the basil and arugula.  Let sit for 5 minutes before cutting into wedges to serve.

Buttery Tart Shell
(Makes One 10-inch Tart Shell)

Ingredients:
1 1/4 cups unbleached all-purpose flour
1/4 teaspoon salt
8 tablespoons (1 stick) cold unsalted butter
2 tablespoons ice water, or more as needed
1/4 cup freshly grated Parmesan cheese

1. To make the dough by hand, combine the flour, salt, and Parmesan in a large bowl.  Using your fingertips, a pastry cutter, or two knives, cut the butter into the flour until the mixture resembles coarse meal.  Add the water, stirring with a fork just until the dough starts to come together.  If necessary, add a little more water, about 1 teaspoon at a time.  To make the dough in a food processor, combine the flour and salt in the processor and pulse once or twice to mix.  Cut the butter into 1-inch pieces, scatter the pieces over the flour, and pulse just until the mixture resembles coarse meal.  Add the water, pulsing just until the dough starts to come together.  If necessary, add a little more water, about 1 teaspoon at a time.

2.  Turn the dough out onto a sheet of plastic wrap and shape it into a disk.  Wrap it in plastic and refrigerate for at least 1 hour hour before rolling.

3. On a lightly floured work surface, roll out the dough to a 12 1/2-inch round.  Fit the round into a 10-inch fluted tart pan with a removable bottom, being careful not to stretch the dough.  Trim the edges of the dough.  Refrigerate for 30 minutes before filling or baking.

4. Preheat the oven to 375 degrees F.  To prebake the tart shell, line the tart shell with parchment paper and fill it with dried beans, uncooked rice, or pie weights.  Bake for 15 minutes, then remove the parchment and weights.  Sprinkle with Parmesan cheese.  Bake for another 8 to 10 minutes, or until golden brown.  Let cool on a wire rack.


SHARE:

Monday, August 24, 2015

Summer's Best: Peach Cobbler

It's amazing to realize that we're a stone's throw from the end of Summer.  I love the Fall season and can't deny that I'm eagerly anticipating a respite from the heat and humidity that overhangs this time of the year.  However, there are some things about Summer that I will absolutely miss long after the air-conditioned days and al fresco nights are no more.  And the season's bounty is one of them.  In my (humble) opinion, one of the absolute best things about Summer is the vibrant, seasonal food that makes its mark on our culinary landscapes.


Stone fruit fits squarely into that mix, and my undisputed favorites remain peaches, plums, and nectarines.  Whether grilled, roasted, fresh, or transformed into other-worldly ice cream, crumbles, tarts, cobblers, jams, pies, and more, they count as little jewels of which I rarely get enough.  And yesterday afternoon was another example of unabashed indulgence.

Perfectly crisp, yet ripe, fragrant peaches made their way from the market, into my kitchen, into my oven, and finally into my mouth and tummy, for one satisfyingly good peach cobbler.

I plan to relish every delicious moment of the remaining weeks of Summer and invite you to join me--starting with this scrumptious cobbler, of course.

Happy Eating!

Tell me: What are some of your favorite Summer things, foods, and experiences?  Leave a comment below to share!

Peach Cobbler
Ingredients:
6 large peaches, peeled and cut into thin wedges
1/4 cup sugar
1 tablespoon fresh lemon juice
1 teaspoon cornstarch

For the biscuit topping:
1 cup all-purpose flour
1/2 cup sugar
1 teaspoon baking powder
1/2 teaspoon salt
3/4 stick cold, unsalted butter, cut into small pieces
1/4 cup boiling water

Method:
Cook peaches:

Preheat oven to 425 degrees F.  Toss peaches with sugar, lemon juice and cornstarch in a 2qt. non-reactive baking dish and bake in the middle of the oven for 10 minutes.

Making topping while peaches bake:

Stir together flour, sugar, baking powder and salt.  Blend in butter with fingertips or a pastry blender until mixture resembles course meal.  Stir in water until just combined.

Remove peaches from oven and drop spoonfuls of topping over them. Bake in the middle of oven until topping is golden, about 25 minutes.  (Topping will spread as it bakes.)  Enjoy!
Recipe courtesy of Epicurious


SHARE:

Wednesday, October 5, 2016

Apple Tarts

Something about the Fall season has stirred up my desire for baking more recently.  I bought an adorable cake pan a couple of weeks ago and was feeling the urge to put it to use almost instantly.  Apple season is in full bloom, so I was seeking inspiration for a cake recipe that would deliciously showcase the fruit.  But, a curious thing happened, and my cake dreams were eclipsed by perfect, little apple tarts. 

Starting with one of my favorite short-cut ingredients, puff pastry, I piled apples coated with the warm flavors of cinnamon and allspice, and brightened with orange zest and juice, on top with child-like anticipation of the goodness that was about to unfold.  A few extra touches later, the tarts were in the oven to bake to golden perfection.   A dusting of confectioner's sugar, along with a scoop of ice cream to finish, make these easy, yet elegant, tarts one of the best additions to your seasonal eating repertoire. 

Happy Eating!

Apple Tarts

Ingredients:
2 large, firm baking apples (Granny Smith is my preference), peeled, cored and sliced into wedges
1 sheet frozen puff pastry, thawed
Zest of an orange
2 teaspoons freshly squeezed orange juice
1/4 teaspoon cinammon
1/8 teaspoon allspice
Sugar, for sprinkling
1 tablespoon butter, cut into pieces
1 large egg
Flour (for surface)
Confectioner's sugar (for dusting)
Ice cream, optional

Method:
Preheat oven to 425 degrees F.  Line a baking sheet with parchment and set aside.

Toss apples, cinnamon, allspice, zest, juice and a bit of sugar to fully coat apples and set aside.  Roll out puff pastry on a lightly floured surface into a long rectangle.  Cut in half crosswise and then cut each half to make a total of four squares.  Transfer dough to the baking sheet and prick with a fork in several places.

Pile apples in the center of each square and dot fruit with butter.  Beat egg and 1 teaspoon water in a small bowl and brush pastry with egg wash.  Fold up the edges around the apples, leaving the center open.  Press along the folded edges to lightly seal.  Brush outside of pastry with egg wash and sprinkle with more sugar.  Let chill in freezer 10 minutes.

Bake tarts until puff pastry is golden, 15-20 minutes.  Reduce oven temperature to 350 degrees and continue to bake until pastry is deep golden brown and apples are tender, 15-20 minutes.  Enjoy! (Note: Tarts can be baked up to 6 hours ahead. Store uncovered at room temperature.)

Recipe adapted from Bon Appetit


SHARE:

Monday, August 5, 2019

Easy Meal Prep x Egg Muffins

After hearing quite a few success stories about the Keto diet over the last while, I recently grabbed a magazine at the local bookstore to learn more about this lifestyle--and to cop some recipes that I could begin incorporating into my eating regimen.

I haven't done a lot just yet in the way of adopting the lifestyle since I'm still in the "exploratory phase", but there were some fabulous recipes that immediately caught my eye and took away some of the mystery around what a Keto-friendly diet is really all about.

And it was the featured egg muffins that leaped off the page and made it to my kitchen first.  What drew me in?  The ease of preparation (like whisking up some eggs and layering them with delicious add-ins in muffin tins for a bake it and forget it done deal.)  With just an hour or so out of my Sunday afternoon to assemble and bake, which meant perfect timing for catching up on a couple of podcasts, it was likely as easy as meal prep goes. 

And we can't forget about the key takeaway of cooking: the taste!  These are delicious and the piquant onion flavor, coupled with the savory goodness from the dry-aged salami and cheese, felt like I was enjoying crust-less, mini quiches.  Some days they were breakfast and others they were lunch with a side salad thrown in. 

The final bonus is that they lend themselves well to freezing or storing in the refrigerator.  What meal-prep dreams are made of, no?

So whether you're a Keto devotee or not, these egg muffins will suit any quest for easy, healthy and delicious eats.  Try them and let me know your thoughts.

Happy Eating!

Egg Muffins

Ingredients:
2 scallions, finely chopped
5 oz. air-dried chorizo, salami or cooked bacon, chopped
12 eggs
6 oz. shredded cheese (your choice)
2 Tbsp. red or green pesto (optional)
Salt and pepper 

Method:
Preheat oven to 350 degrees F

Divide chopped scallions and meat and add equal amounts to bottom of each cup.  Whisk eggs with seasoning and pesto, if desired.  Add cheese; stir.

Pour egg mixture evenly into each cup.  Bake for 15-20 minutes, depending on size of muffin tin.  Let cool before wrapping in plastic and storing in fridge or freezer.  Enjoy!

Recipe courtesy of DietDoctor.com 
 
SHARE:

Tuesday, December 24, 2013

Hazelnut and Cranberry Biscotti

The holiday season and baking go hand-in-hand.  I started baking (and catering) quite a bit during this time of year several years ago, and it has never gone out of style.  It's a wonderful time of year, indeed, for creating and sharing delicious, festive bites like Biscotti.  

Biscotti means "twice-baked" in Italian and the technique of baking them twice yields the crunchy, delectable cookie we all know and love.  Toasted hazelnuts, dried cranberries and orange zest combine to form a truly scrumptious cookie that's perfect for breakfast (dunking in coffee and tea, preferred -:)), snacking, or as a light dessert course.  

However you decide to indulge, you're sure to enjoy this sweet creation and loads of...Happy Eating! 

Hazelnut and Cranberry Biscotti
Ingredients:
1/2 cup (4 oz.) unsalted butter, at room temperature
3/4 cup sugar
2 large eggs
2 teaspoons vanilla extract
1 3/4 cup all-purpose flour
1/2 teaspoon baking powder
1/2 teaspoon ground cinnamon
1/4 teaspoon salt
1 cup hazelnuts, toasted, skinned and coarsely chopped
1/2 cup dried cranberries
1 teaspoon grated orange zest

Method:
Preheat oven to 350 F. 

Place hazelnuts on a baking sheet and toast in the preheated oven for 8 to 10 minutes.  If still in the skin, remove the skin, chop and set aside.

In a large bowl, using an electric mixer on high speed, cream the butter until fluffy and pale yellow.  Add the sugar and continue beating to combine.  Add the eggs one at a time, beating well on low speed after each addition.  Beat in the vanilla on low speed until blended.

Sift together the flour, baking powder, cinnamon, and salt.  Gradually add the flour mixture to the egg mixture and mix on low speed.  Mix or stir in the hazelnuts, cranberries, and orange zest until evenly distributed.  The batter should be very soft.

Turn the batter out onto a generously floured work surface and divide in half.  With well-floured hands, transfer one-half onto a parchment lined baking sheet and shape into a log about 12 inches long and 1 1/2 inches thick.  Place on one side of the baking sheet and repeat with the remaining batter, leaving at least 4 inches between the logs.  (They'll spread as they bake.)

Bake the logs until the edges are golden, about 25-30 minutes.  Transfer the pan to a wire rack and let the logs cool for 10 minutes.  Using a serrated knife, cut the logs, still on the pan, on the diagonal into slices 1/2 wide.  Carefully turn the slices on their sides and return them to the oven.  (If you run out of room, use an additional baking sheet.)

Bake until the edges are golden, about 10 minutes longer.  Let cool completely on the pans on wire racks.  Store in an airtight container.
Recipe adapted from Williams-Sonoma 

SHARE:

Friday, February 20, 2015

{Love in the Kitchen}: Raspberry Scones


I happen to love scones, although I don't bake them as often as I have in times past.  (And the reason for that is purely to steer clear of the temptation they bring...)  Still, whenever the opportunity for an occasional indulgence arises, like my recent Afternoon Tea fete while vacationing, I pause for the cause of scrumptious eats.  

The recent Valentine's Day stirring got me to contemplating recipes that I could make with a Valentine's twist.  And my beautiful copper biscuit cutters that I snagged during my travels last month, which happened to include heart-shaped ones, became just the inspiration I needed to return to the world of magnificent, homemade scones.  (Heart-shaped, no less.) 


I was drawn to the recipe for Raspberry Scones because, well, it included the traditional 'red-themed' accent that comes along with traditional V-day territory. (A bit corny, perhaps.)  And it read like a dream--although I've only used dried fruits in my scones in the past, so kneading the fresh raspberries into the dough, without making the biggest mess ever, was a feat.  The final look was a bit messier than usual, but taste trumps all, in the end.


So, if you're up for some love in the kitchen (and who isn't?), give these scones a try.  They come together and bake off quickly--and the bright and gorgeous raspberry hue gives them a rustic finish that's quite beautiful, if you agree that less than perfect can still be beautiful.  Finally, pair them with some delicious jam, or whipped cream, or both, for the ultimate breakfast, brunch, and tea bite.

Happy Eating!

Raspberry Scones
Recipe courtesy of Martha Stewart

Ingredients:
2 1/2 cups all-purpose flour, plus more for work surface 
1/4 cup plus 1 tablespoon sugar  
1 tablespoon baking powder 
3/4 teaspoon coarse salt  
1/2 cup (1 stick) cold unsalted butter, cut into small pieces 
3/4 cup buttermilk  
1 large egg yolk 
1 1/2 cups fresh raspberries (6 ounces)

Method:

Preheat oven to 400. In a food processor, pulse together flour, cup sugar, baking powder, and salt. Add butter and pulse until pea-size pieces form. In a small bowl, whisk together buttermilk and egg yolk. Slowly pour buttermilk mixture through feed tube into processor, pulsing until dough just comes together.

Transfer dough to a lightly floured work surface and sprinkle raspberries on top. Knead three times to fold in raspberries (there may be loose pieces of dough and a stray berry or two). Gather and pat dough into a 1-inch-thick square and cut or pull apart into 2-inch pieces. Place pieces, about 2 inches apart, on two parchment-lined rimmed baking sheets and sprinkle tops with 1 tablespoon sugar.

Bake until golden brown, 15 to 18 minutes, rotating sheets halfway through. Let scones cool slightly on sheets on wire racks. Serve warm or at room temperature.  Enjoy!


SHARE:

Thursday, June 30, 2022

The Creamiest, Dreamiest Classic Cheesecake


When you’ve been away from one of your happy places, even for great reasons like celebrating family milestones and traveling, such as my recent hiatuses away from home two weekends in a row, it feels oh so good when you’re back—in full force.


I speak of me and my kitchen.  Specifically, creating beautiful, scrumptious food in my kitchen.


So taking several hours last Sunday to indulge in baking was a welcomed return.  The recipe of choice was a dreamy cheesecake recipe by Dorie Greenspan, that I happened upon in the New York Times Cooking archives, during my search for inspiration.  And not only did I thrill and delight myself with the finished masterpiece—I finally checked baking a cheesecake off of my epicurean ‘to do’ list.


Can you believe it?! I’d never made a cheesecake before then.  


I grew up eating my mom’s beloved cheesecake pie (a lighter version of full-on cheesecake) and have otherwise eaten my fair share of cheesecakes over the years.  But baking one myself?  Not until last Sunday.  And I’m so glad I did.  In fact, I’m already dreaming up other flavor variations and nuances for future baking escapades.  


Nothing was spared with this all-in, high crust (humble brag), cream cheese x heavy cream, delicacy.  (I opted for all heavy cream for my first go ‘round, but sour cream and heavy cream, or all sour cream, can also work beautifully, I’m sure.)  Still, my instincts were spot on for me and the creamy, cheese-cakey bite after bite I was seeking.


For a final finish, a.k.a garnish, I decided to add some macerated summer berries for a bit of color and extra goodness. (Totally optional, however, because this baby stands very well on her lonesome.)


I have to admit that I was so proud of my labor of love when I finally went in for the ‘unfolding’ from the springform pan and to take my first bite.  Did I mention, you’ve got to be ready to commit, because it’s a 7.5 hour endeavor—at minimum (chill down time, included.)  Mine was longer because I took the overnight chill down route. But It. Was. Worth. It.  The technique is evident as you go through the recipe—but when you’re in pursuit of unforgettable, too good to be true, results, don’t sweat the technique. ;)


I invite you to make it for yourself, family, friends, enemies that you want to convert to friends, lol!, and anyone else you want to delight (or impress) and spread the joy of baking that’s guaranteed to indulge…


Happy Eating!


Classic Cheesecake

Ingredients:

Crust:

1 3/4 cups graham cracker crumbs

3 tablespoons sugar

Pinch of salt

1/2 stick unsalted butter, melted


Cheesecake:

2 lbs. cream cheese, room temperature

1 1/3 cups sugar

1/2 teaspoon salt

2 teaspoons vanilla extract

4 large eggs, room temperature

1 1/3 cups heavy cream


Method:

  1. To make the crust: Butter a 9-inch springform pan — choose one that has sides that are 2 3/4 inches high (if the sides are lower, you will have cheesecake batter left over) — and wrap the bottom of the pan in a double layer of aluminum foil.
  2. Stir the crumbs, sugar and salt together in a medium bowl. Pour over the melted butter and stir until all of the dry ingredients are uniformly moist. (You can do this with your fingers.) Turn the ingredients into the springform pan and use your fingers to pat an even layer of crumbs along the bottom of the pan and about halfway up the sides. Don’t worry if the sides are not perfectly even or if the crumbs reach above or below the midway point on the sides. Put the pan in the freezer while you heat the oven. (The crust can be covered and frozen for up to 2 months.)
  3. Center a rack in the oven. Heat the oven to 350 degrees and place the springform on a baking sheet. Bake for 10 minutes. Set the crust aside to cool on a rack while you make the cheesecake.
  4. Reduce the oven temperature to 325 degrees.
  5. To make the cheesecake: Put a kettle of water on to boil.
  6. Working with a stand mixer, preferably fitted with the paddle attachment, or with a hand mixer in a large bowl, beat the cream cheese at medium speed until it is soft and creamy, about 4 minutes. With the mixer running, add the sugar and salt and continue to beat for another 4 minutes or so, until the cream cheese is light. Beat in the vanilla. Add the eggs, one by one, beating for 1 full minute after each addition — you want a well-aerated batter. Reduce the mixer speed to low and stir in the sour cream and/or heavy cream.
  7. Put the foil-wrapped springform pan in a roasting pan that is large enough to hold the pan with some space around it.
  8. Give the batter a few stirs with a rubber spatula, just to make sure that nothing has been left unmixed at the bottom of the bowl, and scrape the batter into the springform pan. The batter will reach the rim of the pan. (If you have a pan with lower sides and have leftover batter, you can bake the batter in a buttered ramekin or small soufflé mold.) Put the roasting pan in the oven and pour enough boiling water into the roaster to come halfway up the sides of the springform pan.
  9. Bake the cheesecake for 1 hour 30 minutes, at which point the top will be browned (and perhaps cracked) and may have risen just a little above the rim of the pan. Turn off the oven’s heat and prop the oven door open with a wooden spoon. Allow the cheesecake to luxuriate in its water bath for another hour.
  10. After 1 hour, carefully pull the setup out of the oven, lift the springform pan out of the roaster — be careful, there may be some hot water in the aluminum foil — and remove the foil. Let the cheesecake come to room temperature on a cooling rack.
  11. When the cake is cool, cover the top lightly and refrigerate for at least 4 hours, although overnight is better.
  12. {Baker's Tips}:
  13. At serving time, remove the sides of the springform pan — you can use a hairdryer to do this — and set the cake on a serving platter.
  • Serving: The easiest way to cut cheesecake is to use a long, thin knife that has been run under hot water and lightly wiped. Keep warming the knife as you cut slices of the cake.
  • Storing: Wrapped well, the cake will keep for up to 1 week in the refrigerator or for up to 2 months in the freezer. It’s best to defrost the still-wrapped cheesecake overnight in the refrigerator.

Recipe courtesy of NYT Cooking 


SHARE:

Tuesday, November 25, 2014

Rosemary Popovers

If you're looking to bring some simple, homemade goodness to your table, then homemade popovers is a great way to go.  I baked some over the weekend, adding in fresh rosemary for an extra savory touch.  It was my first time--and a good excuse for putting my popover pan to use, although you don't need one to make these.  A muffin pan will also suffice in yielding warm, delicious popover goodness.

Happy Eating!


Rosemary Popovers
Recipe courtesy of Williams-Sonoma

When making popovers, its important to use a pan that absorbs heat well. The batter needs a burst of heat to convert the moisture to steam, which causes the batter to expand and pop over the sides. When perfectly cooked, popovers emerge with crispy brown exteriors and moist, almost hollow centers.


Ingredients:

2 eggs  
1/4 tsp. salt 
1 cup milk 
2 Tbs. unsalted butter, melted 
1 cup all-purpose flour 
1 1/2 Tbs. very finely chopped fresh rosemary 
1/2 Tbs. very finely chopped fresh flat-leaf parsley


Method:


Butter a popover pan or the wells of a 12-well muffin pan.

In a bowl, lightly whisk together the eggs and salt. Stir in the milk and butter. In another bowl, stir together the flour, rosemary and parsley. Add the flour mixture to the egg mixture, whisking until just blended. Do not over beat.

Fill each cup about half full and place the pan in a cold oven. Set the oven temperature to 425ºF and bake for 20 minutes. Reduce the temperature to 375ºF and bake until the popovers are golden, 10 to 15 minutes more. They should be crisp on the outside. Quickly pierce each popover with the tip of a small knife to release the steam. Return the popovers to the oven for 2 minutes for further crisping, then remove and serve immediately.
 
SHARE:

Thursday, November 19, 2020

Pumpkin Spiced Bundt Cake


So my recent baking spree continues.  And this time I’m leaning into an uber moist and scrumptious (truly, truly) Pumpkin Spiced Bundt Cake.  Honestly speaking, if calories and such were simply a figment of the imagination, I’d be baking around the clock.  Because…dessert! :)  But alas, reality bites at times, so I try to do myself the favor of not having too many sweet, homemade delicacies on hand.


Still, the desire to bake (for the first time this year, I realized) a pound cake in my beautiful bundt pan outweighed any aforementioned caution. ;)  And last Sunday made way for joyous moments dedicated to baking (and relishing) this delicious confection.


While I take my pumpkin spice indulgences on the lighter side, the pumpkin helps to make this one of the moistest cakes you’ll ever taste, with a gorgeous color, to boot, and coupled with the warm, flavor-full spices, it goes down nice and easy, bite after bite after bite.  And maybe a little too easily in my case; but hey, we have to take our pleasures as they come, no?


So not one to keep a great thing (especially a great recipe) to myself, I’m sharing this in time for your very own baking indulgence to celebrate Fall, the holidays, or simply continuing to survive the “wonder” that is 2020.  No matter the reason, you’ll be so glad you baked this cake.  And you’ll be overwhelmed with….


Happy Eating!


Pumpkin Spiced Bundt Cake


Ingredients:

3 cups all-purpose flour

2 ¼ cups of sugar

1 can (15 oz.) pumpkin

3 eggs, room temperature

2 teaspoons baking soda

1 cup canola oil

½ teaspoon salt

1 teaspoon cinnamon

1 teaspoon allspice

1 teaspoon pumpkin pie spice

¼ teaspoon ground nutmeg

1 teaspoon vanilla extract

Confectioner’s sugar


Method:

Preheat oven to 350° F.


Grease cake pan liberally (I used cooking spray) and set aside.


In a medium bowl, whisk together flour, salt, baking soda, and spices.  Set aside.


In a stand-mixer, combine the sugar and oil until well blended (2-3 minutes).  Blend in eggs one at a time, incorporating each fully, before adding the next.  Add in vanilla and blend further.  Add in flour mixture, alternating in batches with the pumpkin until all ingredients are blended in.


Pour batter into prepared cake pan and bake in heated oven for 60-65 minutes, or until a cake tester inserted in the center comes out clean, with no crumbs.


Let the cake rest and cool for 10-15 minutes before inverting onto a plate or wire rack.  Dust (I used a small mesh strainer) the cake with as much confectioner’s sugar as desired—and enjoy!

SHARE:

Wednesday, March 14, 2018

Butternut Squash Galette

Life has been on the busier side lately, so I've been away longer than usual here on the blog.  And if I had to be away, I'm glad to share that it's been a "good" busy spell.  Some exciting (but admittedly time-infringing) work to produce a second-to-none International Women's Day event on last Friday was fulfilled to my deep satisfaction.  Then there are other areas of my life that have shared my attention and focus like vacation planning (priorities, right?), along with ministry and plain 'ole adulting!


When I finally checked IWD off the list last week, I exhaled and my thoughts soon turned to "what's next" here.   And the what's next is a savory galette that wins all the awards for delicious, elegant, seasonal--and easy--fare!

I was spurred along to finally bake a Butternut Squash Galette (which has been on my baking agenda for the months prior that I've bought and stored butternut squash in my pantry) when Monday's windy spell collided with extra sunshine (translate energy) from the daylight savings turn.  And within the hour, a flaky, rustic vegetable tart--accented with tangy, herbed goat cheese (so good!)--was ready to be consumed.

I normally make a tried and true pastry dough, but because I was eager to crank out this too-long delayed delicacy, I opted for one of my all time favorite shortcuts: puff pastry.  And I have to say, the crispy flakiness has me thinking this was the best move after all.

I sliced my squash in thin rounds for a beautiful layering effect I wanted to achieve, seasoned them with olive oil, salt, pepper, herbs de provence and maple syrup, then baked them off to a tender, almost caramelized, doneness.  Then I rolled out my chilled dough, smeared on some goat cheese, layered the squash on top and folded the dough to encircle all the goodness.  A brush of egg wash and sprinkle of flaked sea salt on the dough to finish was all that stood between the tart and the hot oven.

Despite the amazing ease of bringing this dish together, its casual elegance shines through.  It's perfect as a hearty appetizer or served with a side or two for lunch or dinner.

So here's to less busy-ness (for now anyway :) ) and more....

Happy Eating!

Butternut Squash Galette
Ingredients:
1 medium-sized butternut squash
Olive oil
Salt (Kosher and Flaked Sea Salt)
Freshly Ground Black Pepper
Herbs de Provence
Maple Syrup
Herbed Goat Cheese
1 Puff-Pastry Sheet
1 egg, beaten

Method:
Preheat oven to 425 degrees F.

Peel squash and slice into thin rounds.  Toss squash with oil, kosher salt, pepper, herbs and maple syrup (all ingredients measured to taste.)  Spread evenly on a baking sheet and roast in preheated oven for 20-25 minutes, until cooked and slightly browned.

Remove squash from oven and set aside.  Lower oven temperature to 400 degrees F.    

Roll out pastry into a round and smear softened goat cheese in the center, being sure to leave a border.  Layer squash onto pastry and fold edges of pastry up to enclose the ingredients.  Brush the pastry with egg wash and sprinkle with flaked sea salt.  

Place tart on baking sheet and bake for 20-25 minutes until pastry is golden brown.  Remove from oven, slice and enjoy! 


SHARE:

Thursday, December 23, 2021

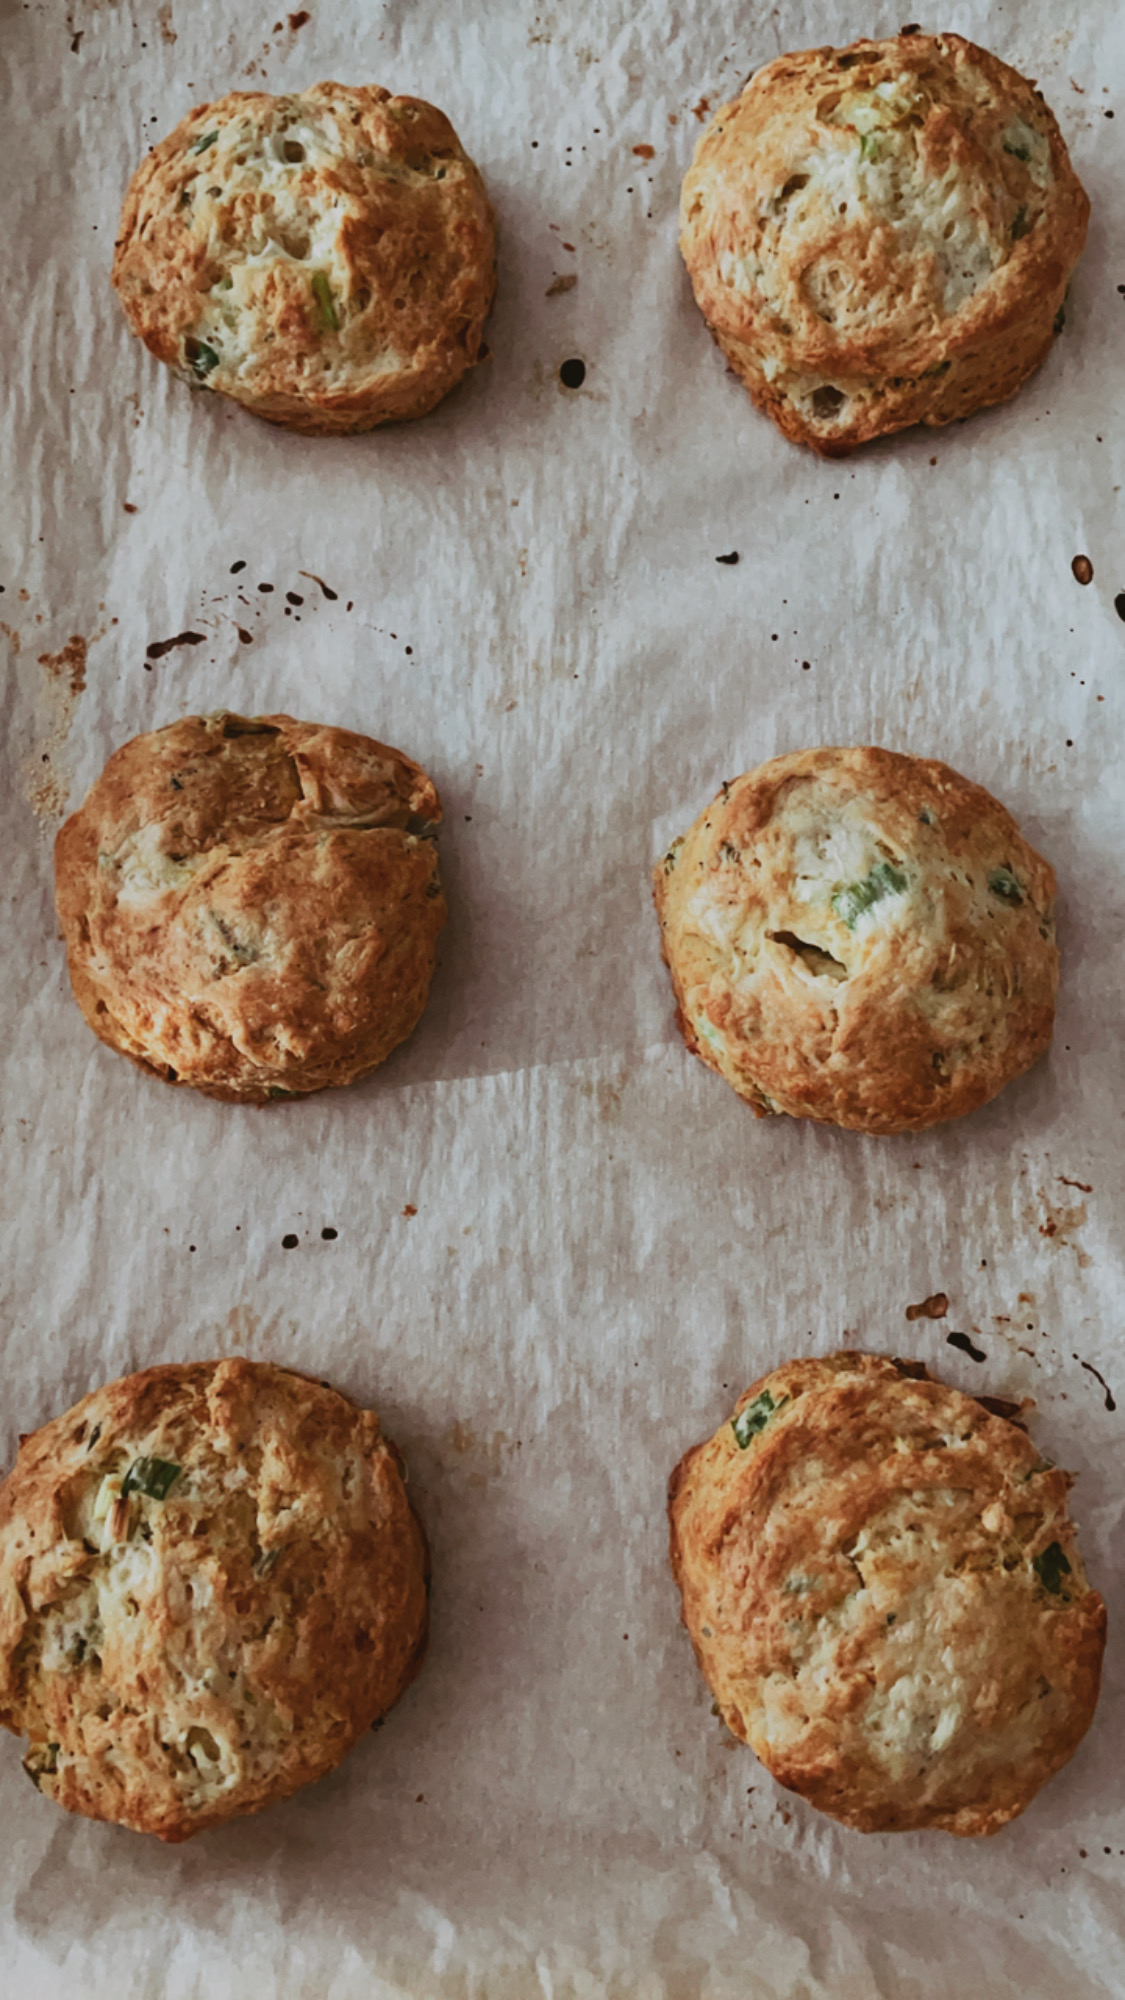
Merry Christmas + Homemade Biscuits


Holidays and baking go hand-in-hand for me, so this past Sunday, I decided to slow down and finally bake homemade biscuits.  Yummy, right?!  

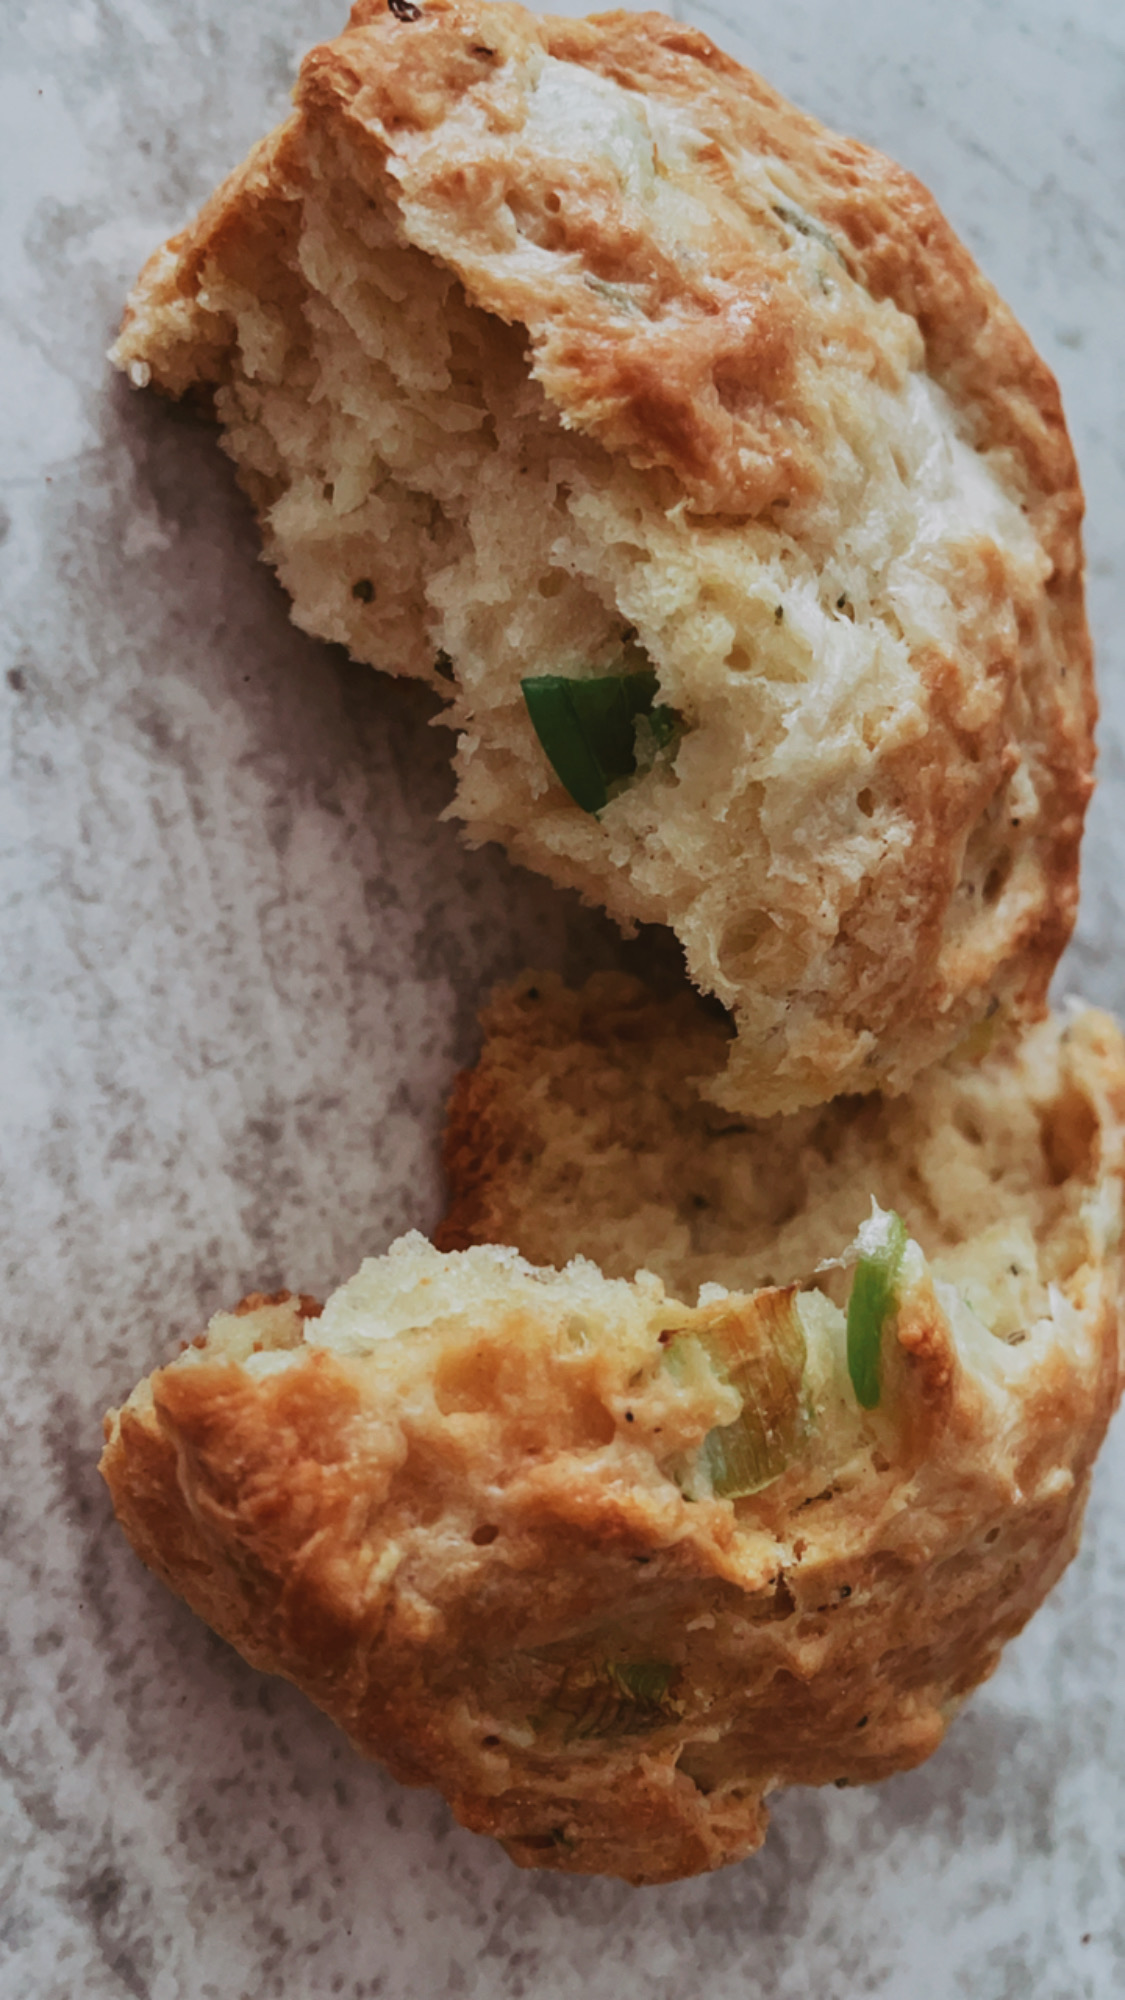
They truly were, with a savory, herbaceous twist, that makes them great for devouring morning, noon or night (i.e. for breakfast, brunch or dinner).  So with that said, I wanted to share the recipe with you in case you decide to follow my lead and bring them to your holiday eating repertoire.  

I'd actually been eyeing these since I saw the recipe in my November issue of Bon Appetite magazine, so it felt good to finally bring them to life in my kitchen. I'm so thrilled to say that they didn't disappoint.  To the contrary, they came out wonderful--with beautiful layers (the hallmark of a great biscuit, no?) and are easy to bring together.


I baked a few to enjoy and photograph for the blog :) and froze the rest of the batch for homemade biscuits on demand, whenever the notion--or craving--hits.  

So whenever you decide to bake them, I hope you experience the same Happy Eating.

Blessings for a Merry Christmas!

xx, Dawn

Stuffing Biscuits 


SHARE:

Saturday, July 30, 2022

Zucchini Muffins


Summer squash and zucchini have made their way back to center stage in my kitchen of late, showing up to the table in mostly savory preparations, as I endeavor to enjoy more of the season’s bounty.  But my fondness for the scrumptious zucchini muffins and zucchini bread I enjoy on occasion turned my affections in that direction recently—and moist, delicious zucchini muffins finally came to life in my kitchen.


It was the perfect way to indulge a weekend morning.  Grating the fresh zucchini, bringing the ingredients together with a few flicks of the wrist, filing the muffin tins, baking them off in the hot oven, reminding myself to be patient while they cooled, and finally—finally—enjoying the fruit of my labor.  Simple pleasures that never get old in my world.


So if you don’t have a garden with zucchini sprouting up (I don’t), grab a few the next time you’re at the market and bake a batch or two.  Bonus: zucchini are in season and cooking and baking with the freshest, seasonal ingredients always yield the best (read: tastiest) results.  Not to mention that they’re more economical in-season, too. 


They’re perfect as a quick breakfast, a snack, for dessert, or any way you want to enjoy them.  Vegetables never tasted so good :), or yielded more…


Happy Eating!


Zucchini Muffins


Ingredients:

2  large eggs, room temperature

1 1/3 cup sugar

2 teaspoons vanilla extract

3 cups grated zucchini

1 cup vegetable oil

2 3/4 cups all-purpose flour

1 teaspoon baking soda

1 teaspoon baking powder

1/4 teaspoon kosher salt

2 teaspoons cinnamon

1 teaspoon ground ginger

1/2 teaspoon nutmeg


Method:

Preheat the oven to 350 degrees F.


In a large bowl, beat the eggs.  Mix in the sugar and vanilla extract. Stir in the grated zucchini and the oil. In a separate bowl, mix together the flour, baking soda, baking powder, spices and salt.


Stir the dry ingredients into the zucchini mixture (be careful not to overmix!)


Prep your muffin pan with paper muffin cups or grease generously.  Use a spoon, ice cream scooper or small measuring cup to fill the cups up completely.


Bake until the muffins are golden brown or a tester comes out clean (about 20-30 minutes, depending on the oven). Remove from the oven and cool in the pan on a wire rack for about five minutes.  Remove from the muffins from the muffin pan and cool them another 20 minutes on the rack.  Eat and enjoy!


P.S. Muffins can be stored in the freezer for up to two months. 


Recipe adapted from Simply Recipes  

SHARE:
© D.M.R. Fine Foods. All rights reserved.
MINIMAL BLOGGER TEMPLATES BY pipdig