Thursday, June 30, 2022

The Creamiest, Dreamiest Classic Cheesecake


When you’ve been away from one of your happy places, even for great reasons like celebrating family milestones and traveling, such as my recent hiatuses away from home two weekends in a row, it feels oh so good when you’re back—in full force.


I speak of me and my kitchen.  Specifically, creating beautiful, scrumptious food in my kitchen.


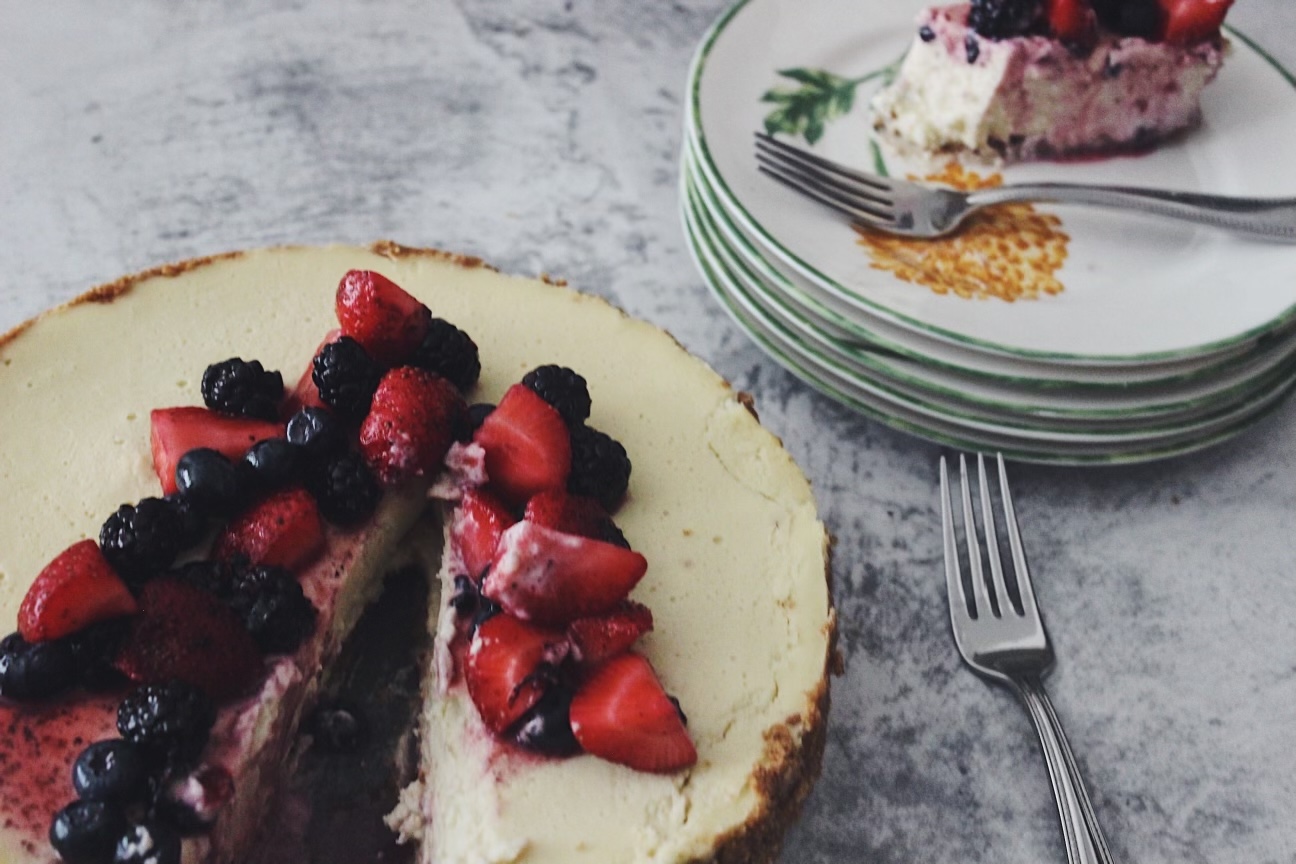
So taking several hours last Sunday to indulge in baking was a welcomed return.  The recipe of choice was a dreamy cheesecake recipe by Dorie Greenspan, that I happened upon in the New York Times Cooking archives, during my search for inspiration.  And not only did I thrill and delight myself with the finished masterpiece—I finally checked baking a cheesecake off of my epicurean ‘to do’ list.


Can you believe it?! I’d never made a cheesecake before then.  


I grew up eating my mom’s beloved cheesecake pie (a lighter version of full-on cheesecake) and have otherwise eaten my fair share of cheesecakes over the years.  But baking one myself?  Not until last Sunday.  And I’m so glad I did.  In fact, I’m already dreaming up other flavor variations and nuances for future baking escapades.  


Nothing was spared with this all-in, high crust (humble brag), cream cheese x heavy cream, delicacy.  (I opted for all heavy cream for my first go ‘round, but sour cream and heavy cream, or all sour cream, can also work beautifully, I’m sure.)  Still, my instincts were spot on for me and the creamy, cheese-cakey bite after bite I was seeking.


For a final finish, a.k.a garnish, I decided to add some macerated summer berries for a bit of color and extra goodness. (Totally optional, however, because this baby stands very well on her lonesome.)


I have to admit that I was so proud of my labor of love when I finally went in for the ‘unfolding’ from the springform pan and to take my first bite.  Did I mention, you’ve got to be ready to commit, because it’s a 7.5 hour endeavor—at minimum (chill down time, included.)  Mine was longer because I took the overnight chill down route. But It. Was. Worth. It.  The technique is evident as you go through the recipe—but when you’re in pursuit of unforgettable, too good to be true, results, don’t sweat the technique. ;)


I invite you to make it for yourself, family, friends, enemies that you want to convert to friends, lol!, and anyone else you want to delight (or impress) and spread the joy of baking that’s guaranteed to indulge…


Happy Eating!


Classic Cheesecake

Ingredients:

Crust:

1 3/4 cups graham cracker crumbs

3 tablespoons sugar

Pinch of salt

1/2 stick unsalted butter, melted


Cheesecake:

2 lbs. cream cheese, room temperature

1 1/3 cups sugar

1/2 teaspoon salt

2 teaspoons vanilla extract

4 large eggs, room temperature

1 1/3 cups heavy cream


Method:

  1. To make the crust: Butter a 9-inch springform pan — choose one that has sides that are 2 3/4 inches high (if the sides are lower, you will have cheesecake batter left over) — and wrap the bottom of the pan in a double layer of aluminum foil.
  2. Stir the crumbs, sugar and salt together in a medium bowl. Pour over the melted butter and stir until all of the dry ingredients are uniformly moist. (You can do this with your fingers.) Turn the ingredients into the springform pan and use your fingers to pat an even layer of crumbs along the bottom of the pan and about halfway up the sides. Don’t worry if the sides are not perfectly even or if the crumbs reach above or below the midway point on the sides. Put the pan in the freezer while you heat the oven. (The crust can be covered and frozen for up to 2 months.)
  3. Center a rack in the oven. Heat the oven to 350 degrees and place the springform on a baking sheet. Bake for 10 minutes. Set the crust aside to cool on a rack while you make the cheesecake.
  4. Reduce the oven temperature to 325 degrees.
  5. To make the cheesecake: Put a kettle of water on to boil.
  6. Working with a stand mixer, preferably fitted with the paddle attachment, or with a hand mixer in a large bowl, beat the cream cheese at medium speed until it is soft and creamy, about 4 minutes. With the mixer running, add the sugar and salt and continue to beat for another 4 minutes or so, until the cream cheese is light. Beat in the vanilla. Add the eggs, one by one, beating for 1 full minute after each addition — you want a well-aerated batter. Reduce the mixer speed to low and stir in the sour cream and/or heavy cream.
  7. Put the foil-wrapped springform pan in a roasting pan that is large enough to hold the pan with some space around it.
  8. Give the batter a few stirs with a rubber spatula, just to make sure that nothing has been left unmixed at the bottom of the bowl, and scrape the batter into the springform pan. The batter will reach the rim of the pan. (If you have a pan with lower sides and have leftover batter, you can bake the batter in a buttered ramekin or small soufflé mold.) Put the roasting pan in the oven and pour enough boiling water into the roaster to come halfway up the sides of the springform pan.
  9. Bake the cheesecake for 1 hour 30 minutes, at which point the top will be browned (and perhaps cracked) and may have risen just a little above the rim of the pan. Turn off the oven’s heat and prop the oven door open with a wooden spoon. Allow the cheesecake to luxuriate in its water bath for another hour.
  10. After 1 hour, carefully pull the setup out of the oven, lift the springform pan out of the roaster — be careful, there may be some hot water in the aluminum foil — and remove the foil. Let the cheesecake come to room temperature on a cooling rack.
  11. When the cake is cool, cover the top lightly and refrigerate for at least 4 hours, although overnight is better.
  12. {Baker's Tips}:
  13. At serving time, remove the sides of the springform pan — you can use a hairdryer to do this — and set the cake on a serving platter.
  • Serving: The easiest way to cut cheesecake is to use a long, thin knife that has been run under hot water and lightly wiped. Keep warming the knife as you cut slices of the cake.
  • Storing: Wrapped well, the cake will keep for up to 1 week in the refrigerator or for up to 2 months in the freezer. It’s best to defrost the still-wrapped cheesecake overnight in the refrigerator.

Recipe courtesy of NYT Cooking 


SHARE:

Monday, February 13, 2017

Chocolate Peanut Butter Cups

Let's just say that my affinity for chocolate and peanut butter combined knows few, if any, bounds.  From childhood, peanut butter has always been one of my absolute favorite tastes.  (I actually have a family member or two who find it totally distasteful, and every so often I have to insert the incredulous side-eye/eye roll to this madness. 😏) 


As I was saying, PB (with, or without, the J) is a delicacy I find scrumptious from cookies (it's my favorite kind and perpetual "go to"), to candies, and beyond.  And while I'm not the world's biggest chocoholic, chocolate peanut butter cups--or any variation of those ingredients--squarely amount to confectionery delights of the grandest proportions.  Translation: it's not safe to keep them around for long...or my hips and waist may be impacted.

Still, everyone deserves a special indulgence (or two or three or more) every so often.  And these homemade goodies more than fit the bill of indulgent, undeniable goodness.   And served to someone special?  There's no denying the love that's involved.  

So for all my fellow chocolate-peanut butter lovers, this one's for you.

Happy Eating!

Chocolate Peanut Butter Cups
Ingredients:
9 ounces milk or semi-sweet chocolate
3/4 cup smooth, natural peanut butter
1/4 cup confectioner's sugar
1/2 teaspoon vanilla extract
1/2 teaspoon kosher salt

Method:
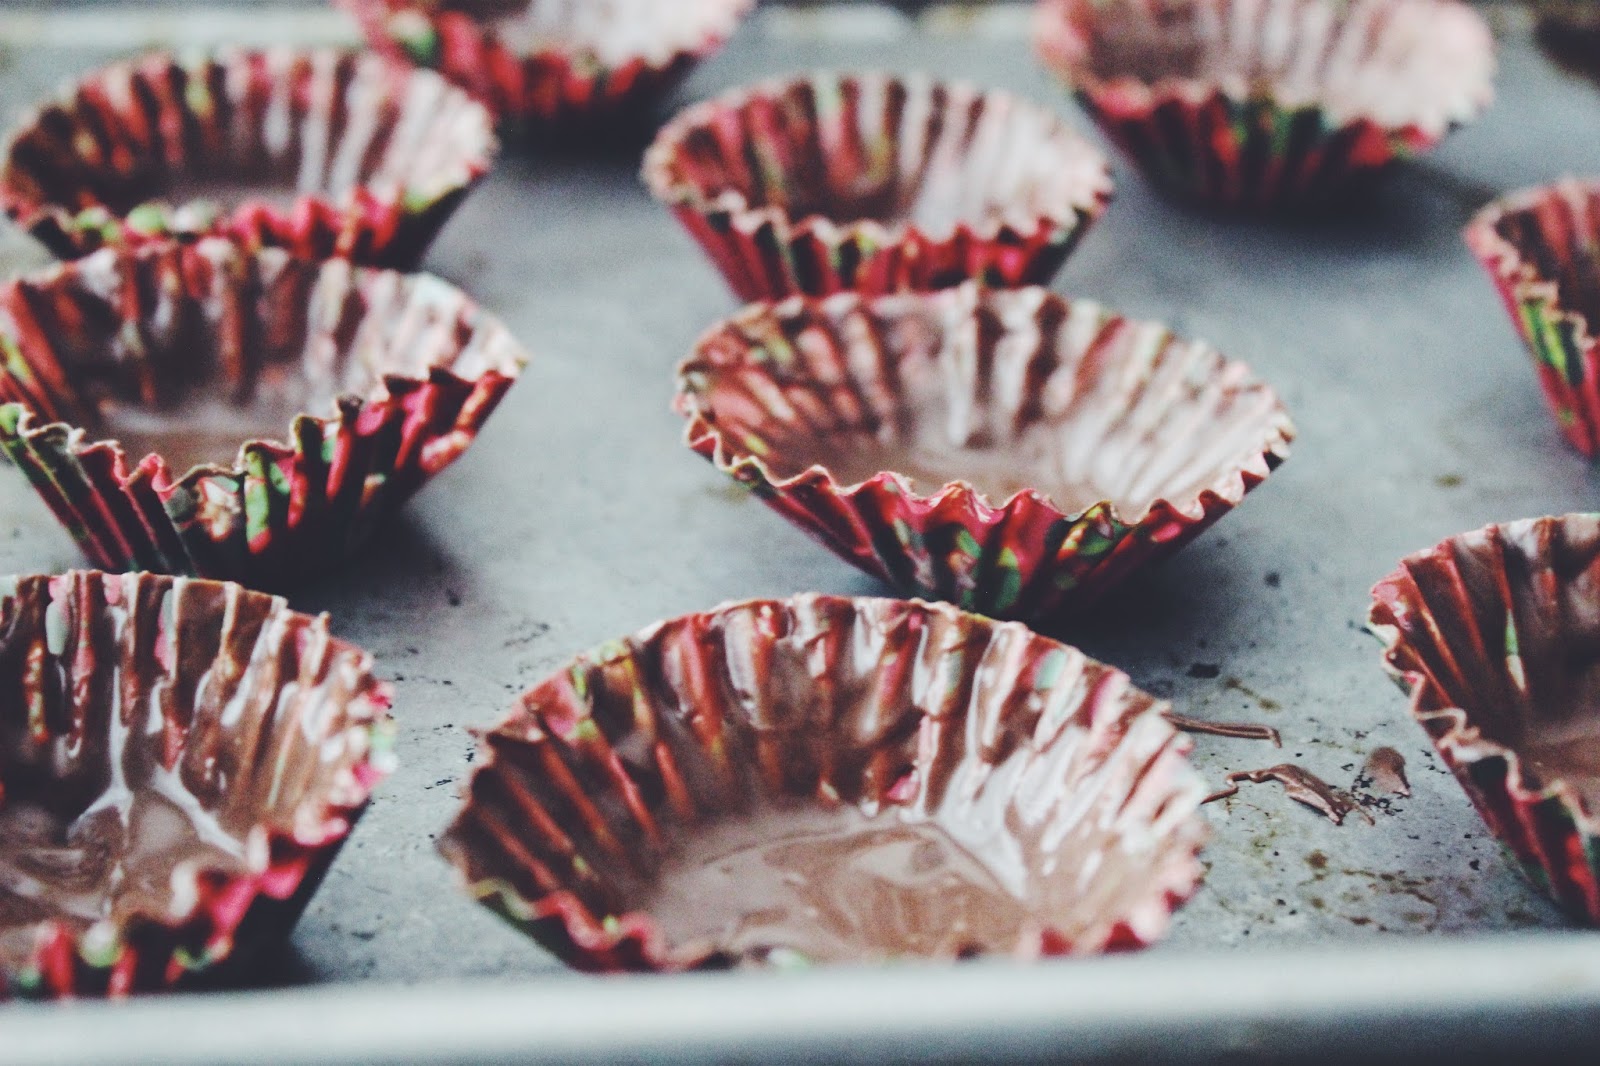
  1. Set 18 mini paper baking cups on a baking sheet. Melt 4 ounces of the chocolate either over a double boiler on the stove top or in short bursts in the microwave. Spoon 1 teaspoon of melted chocolate into each cup. Use an offset spatula or a small spoon to spread the chocolate slightly up the sides of each baking cup; make sure you have an even chocolate base at the bottom of each cup. Let cool at room temperature for about 15 to 20 minutes until mostly solid.
  2. Meanwhile, in a medium bowl, stir together peanut butter, confectioners’ sugar, vanilla extract and salt. (Make sure the peanut butter is well-combined in the jar before you measure it.) Transfer the peanut butter mixture to a resealable plastic bag and seal it tightly.
  3. Cut one corner of the plastic bag and pipe 2 to 3 teaspoons of peanut butter mixture into the center of each cup. With a very lightly moistened finger, tamp down the peanut butter and make it flat and even, but leave a bit of space between the peanut butter and the edge of the paper cup (you should be able to see a ring of chocolate peeking from below the peanut butter).
  4. Melt the remaining 5 ounces of chocolate. Spoon 1 teaspoon of chocolate onto the top of each cup. Use an offset spatula or a small spoon to spread the chocolate evenly over the top and down the sides of the cup. Refrigerate until solid, about 30 minutes.
 Enjoy!
Recipe courtesy of New York Times Cooking
    
SHARE:

Friday, March 13, 2015

{Be Inspired!}: Simple Pleasures

Photo Credit: The New York Times

I'll admit that I love the grand, OMG, wow moments that punctuate our lives.  But the reality is that those punctuation points are intermixed with the more tempered--and more frequent--normalcy of our everyday lives and routines.  Routine isn't a bad thing, however--especially when sprinkled (or showered) with simple pleasures. 

If you've never thought of simplicity and pleasure as likely bedfellows, I assure you they are.  A favorite song.  A talk with a good friend.  A thought-provoking read.  A motivating quote.  Fresh flowers.  An unforgettable meal.  A great dress or shoe sale. :)  A lingering sunset.  The list becomes virtually endless when I take the time to pause and reflect and embrace the joy of everyday living. 

So today's inspiration is all about sharing a few of the simple, but nonetheless special, pleasures that brought laughter, satiation, and the joie de vivre to my life this week.  

A new recipe for my weeknight repertoire --  I discovered a "fried" chicken like dish that came together on a sheet pan in my oven.  The results? Delicious crispy-skinned, moist chicken legs that are still as good the next day (without the added cleanup or calories of its fried counterpart.)   See the easy recipe, courtesy of New York Times, here.

Farm-to-table meets the runway at Paris Fashion Week -- It sounds strange, I know.  And it is.  Except that we're talking jokes and fun and the quirky approach Valentino lended to its Autumn-Winter '15 runway show this week.  I love fashion--and intermixed with a bit of Zoolander humor brought a welcomed laugh.  Lighten up with this fun video parody.  

Photo Credit: Fashonista.com
   
A birthday party for me! -- So, Anthropologie just happens to be one of my favorite stores for everything from home and kitchen decor, to clothing, jewelry and more; we go way back.  And I received a sweet surprise from them this week: an invitation to a birthday party for me (not a private party, but a party all the same!--a spring fashion show, sips and snacks, etc.).  So a little shopping and celebrating are in order for this March birthday girl.  


What are some of the simple pleasures that brighten your days?

May we all embrace more of them...along with Happy, Inspired Living!


SHARE:

Wednesday, August 27, 2014

Oven-Roasted Mussels


Steamed...grilled...in savory tarts--just a few of the ways I enjoy preparing (and feasting on) mussels.  For a slight twist, I added oven-roasting to the list this past weekend. Filling my favorite cast-iron skillet with the mussels and their accompanying marinade (aka bread-sopping goodness) of tomatoes, garlic, white wine, olive oil, chili flakes, parsley, salt and pepper, and returning minutes later to perfectly scrumptious fare, cemented this as a definite keeper in my repertoire. 

Easy to prepare, elegant, and worth the savor, mussels remain one of my favorite seafood gems.


Happy Eating!

Oven-Roasted Mussels
Recipe courtesy of the New York Times

Ingredients:
3 1/2 pounds black mussels
2 tablespoons extra virgin olive oil
2 to 4 garlic cloves (to taste), minced
1/2 cup dry white wine
1 pound roma tomatoes, seeded and finely chopped
1/4 to 1/2 teaspoon red pepper flakes
1/4 cup minced flat-leaf parsley
Salt and freshly ground pepper to taste 

Method:
Preheat the oven to 400 degrees. Clean the mussels. Inspect each one carefully and discard any that have opened (if some are partly open, tap them with your finger, and if they close back up they are O.K.) or have cracked shells. Place in a large bowl, fill the bowl with cold water and rinse several times, swishing the mussels around in the water, pouring out the water and refilling. Clean the shells, if necessary, with a brush or the end of one of the mussels, and pull out the beards – the hairy attachments emerging from the shells. Do not do this until just before cooking, or the mussels will die and spoil. 

Combine all of the ingredients in a large bowl and toss with the mussels. Refrigerate for 10 minutes.

Arrange the mussels, pointed ends up, in a single layer in a cast iron skillet and/or a heavy baking dish. Spoon the marinade left in the bowl over the mussels and place in the preheated oven. Bake for about 10-15 minutes, until most of the mussels have opened.  Remove from the heat and discard any mussels that have not opened.  Serve and enjoy!
 
 
SHARE:

Thursday, April 26, 2012

Delectable Discovery: Kohlrabi

Photo Credit: The New York Times
I am always excited when I make a new (new for me, anyway) foodie discovery, especially when it involves a food that's both delectable and refreshing.  Such was the case during a recent business trip to Chicago, which included a fabulous and indulgent dinner with colleagues at The Publican, in Chi-town's Meat Packing District.  And it was there, while enjoying the vibrant energy and farmhouse fare, that I discovered kohlrabi.

Kohlrabi can be eaten raw or cooked, and my introduction to it was in the raw state, accented with little more than citrus acid to awaken its natural goodness.  Simple. Fresh. Goodness.  Not soon forgotten, I'm already looking forward to days to come when kohlrabi will surely make its mark in my salads, slaws, and more. 

I love sharing my discoveries with you and invite you to join me in exploring fresh and delicious takes on this quirky vegetable.  Also, let me know what's your latest foodie discovery.

Happy Eating!
SHARE:

Monday, December 13, 2010

Red Rooster Harlem Set to Open!

There's much ado about Harlem.  Red Rooster Harlem, that is.  For months, inquiring minds have wanted to know the answer to this simple question: "When will Red Rooster open?".  While reassuring us that the day and time were sure to come, celebrated Chef and Owner, Marcus Samuelsson, has been quiet on the specifics.  Until now.  And finally, we have an answer.  The long-anticipated restaurant opening will occur just in time for the holidays and give patrons, near and far, the taste they've been longing for.  Read more about the opening--and get a sneak peek at the menu--from today's New York Times Diner's Journal.

Alas, I'll have to live vicariously through those who are fortunate enough to get in on what's sure to be a spectacular opening weekend until my travels bring me to the Big Apple next.  And I'm thinking that it won't be long.

Congrats to Chef Samuelsson, Chef Bergquist--and the entire Red Rooster team! 
SHARE:
© D.M.R. Fine Foods. All rights reserved.
MINIMAL BLOGGER TEMPLATES BY pipdig