Sunday, February 26, 2023

The Perfect Fried Chicken


Over my years of living, it’s fair to say that I’ve relished my share of fried chicken.  Much of my experience came as I grew up and feasted on my grandmother’s and mother’s fried chicken—both exceptional.  


I have so many precious memories of my grandmother hosting a dinner replete with her fried chicken (expertly fried in her cast iron skillet) and whatever else she added to the menu.  It was always clear, to me at least, that the fried chicken was the main event—the star—of the meal.  And if I may go further back in my heritage, she inherited her skills honestly from her mother, my great-grandmother, who won awards and was written up in the local paper for her fried chicken way back in the early 20th century.  


So great, award-winning, exceptionally delicious—dare I say, perfect—fried chicken is in my genes.   I truly did get it from my mamas (great grandmama to grandmama to my mama.)  As I have a way of doing, I’ve slightly adapted my own approach to making “finger-licking good” fried chicken in the years since.  And because it’s not a dish that I make often these days, when I do, it has to be GREAT!  I mean, I can’t be bothered with the additional mess of frying, and the extra calories, for mediocre chicken.  Anybody?


So before I delve into what makes my chicken the fried chicken you never knew you needed, allow me to share the two elements to achieving the perfect fried chicken:


Moist, flavor-filled meat; and 

Crispy, crunchy (and flavor-laden) skin.


That’s it.  


Flavor, crunch, and juicy chicken is what we came for, no?


So without further ado, let’s get into it a few key techniques to make your next batch of fried chicken, your best batch yet.


Getting the Juiciest Meat:


If you’re familiar with my tips for the best turkey, then you know that brining is an essential in my arsenal.  The same applies for the juiciest fried chicken.  A quick (2-3 hours will work) brine in a salt, sugar solution is worth the payoff in making your chicken the most moist and tender bird.  (*Cook’s Note: if you prefer a buttermilk brine, be my guest.  It will work equally well, I just don’t prefer the strong buttermilk notes it infuses into the chicken.)


The Spice Is Right:


As a long-time spice girl, who must have flavor bite after bite, I use my custom fried chicken spice blend to make my chicken unforgettably scrumptious.  The key ingredients are kosher salt, freshly ground black pepper, celery salt, cayenne pepper,  garlic powder and smoked paprika. (*Cook’s Note: I use my spice blend to season both the chicken and the flour mixture for extra goodness.) 


The Perfect Frying Temperature:


For perfectly done, golden brown chicken, you want to fry it at a temperature of 350 degrees F.  To maintain this temperature and to ensure your chicken actually fries to a golden crisp, rather than steams or burns, in the oil, avoid over-crowding your frying pan/pot and keep an eye on the oil temperature throughout. This may require working in batches, but it will be worth it in the end!  Aim for 160 degrees F (dark meat) to 165 degrees (white meat) for perfect doneness.  


Tools to Have On Hand:


I recommend a deep-frying or candy thermometer to measure and monitor the temperature of the oil (sometimes it can cool down a bit as you add in new pieces or unexpectedly get too hot).  I additionally recommend an instant-read thermometer to test doneness.  A baking rack will also come in handy, if you have one available. 


For more of my tips and techniques, you can checkout my fried chicken tutorial where I walk you through all of the steps and show you my end results. Refer to it as often as needed.


Now that we’ve gotten all of that in place, let’s get on to what really matters…


Happy Eating!


The Perfect Fried Chicken


Ingredients:

Skin-on chicken legs (or whatever cuts you prefer)

Buttermilk

2 cups all-purpose flour or more, as needed

2 tablespoons cornstarch

Quart of canola, vegetable, or peanut oil for frying

1 teaspoon kosher salt

1/2 teaspoon freshly ground black pepper

1 teaspoon garlic powder

1 teaspoon celery salt

1/2 teaspoon cayenne pepper

1 teaspoon smoked paprika


For Brine:

1/4 cup salt

1/4 cup sugar

Water


*Gauge ingredient quantities based on the amount of chicken you’re frying and adjust accordingly.


Method:

Mix brine solution, add chicken, and brine in the refrigerator for two hours up to overnight.


Remove chicken from the refrigerator and the brine solution. Pat the chicken with paper towels until completely dry and set aside.


Mix salt, pepper, celery salt, garlic powder, cayenne and paprika together.  Mix flour and cornstarch together. Generously season chicken and flour mixture.


Dip chicken pieces in buttermilk, followed by the flour mixture, to coat.  Let chicken rest on a baking rack for 15-20 minutes before frying.


When ready to fry, heat oil to 350 degrees F in a heavy-bottomed pan (like a Dutch Oven) or deep-fryer.  Add chicken into oil and fry until done, approximately 8-10 minutes or so (use your thermometer to test doneness, however!).


Place fried chicken on a baking rack over a baking sheet/tray to drain any excess oil and lightly sprinkle the hot chicken with a bit of salt or more of the seasoning blend, if desired.  


Serve and enjoy!!


SHARE:

Thursday, June 30, 2022

The Creamiest, Dreamiest Classic Cheesecake


When you’ve been away from one of your happy places, even for great reasons like celebrating family milestones and traveling, such as my recent hiatuses away from home two weekends in a row, it feels oh so good when you’re back—in full force.


I speak of me and my kitchen.  Specifically, creating beautiful, scrumptious food in my kitchen.


So taking several hours last Sunday to indulge in baking was a welcomed return.  The recipe of choice was a dreamy cheesecake recipe by Dorie Greenspan, that I happened upon in the New York Times Cooking archives, during my search for inspiration.  And not only did I thrill and delight myself with the finished masterpiece—I finally checked baking a cheesecake off of my epicurean ‘to do’ list.


Can you believe it?! I’d never made a cheesecake before then.  


I grew up eating my mom’s beloved cheesecake pie (a lighter version of full-on cheesecake) and have otherwise eaten my fair share of cheesecakes over the years.  But baking one myself?  Not until last Sunday.  And I’m so glad I did.  In fact, I’m already dreaming up other flavor variations and nuances for future baking escapades.  


Nothing was spared with this all-in, high crust (humble brag), cream cheese x heavy cream, delicacy.  (I opted for all heavy cream for my first go ‘round, but sour cream and heavy cream, or all sour cream, can also work beautifully, I’m sure.)  Still, my instincts were spot on for me and the creamy, cheese-cakey bite after bite I was seeking.


For a final finish, a.k.a garnish, I decided to add some macerated summer berries for a bit of color and extra goodness. (Totally optional, however, because this baby stands very well on her lonesome.)


I have to admit that I was so proud of my labor of love when I finally went in for the ‘unfolding’ from the springform pan and to take my first bite.  Did I mention, you’ve got to be ready to commit, because it’s a 7.5 hour endeavor—at minimum (chill down time, included.)  Mine was longer because I took the overnight chill down route. But It. Was. Worth. It.  The technique is evident as you go through the recipe—but when you’re in pursuit of unforgettable, too good to be true, results, don’t sweat the technique. ;)


I invite you to make it for yourself, family, friends, enemies that you want to convert to friends, lol!, and anyone else you want to delight (or impress) and spread the joy of baking that’s guaranteed to indulge…


Happy Eating!


Classic Cheesecake

Ingredients:

Crust:

1 3/4 cups graham cracker crumbs

3 tablespoons sugar

Pinch of salt

1/2 stick unsalted butter, melted


Cheesecake:

2 lbs. cream cheese, room temperature

1 1/3 cups sugar

1/2 teaspoon salt

2 teaspoons vanilla extract

4 large eggs, room temperature

1 1/3 cups heavy cream


Method:

  1. To make the crust: Butter a 9-inch springform pan — choose one that has sides that are 2 3/4 inches high (if the sides are lower, you will have cheesecake batter left over) — and wrap the bottom of the pan in a double layer of aluminum foil.
  2. Stir the crumbs, sugar and salt together in a medium bowl. Pour over the melted butter and stir until all of the dry ingredients are uniformly moist. (You can do this with your fingers.) Turn the ingredients into the springform pan and use your fingers to pat an even layer of crumbs along the bottom of the pan and about halfway up the sides. Don’t worry if the sides are not perfectly even or if the crumbs reach above or below the midway point on the sides. Put the pan in the freezer while you heat the oven. (The crust can be covered and frozen for up to 2 months.)
  3. Center a rack in the oven. Heat the oven to 350 degrees and place the springform on a baking sheet. Bake for 10 minutes. Set the crust aside to cool on a rack while you make the cheesecake.
  4. Reduce the oven temperature to 325 degrees.
  5. To make the cheesecake: Put a kettle of water on to boil.
  6. Working with a stand mixer, preferably fitted with the paddle attachment, or with a hand mixer in a large bowl, beat the cream cheese at medium speed until it is soft and creamy, about 4 minutes. With the mixer running, add the sugar and salt and continue to beat for another 4 minutes or so, until the cream cheese is light. Beat in the vanilla. Add the eggs, one by one, beating for 1 full minute after each addition — you want a well-aerated batter. Reduce the mixer speed to low and stir in the sour cream and/or heavy cream.
  7. Put the foil-wrapped springform pan in a roasting pan that is large enough to hold the pan with some space around it.
  8. Give the batter a few stirs with a rubber spatula, just to make sure that nothing has been left unmixed at the bottom of the bowl, and scrape the batter into the springform pan. The batter will reach the rim of the pan. (If you have a pan with lower sides and have leftover batter, you can bake the batter in a buttered ramekin or small soufflé mold.) Put the roasting pan in the oven and pour enough boiling water into the roaster to come halfway up the sides of the springform pan.
  9. Bake the cheesecake for 1 hour 30 minutes, at which point the top will be browned (and perhaps cracked) and may have risen just a little above the rim of the pan. Turn off the oven’s heat and prop the oven door open with a wooden spoon. Allow the cheesecake to luxuriate in its water bath for another hour.
  10. After 1 hour, carefully pull the setup out of the oven, lift the springform pan out of the roaster — be careful, there may be some hot water in the aluminum foil — and remove the foil. Let the cheesecake come to room temperature on a cooling rack.
  11. When the cake is cool, cover the top lightly and refrigerate for at least 4 hours, although overnight is better.
  12. {Baker's Tips}:
  13. At serving time, remove the sides of the springform pan — you can use a hairdryer to do this — and set the cake on a serving platter.
  • Serving: The easiest way to cut cheesecake is to use a long, thin knife that has been run under hot water and lightly wiped. Keep warming the knife as you cut slices of the cake.
  • Storing: Wrapped well, the cake will keep for up to 1 week in the refrigerator or for up to 2 months in the freezer. It’s best to defrost the still-wrapped cheesecake overnight in the refrigerator.

Recipe courtesy of NYT Cooking 


SHARE:

Wednesday, November 27, 2019

Hasselback Butternutsquash with Maple Butter

Happy Thanksgiving Eve! If you've been taking my advice ;), you're probably well along the path of Thanksgiving prep by now.  But, if I may, I have to share a recipe that really should land a spot on your Thanksgiving--and beyond--menu. Why? Because it's the quintessential perfect dish (translation: comes together easily, is stunning, and tastes ah-mazing!)


If you're like me, then you can't get enough of butternut squash, especially during this time of the year.  And since I've always admired the beauty of the hasselback technique (namely on potatoes), when I saw it done on butternut squash, I knew I had to finally try my hand.  And if my virtual oohs and ahhs are any indication, this one's a definite keeper.  Need more convincing?  This dish now ranks as one of my all-time favorite side dishes. 

So without further delay, here's the recipe for Hasselback Butternut Squash. I finished these with a generous pour of maple butter, chopped walnuts (for a bit of crunch and texture) and sage, for added color and freshness.  Confession: I shared "the making" of these on my instastory feed on yesterday evening (you can watch it in my 'The Holidays' highlights once the stories expire) and took a poll on whether I should share the full recipe in time for Thanksgiving.  The overwhelming majority said they wanted it, so here we are.

Blessings for a Happy Thanksgiving and, as always, Happy Eating!

Hasselback Butternut Squash with Maple Butter

Ingredients:
1 large butternut squash, peeled, halved lengthwise and seeds removed  
Olive oil
Kosher Salt
Freshly Ground Pepper (optional)
1/2 teaspoon ground cinnamon
1/2 teaspoon ground nutmeg
1/4 cup pure maple syrup
2 tablespoons unsalted butter
Chopped walnuts, toasted
Fresh sage, torn in small pieces

Method:
Preheat oven to 425 degrees F.

Peel and prep squash.  Place on a baking sheet and drizzle generously with oil.  Season liberally with salt and bake in the preheated oven for twenty minutes.  Remove from oven and slice the squash in 1/8 in. thick slits without cutting all the way through to keep squash intact.  Cook's Note: place butter knives on either side of the squash to help with the cutting precision.

Sprinkle squash with cinnamon, nutmeg and more salt, to taste.  Return to the oven and bake for an additional 20 minutes.  While waiting, melt the butter in a small saucepan and add in the maple syrup.  Stir to combine and set aside to cool slightly.

Take squash from the oven and generously pour maple butter over it (you can do this on the baking sheet or move it to the serving dish first and then dress with the butter.)  Finish with a garnish of walnuts and sage.  Enjoy!

Dish can be made in advance and stored in the refrigerator until ready to reheat and serve.  

Recipe adapted from How Sweets Eat


SHARE:

Sunday, January 27, 2019

Spice Roasted Chicken x BHM Potluck

One of the very first dishes I "mastered" when I began my culinary journey in earnest was the classic, beloved, roasted chicken.  Growing up, you'd be hard pressed to find a kitchen that didn't have some variation and ode to this home-cooking staple.  But what I set out to perfect was not your grandmother's roasted chicken.

Upon finding my stride with the technique of yielding a crispy skin, coupled with moist, tender white and dark meat, I fell in love with the seeming ease of bringing this dish together with varying flavor profiles.  Stuffing the cavity with herbs and aromatics, seasoning abundantly, lathering the skin with compound butters, and more, my roasted chicken earned a place all its own in my cooking repertoire. And my friends and family will attest that it makes its appearance as the star of many a dinner party and holiday meal.

So as I contemplated what I wanted to share for the, now annual, Black History Month Virtual Potluck, roasted chicken was a natural choice. **See the full 2019 BHM Potluck lineup below, following the recipe!

Being the self-proclaimed "Spice Girl" that I am, I decided to bring some of my favorite spices to the flavor profile.  I made a chili-spiced compound butter with chipotle chili powder, cumin, paprika, garlic powder, and kosher salt. The yield was a deep burnished color (like chili!), crispy skin, and tender moist chicken infused with flavor, from the inside- out.


And for an extra special touch, I threw chopped vegetables into the roasting pan to roast alongside the chicken, while absorbing the flavor of the chicken juices.  Umm-umm, good and an easy meal-in-one that also happens to be one of my favorite ways to serve this dish.

Make it and prepare to add it to your cooking rotation again and again.

Happy Eating!

Spice Roasted Chicken 
Ingredients:
1 Whole Chicken (3 to 4 lbs.)  

5 tablespoons unsalted butter, at room temperature
1 large onion, quartered

1 lemon, quartered
1 head of garlic, halved with skin on
1 teaspoon ground chili powder
1 teaspoon ground cumin

1 teaspoon paprika
1 teaspoon garlic powder
1 teaspoons kosher salt, plus more for additional seasoning

Freshly ground black pepper
Vegetables (sweet potatoes, fennel, and carrots), peeled and chopped


Method:
Preheat oven to 450 degrees F.


Combine butter, spices and 1 teaspoon of salt in a small dish.  Set aside. 
Place chicken in a cast iron skillet or roasting pan and sprinkle the cavity with salt and pepper.  Stuff the cavity with onion, lemon, and garlic.  Rub the chicken with the spice butter and gently lift the skin over the breast and tuck butter underneath.  (Be careful not to tear the skin.)  Season the chicken all over with additional salt and black pepper.  Tuck the wings under and tie the legs together.


Spread the root vegetables in the roasting pan to form a bed around the chicken.  Place chicken in the preheated oven and roast for thirty minutes, then lower the temperature to 350 degrees F and roast for another 30 to 35 minutes, or until the juices run clear and the internal temperature from the thigh reads 165 degrees.  Remove the chicken from the oven, tent with foil and allow to rest for 10-20 minutes.  Carve and serve with the vegetables.  Enjoy!

Black History Month Virtual Potluck, 2019

Beautiful Eats & Things | Okra, Corn, & Tomato Chicken Stew
B Sugar Mama | Red Beans and Rice
Cooks with Soul | Boudin balls
D.M.R. Fine Foods | Spice Roasted Chicken
Dash of Jazz | Soul Food Power Bowl
Dish it with Tisha | Jamaican Curry Chicken
Domestic Dee    | Chicken Sliders
Eat.Drink.Frolic. | Bourbon + sweet potato pie
First and Full    | Homemade Peach Pie
Food Fidelity    | Nashville Hot Shrimp Sandwich
Foodie In New York    | Chess Pie
Immaculate Bites | Pimento Cheese
Kenneth Temple | Chicken & Sausage Gumbo
Marisa Moore Nutrition | Sweet and Spicy Roasted Cabbage
Meiko And The Dish    | Hot Buttered Rum Biscuits
My Life Runs On Food | Southern Style Caesar Salad
Rosalynn Daniels | Osso Bucco
Savory Thoughts | Haitian Patty
Simply LaKita | Fried Okra
Sweet Tea & Thyme | Spiced Peach Shortcakes
That Girl Cooks Healthy | Scotch Bonnet Pepper Sauce
The Hungry Hutch | Cornbread Dressing
The Seasoning Bottle | Guava Short Ribs
Whisk It Real Gud | Banana Bread
SHARE:

Sunday, October 8, 2017

Braised Short Ribs

There's something about this time of year that fuels my love for cooking and baking more than others.  Despite this year's trend towards sustained warmer temps into the early days of Fall, I decided to rev up my cooler weather repertoire last weekend.  And I couldn't think of a better way to launch into the land of seasonal eats than with my favorite braised short ribs.  So I grabbed my extra large dutch oven and let the fun unfold. 

Hearty beef short ribs, cooked to moist, tender, melt-in-your-mouth perfection, made for a Sunday supper that was loved by all (every cook's goal, right?).

I shared the behind-the-scenes action of bringing the dish together, so if you missed the fun, you can catch it here.

File this recipe in your "must have" warm and cozy fare because I'm certain that you'll want to make it again and again.  Served over creamy polenta, with pasta, mashed potatoes, as tacos, and more, makes this dish supremely versatile...and the gift that keeps on giving.

Happy Eating!

Braised Short Ribs 
Ingredients:
3 lbs beef short ribs 
1 large onion, diced
3 carrots, peeled and diced 
3 garlic cloves, minced
Kosher Salt
Freshly ground pepper
Garlic powder
1 tablespoon tomato paste
2 cups beef broth
1 bottle dry red wine
1 tablespoon brown sugar
Few dashes of Worcestershire sauce
Bundle of fresh thyme, tied together with kitchen twine
2 bay leaves
1 cup flour
1/4 cup olive oil   

Method:
Preheat oven to 350 degrees F.

Season flour with salt, pepper and garlic powder.  Separately, sprinkle salt and pepper on short ribs.  Dredge short ribs in flour to coat, dusting off excess.  Set aside on a baking sheet.

Heat oil over medium-high heat in a large dutch oven.  Add short ribs and sear on each side until golden brown (working in batches if necessary to prevent overcrowding the pot).  Remove seared ribs and return to the baking sheet.

Add onions, carrots and garlic and saute until tender, using same oil.  Stir in wine, broth, tomato paste, sugar, Worcestershire, and more salt and pepper to taste.  Add short ribs back to the dutch oven, toss in thyme and bay, and bring to a boil.  Lower heat and simmer until the liquid is reduced by almost half.  

Place covered dutch oven in the preheated oven and cook for 2 to 2.5 hours, until short ribs are fork tender.  Remove twine and bay leaves.  Transfer the ribs to a baking sheet.  Spoon fat off the top of the braising liquid. Taste for seasoning. Add ribs back in, serve and enjoy! 
 
SHARE:

Friday, January 15, 2016

{Put an Egg on It}: Recipes, Cooking Techniques & More!

Herbed Baked Eggs
Welcome to the wonderful world of eggs!  Boiled. Baked. Scrambled. Poached. Frittatas. Omelets. (Okay, by now you get the picture.)  The incredible, edible egg is indeed one versatile and mouth-watering star ingredient fueling some of our most delicious dreams. 

I, for one, have taken to incorporating them into my diet more since the new year debuted (the boiled variety is a favorite for protein-fueled breakfasts and snacking).  But did you ever consider that when it comes to preparing them, technique is involved?  Well, there is.  And today's post is dedicated to all the egg-noshing, technique, and etiquette savvy, that I can muster.  If you're like me, you'll soon be saying, 'put an egg on it!'. 

Recipes ~

Herbed Baked Eggs are one of my absolute favorite ways to indulge.  Easy, yet elegant, they're even great for entertaining (think brunch).  For more ways to indulge, here are 44 (yes, 44) additional recipes to keep your egg recipe rotation in high gear.

Technique ~ 

What every good cook needs, but admittedly sometimes lacks, is the skill to pull off the runny, poached egg, light and fluffy omelet, and immaculate golden yolk that boiled eggs are made of.  If that's someone you know ;), then help is here.  These tips and tricks will have your egg game strong before you can say, 'what's for breakfast?'.

Etiquette ~ 

And once all the "work" is done, all that's left is the eating, right?  Well, before you do, make sure you know exactly how to eat them.  My quick and fun dining tutorial will equip you in no time.

Now... on to Happy Eating!


SHARE:

Monday, November 2, 2015

All About Pie: Primers, Tips & Tricks

Photo Credit: Williams-Sonoma

When it comes to baking, pies are in a class all their own.  From mastering the perfect dough, to blind baking, to avoiding common mistakes, to yielding (and decorating) the best crust ever, I've gathered the essentials to ensure your pie-baking expeditions are better and more scurmptious than ever.

William-Sonoma's Pie Primer serves up everything you need to know to master a perfect dough and yield a beautifully delicious pie--again and again.

Bon Appetit reveals the six common pie-baking mistakes--and how to avoid them.

Martha Stewart rounds things out with a Pie Crust 101 tutorial for fail-proof results.

With these pie essentials in tow, you'll be all set to indulge in...Happy Baking!
SHARE:

Wednesday, April 15, 2015

D.M.R. Fine Foods Pop-Up Cooking School: Savor the Flavors of Spring

Although the 'April Showers' mantra has been proving true of late (rain, rain go away...), I'm elated that Spring has finally sprung again.  And I couldn't think of a better way to celebrate than with a Spring-themed menu for my upcoming Techniques and Tastings(TM) Pop-Up Cooking School!

On the afternoon of May 2nd, you're invited to join me for our first class of 2015 where we'll indulge once again in a fabulous time of food, learning and fun--replete with up close and personal cooking instruction, scrumptious tastings, recipes and more, at the beautiful host venue, Lovable Foods.

Mark your calendars and make plans to attend for a delicious afternoon to remember!  For full event details, including our featured menu, and registration--go here.  Seating is limited, so don't delay!

I look forward to seeing you there and sharing...

Happy Eating!

P.S. If you missed our 2014 Spring and Summer Pop-Up Cooking Schools, check out the highlights--here and here.  You can also visit our Facebook page to see what previous attendees had to say.


SHARE:

Wednesday, March 4, 2015

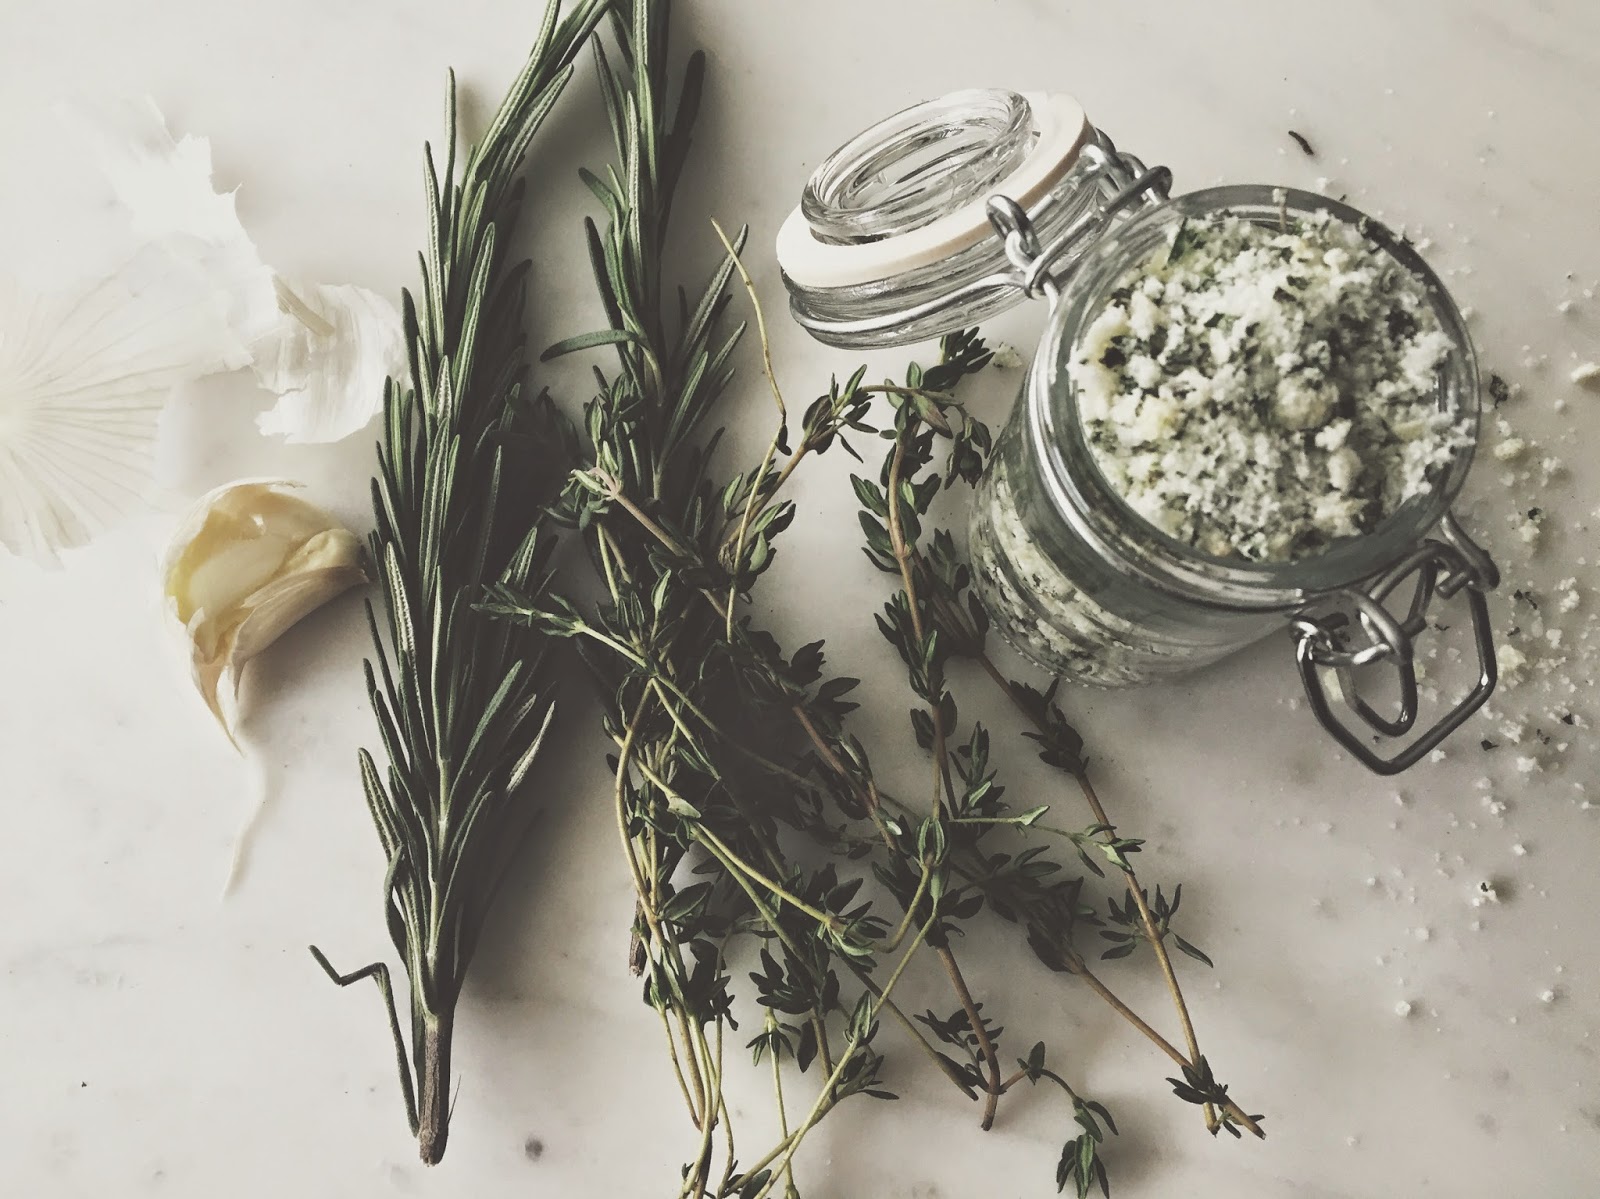
Garlic Herb Salt


Infusion is, without question, one of my most favorite ways of imparting extra umph and scrumptious goodness to the foods and drinks I love.  From coffee, to compound butter, to vinaigrettes, and beyond, it's found its way into my repertoire on more than a few occasions.  No coincidences there.

Over the weekend, I was inspired to combine some of my favorite herbs (thyme, rosemary and parsley) with several cloves of fresh garlic to create a beautiful and exceptionally delicious garlic herb salt.  And, if you're remotely like me, then you might be tempted to salivate slightly at just the thought of all the ways this treasure will transform your dishes and enhance your cooking regimen. 

The hand-chopped technique, along with the overnight air-drying, yielded the perfect coarse, crumbly texture.  All stored away, with a little reserved for gifting, it's a welcomed gourmet addition to my pantry--and it should be in yours, too.

Happy Eating!

Garlic Herb Salt
Recipe courtesy of Saveur

Ingredients:
6 cloves garlic
½ cup kosher salt

1 cup mixed fresh herbs

Method:
Crush garlic and coarsely chop with half of salt to form a chunky paste. Slowly add herbs and remaining salt and continue to chop into a fine paste. Spread on a parchment paper-lined baking sheet and let sit uncovered overnight or up to 24 hours until dry and crumbly.  Store in an airtight glass jar up to 1 month.
 

SHARE:

Thursday, July 17, 2014

{Homemade}: Summer Pickling


Last weekend I finally got around to doing something that I had been wanting to do for what seems like forever: make my own homemade pickles.  With it came the nostalgia of remembering my truly amazing grandmother whom I used to watch as a little girl.  Upon reflection, it dawned on me that she could do it all, literally.  From preserving to canning to pickling to baking to cooking, her culinary prowess was as broad and as effortless as they come--and her pantry was always stocked with the abundant fruits of her labor for the taking and relishing.

So back to me and my kitchen, here I was, finally about to embark on my first pickling expedition.  Inspired by the abundant pickling ideas floating around, I decided to start with a simple method that didn't require the heavier lifting and technicalities of sterilizing jars, etc., etc., but only required the coming together of my homemade pickling brine (scrumptious) and my vegetable of choice, crisp carrots.  Within a matter of minutes, I was pouring my brine over the carrots and garlic cloves in my jar and salivating with the anticipation of what the next 24 hours would bring. 


Waiting period over, I couldn't wait to retrieve the treasure from my refrigerator and finally have a taste.  I loved the slightly sweet under note and briny goodness from the apple cider vinegar, along with the bright, sharp flavors that carried through from the mustard seed, fennel seed, red chili flakes, and more.  Light, healthy and refreshing, my pickled carrots are my new favorite snack for Summer.  

 
Not one to let a good thing go to waste, I plan on increasing my pickling repertoire in the days ahead.  In fact, I'm already eyeing fresh jalapenos for what's next.  Give it a try in your kitchen and let me know how you like it and what combinations you come up with.  From the brine variations to the ingredient profiles, there's a world of briny deliciousness just waiting to be discovered and savored!

Happy Eating!

Carrot Fridge Pickles
 Adapted from FOOD52

Ingredients:

1 lb. carrots
2 garlic cloves, peeled and halved
1 teaspoon whole coriander
2 teaspoons fennel seed
2 teaspoons mustard seed
½ teaspoon chili flakes

2 tablespoons kosher salt
1 ¼ cup water
2 ½ cups apple cider vinegar
¼ cup sugar


Method:
Cut the carrots into spears that fit the height of the jars you are using.  Set carrots aside. In a saucepan combine the remaining ingredients.  Bring to a simmer, and then turn off heat.  

Place the cut carrots in a clean jar(s).  Carefully pour the hot brine over until they are submerged. Cover and refrigerate for at least one day. Well sealed refrigerator pickles will keep for 1 month. Enjoy!


SHARE:
© D.M.R. Fine Foods. All rights reserved.
MINIMAL BLOGGER TEMPLATES BY pipdig