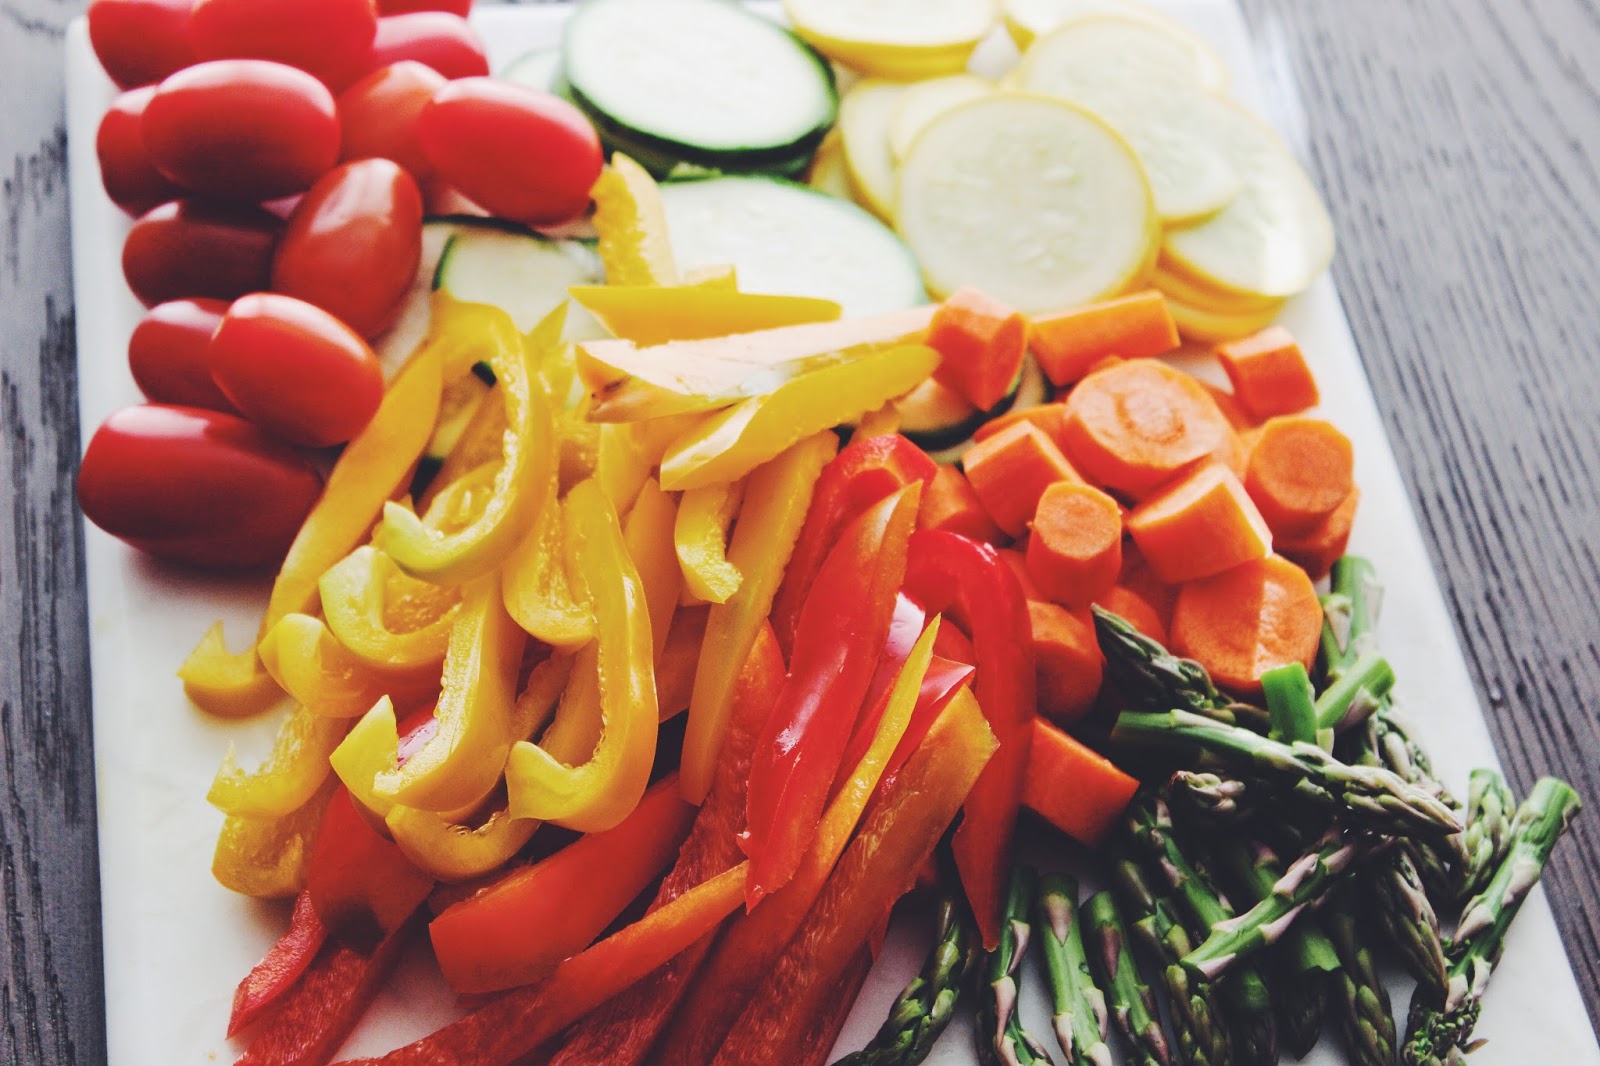
Wednesday, June 8, 2022

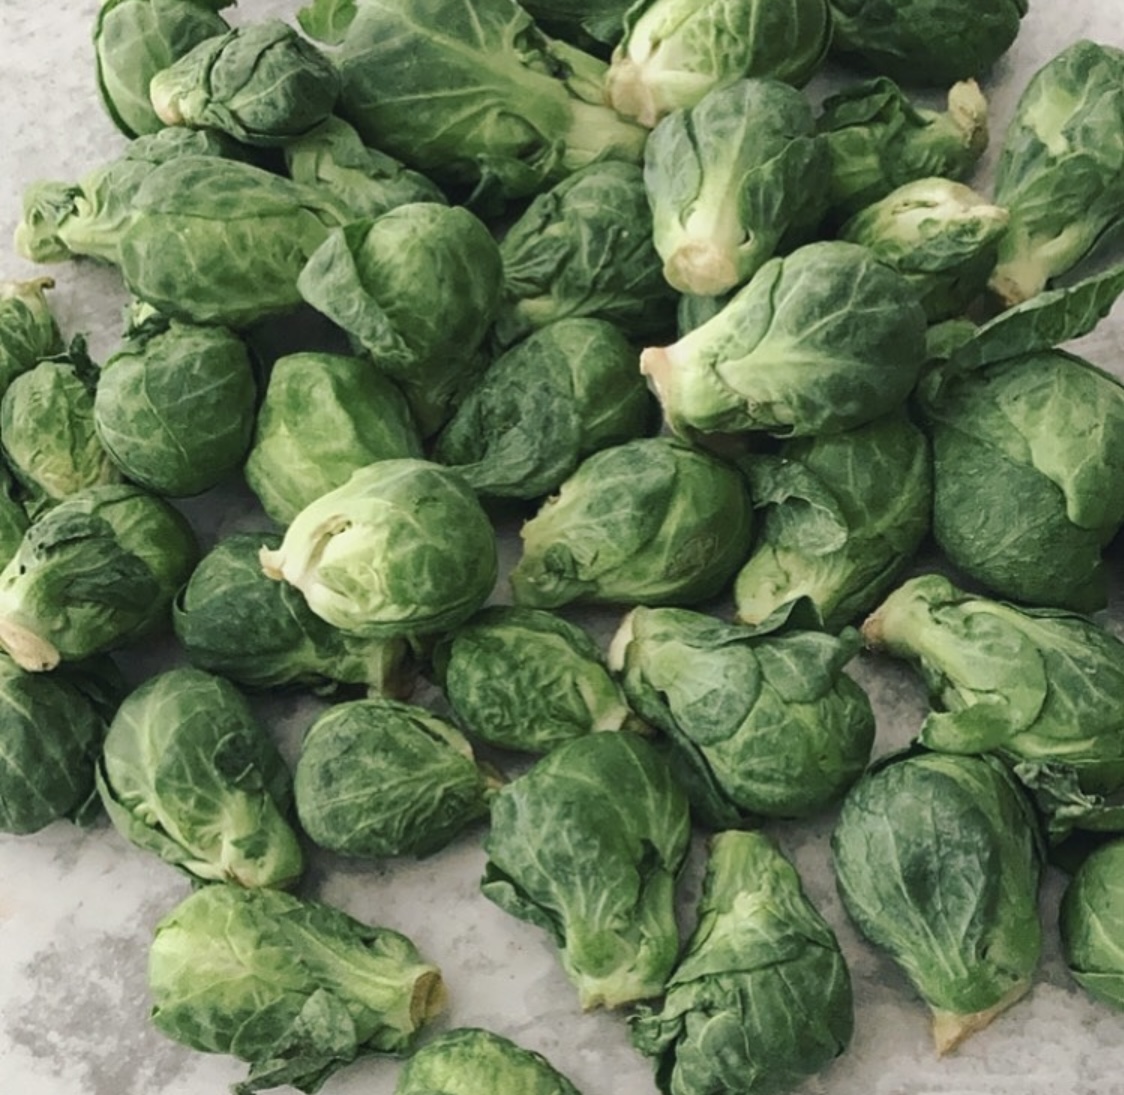
Chili, Soy and Honey Brussels Sprouts


I get cooking inspiration from so many sources.  From food t.v., to magazines, travel, cookbooks, dining out, and more, there’s no shortage of familiar and novel ways, alike, to feed my passion.  And among the list, scrumptious, unforgettable tastes rank supreme.  

And my latest kitchen foray is a direct result of one such unforgettable dish I had last year while visiting my forever favorite, NYC. I took a chance on a cozy Italian restaurant near my hotel, after a long day, replete with an early flight into the city and non-stop goings upon my arrival.  (Just my speed, and the ultimate allure, whenever I’m in the Big Apple.) So settling in at the bar to order up some pasta, and the brussels sprouts that the server was raving about, was just what I needed to finish a wonderful day.  


So about those brussels sprouts.  They were crispy, with the perfect balance of sweet, spicy and savory goodness.  They were quite literally the best brussels sprouts that I had tasted to date, and currently that ranking still holds.  Who knew you could elevate an already favorite ingredient even further?  That’s the joy of cooking—and eating!


While I can’t recall the exact ingredients that restaurant’s kitchen used, I do recall enough of the flavors to inspire my own twist and nod to the amazing sprouts.  Simple, quick, versatile and supremely flavorful, it’s everything you want in a recipe—and more. Leading with the perfect trifecta of sweet, savory and somewhat piquant notes, I trust that you will make this a star side (or possibly even main) dish in your cooking and entertaining repertoires once you make them.


I crisped them up in the air fryer (but roasting them in a very hot oven will get you there, too) and finished them off in that wonderful marinade.  From there, all that was left to do was to indulge in…


Happy Eating!


Chili, Soy and Honey Brussels Sprouts


Ingredients:

1-2 lbs. brussels sprouts, halved lengthwise

Olive oil

Kosher salt

1 tablespoon soy sauce

1 tablespoon chili garlic paste

1 tablespoon hot honey (any variety of honey will work)


Method:

Season brussels sprouts with a generous drizzle of olive oil and salt. Cook according to air fryer instructions, until golden and crispy.  (For oven roasting, preheat the oven to 400 degrees F and roast for 18-25 minutes, watching carefully to ensure they don’t burn.


Meanwhile prepare the marinade by combining the soy sauce, chili paste and honey in a small bowl.  Stir to mix thoroughly.  Set aside.


Once the brussels sprouts are ready, pour the marinade over and toss to coat the sprouts. Serve and enjoy!

SHARE:

Saturday, January 22, 2022

Vegetable and Bacon Frittata


If raiding your fridge and bringing a meal together easily is your kind of thing, then a frittata is just what the home chef ordered.  I’ve always appreciated the easy touch and elegant finish that goes into making this Italian variation on an omelette.  

And while deciding what to make this past Sunday—that would match the ingredients I had on had (yes, I raided my fridge for this) and also yield a healthy, delectable bite—a frittata seemed to be the perfect fit.  Reminiscent of a crust-less quiche (or mini quiches), it is adaptable to whatever you want to toss into the skillet.


From a prep perspective, I cooked my turkey bacon and sautéed my vegetables before pouring in my cheese and egg mixture.  From there it was off to the oven to bake and set-up into a beautiful, golden finish.  And whether you’re indulging for breakfast, brunch, or anytime, it’s a superb dish to serve when feeding a crowd or a party of one.  Bonus? If you find yourself with leftovers, the individual slices make for the best ready-made breakfast in the days that follow.  


So now that I’ve hopefully piqued your desire to bring this dish to life (or a variation matching what you have on hand), let’s get on with what’s most important….


Happy Eating!


Vegetable and Bacon Frittata


Ingredients:

9 large eggs

3 scallions

1 sweet bell pepper

1 Chile pepper

5-6 strips of turkey bacon (cooked)

1 tbs. Olive oil

4 oz. Shredded cheese

1/4 cup milk

Cherry tomatoes, halved

A bunch (a couple of handfuls or so) of raw kale greens

Italian parsley, finely chopped

Parmigiano Reggiano

Kosher salt and freshly ground black pepper, to taste


Method:


Preheat oven to 400 degrees F.


Whisk together eggs, milk, cheese, salt and pepper in a large bowl.  Set aside.


Add oil to an oven-safe skillet and heat over medium-high heat (cast iron recommended, if pre-seasoned or enameled). Add in scallions, bell pepper, and Chile pepper and sauté until softened, about 2-3 minutes.  Add in the cherry tomatoes, kale and bacon and continue sautéing for another 2-3 minutes.  Pour in the egg mixture and place skillet in the pre-heated oven.


Bake for 18-20 minutes or until the top is set and golden-ish in color.  Remove from the oven (remember to use oven mitts!) and garnish with parsley and grated Parmigiano Reggiano. Serve and enjoy!


SHARE:

Tuesday, July 21, 2020

Grilled Shrimp Lettuce Wraps


Frozen shrimp has always been a go-to staple in my freezer--and especially so during the quarantine, shelter-in-place, days of late.  Besides going from frozen to thawed within minutes, there is something comforting about knowing that you've got seafood virtually on-demand and waiting to be transformed into as many delicious iterations as your imagination can muster.

So this past Sunday, after a morning walk, followed by an online worship service, and re-watching Hamilton (squeal!), my mind went to what's for dinner.  And in keeping with my already low-key Sunday vibes, I decided to keep it simple.

What resulted was simple in preparation, indeed, in that I had all of the ingredients on hand in my fridge, but by no means simple in final wow-appeal and delicious-ness.  Translation: it. was. so. good.


Grilled shrimp (I grilled my shrimp on my indoor smokeless grill for extra ease), lettuce leaves to serve as the bed and wrap, piquant scallions, juicy grape tomatoes, hothouse cucumber slices, and a punchy lime vinaigrette, made for one good 'til the last bite creation.  The lightness of the dish (perfect for Summer) x the big flavors made this an instant favorite.  It's a gorgeous meal-in-one that can double as appetizers or a main course, depending on whether you're hungry or hangry. :)

Enjoy--and join me in finding delight in the simple pleasures of...

Happy Eating!

Grilled Shrimp Lettuce Wraps
Ingredients:
Shrimp, peeled and deveined
Kosher Salt
Freshly Ground Pepper
Old Bay Seasoning
Worcestershire Sauce
Tabasco
Olive Oil
Lettuce leaves (Boston or Bibb, recommended)
Grape tomatoes, halved
Scallions, chopped (white and green parts)
Hothouse cucumber, thinly sliced
Lime Vinaigrette (recipe follows)
Flaked sea salt for garnish (optional)

Method:
Place shrimp in a bowl and season to taste with salt, pepper, Old Bay, Worcestershire, Tabasco and oil; toss ingredients to combine. Grill shrimp until just done about 2 minutes or so per side. While shrimp is grilling, prepare vinaigrette.  Once done, remove shrimp and drizzle with some of the vinaigrette.  Toss to coat and set aside.

Arrange lettuce, tomatoes, scallions, cucumber and shrimp on a platter.  Place remaining vinaigrette in a dish/bowl and add to platter.  Garnish with a light sprinkle of flaked sea salt to finish, if using.  To assemble, place cucumber, tomatoes, shrimp and scallions on lettuce leaf.  Garnish with a drizzle of vinaigrette to finish--and enjoy!

Lime Vinaigrette
Ingredients:
Juice of 1 lime
Teaspoon of Dijon mustard   
1/2 teaspoon of honey
Kosher salt and ground pepper to taste
1 Tablespoon of Extra Virgin Olive Oil  

Method:
Whisk together lime juice, mustard, honey, salt and pepper.  Drizzle in oil and whisk until emulsified and fully incorporated. (Cook's Note: I like my vinaigrette with a good acidic punch so I typically use less oil than is standard.  Feel free to modify with more oil, as desired.  And you can also double the original recipe for more vinaigrette. Store remaining vinaigrette in an airtight container in the refrigerator for up to a week.) 


SHARE:

Wednesday, November 27, 2019

Hasselback Butternutsquash with Maple Butter

Happy Thanksgiving Eve! If you've been taking my advice ;), you're probably well along the path of Thanksgiving prep by now.  But, if I may, I have to share a recipe that really should land a spot on your Thanksgiving--and beyond--menu. Why? Because it's the quintessential perfect dish (translation: comes together easily, is stunning, and tastes ah-mazing!)


If you're like me, then you can't get enough of butternut squash, especially during this time of the year.  And since I've always admired the beauty of the hasselback technique (namely on potatoes), when I saw it done on butternut squash, I knew I had to finally try my hand.  And if my virtual oohs and ahhs are any indication, this one's a definite keeper.  Need more convincing?  This dish now ranks as one of my all-time favorite side dishes. 

So without further delay, here's the recipe for Hasselback Butternut Squash. I finished these with a generous pour of maple butter, chopped walnuts (for a bit of crunch and texture) and sage, for added color and freshness.  Confession: I shared "the making" of these on my instastory feed on yesterday evening (you can watch it in my 'The Holidays' highlights once the stories expire) and took a poll on whether I should share the full recipe in time for Thanksgiving.  The overwhelming majority said they wanted it, so here we are.

Blessings for a Happy Thanksgiving and, as always, Happy Eating!

Hasselback Butternut Squash with Maple Butter

Ingredients:
1 large butternut squash, peeled, halved lengthwise and seeds removed  
Olive oil
Kosher Salt
Freshly Ground Pepper (optional)
1/2 teaspoon ground cinnamon
1/2 teaspoon ground nutmeg
1/4 cup pure maple syrup
2 tablespoons unsalted butter
Chopped walnuts, toasted
Fresh sage, torn in small pieces

Method:
Preheat oven to 425 degrees F.

Peel and prep squash.  Place on a baking sheet and drizzle generously with oil.  Season liberally with salt and bake in the preheated oven for twenty minutes.  Remove from oven and slice the squash in 1/8 in. thick slits without cutting all the way through to keep squash intact.  Cook's Note: place butter knives on either side of the squash to help with the cutting precision.

Sprinkle squash with cinnamon, nutmeg and more salt, to taste.  Return to the oven and bake for an additional 20 minutes.  While waiting, melt the butter in a small saucepan and add in the maple syrup.  Stir to combine and set aside to cool slightly.

Take squash from the oven and generously pour maple butter over it (you can do this on the baking sheet or move it to the serving dish first and then dress with the butter.)  Finish with a garnish of walnuts and sage.  Enjoy!

Dish can be made in advance and stored in the refrigerator until ready to reheat and serve.  

Recipe adapted from How Sweets Eat


SHARE:

Sunday, October 28, 2018

{What's For Dinner}: Stuffed Peppers with Quinoa and Italian Chicken Sausage


I've never had to overthink much when it comes to what I eat.  I often teasingly say that I'm an equal opportunity eater, meaning that I enjoy good food without discrimination.  However, lately, I've renewed my commitment to healthier fare to attain (and maintain) my personal health and fitness goals. 

Despite the bad rap that "healthy" foods can sometimes receive, nothing could be farther from the truth.  Sure, it might mean moderation when it comes to indulgences, as well as embracing our favorite foods prepared in slightly different ways (e.g. baked vs. fried), etc., but it does not have to mean absence of flavor and the scrumptious goodness that we desire--and deserve.

Last week I whipped up one of my favorite healthy dishes, that not only delivers scrumptious flavor bite after bite, but also happens to be a cinch to prepare.  Can we say, win-win?!  I grabbed some sweet peppers from the market and decided to transform them into a meal by stuffing them with a quinoa and Italian chicken sausage mixture. (So good!) They were received by happy mouths and tummies, mine included!, and will definitely be on future rotation in my cooking repertoire.

I'm excited for you to make them and enjoy the same satisfaction and....

Happy Eating!

Stuffed Peppers with Quinoa and Italian Chicken Sausage 

Serves 6
Ingredients:
6 sweet peppers
1 cup quinoa
1 lb. Chicken Italian Sausage
2 teaspoons tomato paste
1/2 cup tomato sauce
1 teaspoon dried oregano
Salt, to taste (optional)
Olive Oil
Shredded Cheese
Chopped scallions to garnish (optional)

Method:
Preheat oven to 400 degrees F.

Rinse and dry peppers, core to remove stem and seeds, and set aside in a baking dish.

Pre-heat a tablespoon or two of oil in a large skillet over medium-high heat.  Add sausage (removed from casings) and saute until browned and cooked through.  Set aside.

Cook quinoa according to package instructions. Drain through a sieve and add to skillet with sausage.  Add in tomato paste, tomato sauce, oregano and a light sprinkling of salt.  Over low heat, stir to combine all the ingredients and form a quinoa and sausage mixture. 

Lightly drizzle oil over peppers and spoon quinoa and sausage mixture into each one.  Sprinkle cheese on top of each and cover the baking dish with foil.  Bake for 25-30 minutes in the preheated oven or until peppers are tender.  

Remove from oven and garnish with scallions.  Serve hot and enjoy!


SHARE:

Tuesday, November 21, 2017

{In Case You Missed It}: Atlanta Plugged In x Thanksgiving

Today started with an absolute bang as I headed back to Atlanta Plugged In to share some final tips and recipes to round out your Thanksgiving prep and menu.


We talked turkey to kick things off, as I shared a few of my tried and true turkey prep tips to help make your big bird the best it can be.  Get the full list of preparation tips here.


I also shared a couple of easy recipes to round out the Thanksgiving table, including my scrumptious Sweet Potato Crostini and a Roasted Vegetable Medley as the perennial favorite side dish.

Here's wishing you the Happiest Thanksgiving--and, as always, Happy Eating!


SHARE:

Saturday, June 17, 2017

{Cooking for Dad}: A Father's Day Menu

There are few things that compare to the love, care, protection, guidance and affirmation that come from a father (or father-figure).  An undisputed daddy's girl, my father represented many "firsts" in my life.  He was my first love; the first man to affirm me and see the best in me; the first to lovingly foster the big dreams that he had for me.  And although he wasn't perfect, he was perfect for me.

Our earth story ended shortly before my 19th birthday, when he moved to heaven, but there isn't a day, or year, that goes by in which I'm not thinking of him, thankful for the love he gave to me, and wishing I still had him on this side of heaven with me.

If my dad were still here with me, I would prepare for him a meal fit for a king.  And as you prepare to cook for the special man (or men) in your life, this menu is all you need to make for a delicious and unforgettable meal:  Roasted Chicken and Vegetables, Rosemary Popovers, Arnold Palmer Special, and Cherry Upside Down Cake.  Now who wouldn't want that for dinner?! (No guy that I know. :))

So here's to a Happy Father's Day...and Happy Eating!

Arnold Palmer Special
Roasted Chicken and Vegetables
Rosemary Popovers
Cherry Upside Down Cake


SHARE:

Monday, April 17, 2017

Prosciutto-Wrapped Roasted Asparagus


This past weekend was abuzz with the anticipation of Easter.  Besides my focus on worship on the holy holiday, my agenda also entailed the making of goodie baskets for some special little people, and, as you might have guessed, deciding on my contribution to a family Easter dinner menu.  I also managed to score the perfect "Easter Dress" recently, which is undoubtedly a delight to the fashionista in me. :)

Back to the menu... My thoughts ranged from baking a cake (eclipsed by a cousin's announcement that she would be bringing cupcakes), to savory scones, to deviled eggs, to finally--a roasted vegetable dish (with some added umami) and the fixings for Arnold Palmer sips.

Asparagus are a delicacy--and especially when you're buying them in-season.  With my mind--and menu addition--finally settled, I roasted up some gorgeously green and fresh asparagus and finished them with a blanket of the umami goodness I mentioned above, i.e. salty, yummy prosciutto.  Simple. easy. elegant. and most importantly, delicious.

Beyond the ease of preparation and taste factors, this dish is also a star because it can be served as almost any course you like, making for appetizer, salad, lunch, or side dish heaven.  And it's spring eating as its best.

Happy Eating!

Prosciutto-Wrapped Roasted Asparagus
Ingredients:
1.5-2lbs. fresh asparagus
1/2 lb. prosciutto, thinly sliced
olive oil
kosher salt
freshly ground black pepper

Method:
Preheat oven to 400 degrees F.

Rinse, dry and trim asparagus stalks (break off the woody ends; they will snap at the natural breaking point).  Place asparagus on a foil-lined baking sheet and drizzle with oil.  Season with salt and pepper to taste and roast in preheated oven for 12-15 minutes, until tender, but not overly cooked. 

Wrap cooked asparagus with strips of prosciutto.  Serve and enjoy!    


SHARE:

Monday, November 7, 2016

Sweet Potato Chowder

Hearty root vegetables are a staple in my cooler weather recipes.  And one that tends to be in heavier rotation and stand out from the crowd in my kitchen is the good to you, good for you sweet potato.  I mean, what's not to like love about this superstar ingredient?  With health benefits galore and the knack for tasting really good no matter how you fix it, I took my sweet potato affections to another level recently and decided upon a luscious, decadent Sweet Potato Chowder.

The delightful thing about this chowder is that it comes together easily (I love a good homemade soup, stew and chowder) and tastes quite good.  And here's the reason for that: it's flavored with curry, which lends both phenomenal taste and color, coconut milk, and has a slight (not overbearing in case you're dubious) hint of spicy kick from chipotle in adobo.  Combined with the sweet, hearty potatoes and other flavorings,  it's a chowder worth making and savoring again and again.

As the cooler weather and holiday season unfold, this is one dish you'll want in your repertoire for certain.  Go ahead and make it...and thank me later.

Happy Eating!

Sweet Potato Chowder
Ingredients:
5-6 large sweet potatoes, peeled and chopped
1 large onion, diced
2 garlic cloves, minced
2 tablespoons olive oil
2 tablespoons mild curry powder
1 chipotle pepper in adobo, diced
2 teaspoons kosher salt (plus more to taste, as needed)
1/2 teaspoon freshly ground black pepper
1 quart chicken broth
1 can coconut milk
Fresh parsley, chopped, for garnish (optional)
Sour cream (optional)

Method:
Heat oil in a large soup pot or dutch oven.  Add onion and cook until they begin to soften slightly (about 2-3 minutes).  Add in garlic and curry and cook until onions become softened and translucent (another 3-4 minutes).  Add in potatoes, chipotle, salt, pepper, broth and coconut milk.  Stir to combine well.  Bring to a boil, then reduce to a simmer for 20 minutes or until potatoes are fork tender. 

Ladle 3 cups of soup mixture into a blender and puree.  Add pureed soup back into pot, stir to combine and taste for seasoning.  Garnish with fresh parsley and a swirl of sour cream (optional).  Serve warm and enjoy!

 (Cook's Note: Recipe can be made ahead and stored in airtight container in the refrigerator for up to 24 hours before reheating and serving.) 

Adapted from Better Homes and Gardens
SHARE:

Thursday, August 11, 2016

Roasted Red Peppers and Cherry Tomatoes with Goat Cheese

Tomato season is finally here--and if that excites you as much as it does me, then you'll be happy to add a simple, but superbly fresh and delicious recipe to your Summer eats rotation.  Vibrant, roasted red peppers provide the perfect canvas for ripe cherry tomatoes, sweet basil, tangy goat cheese and other savory flavorings.

The tastes of Summer are on full display in this simple, yet scrumptious, salad.

Happy Eating!

Roasted Red Peppers and Cherry Tomatoes with Goat Cheese
(Recipe adapted from Bon Appetit)
 
Ingredients:
  • 4 red bell peppers, halved, seeds and ribs removed
  • 6 oil-packed anchovy fillets, finely chopped
  • 4 garlic cloves, thinly sliced
  • 1 cup basil leaves, divided
  • Kosher salt, freshly ground pepper
  • 2 tablespoons plus ⅓ cup olive oil
  • 1 pint cherry tomatoes, halved
Method:
  • Preheat oven to 375°. Place bell peppers, skin side down, in a shallow baking dish and top with anchovies and garlic. Tear ¼ cup basil leaves over top, season with kosher salt and black pepper, and drizzle with 2 Tbsp. oil. Bake until peppers are tender but still hold their shape and are slightly charred around edges, 35–45 minutes. Let cool.

  • Meanwhile, blend remaining ¾ cup basil and remaining ⅓ cup oil in a blender until smooth; season basil oil with kosher salt and black pepper. 

  • Arrange bell peppers on a platter. Top with tomatoes, goat cheese, and more basil, then drizzle with basil oil and season with sea salt and black pepper.


SHARE:

Tuesday, May 31, 2016

Grilled Caesar Salad with Homemade Caesar Dressing

This past weekend marked the unofficial start of the Summer season.  There were festivals, concerts and BBQs galore to soak in the beautiful weather and holiday weekend good vibes--and that means food (specifically what to eat) was never too far behind.

A family BBQ was on my agenda for Memorial Day and I contemplated what to contribute to the menu.  I briefly considered doing a dessert, but then decided to go in a different (but equally delicious) direction with a classic Summer staple: salad.  But not just any salad.  If it was going to be a salad that could hold its own among burgers and franks and sides and, yes, dessert, it had to be one that I was sure could deliver.   So I decided to dust off my my recipe for Grilled Caesar Salad with homemade Caesar dressing.  I fell in love with this salad years ago, and it was a hit at last year's Spring Pop-Up Cooking School, so it had already passed the taste test many times over.


There's nothing quite like making your food from scratch. The homemade effect is hard to beat and that couldn't be truer when it comes to homemade salad dressings.  Caesar dressing is especially wonderful with a bold, deeply savory and scrumptious flavor that can single-handedly elevate your classic Caesar Salad to other-worldliness-and when coupled with grilled, slightly charred greens, you'll never see this salad the same again.


Here's to a beautiful Summer filled with lots of Happy Eating!

Grilled Caesar Salad with Homemade Caesar Dressing

Ingredients:
2-3 tablespoons fresh lemon juice
1 garlic clove, peeled and finely minced
1 teaspoon Dijon mustard
1 teaspoon anchovy paste
1 teaspoon Worcestershire sauce
Few dashes of Tabasco (optional)
3 tablespoons grated Parmesan, plus extra for sprinkling
1/4 teaspoon kosher salt
1/4 teaspoon freshly ground black pepper
1 large egg yolk
1/2 cup extra virgin olive oil, plus extra for drizzling
Romaine hearts

Method:
Add the lemon juice, garlic, mustard, anchovy paste, Worcestshire, hot sauce (if using), egg yolk, salt, and pepper to a blender to combine.  With the blender on low, slowly drizzle in the olive oil to incorporate until dressing is thickened.  Remove dressing from blender and whisk in 3 tablespoons of Parmesan.  Set aside.

Heat a grill pan over medium-high heat.  Take romaine hearts and lightly drizzle with olive oil.  Grill, face-side down, for up to two minutes, or just until greens start to slightly wilt and char.

Greens can be served whole or chopped.  Add dressing and garnish with a sprinkling of fresh Parmesan.  Enjoy!     


SHARE:

Monday, April 11, 2016

Green Bean Salad with Mustard Seeds and Tarragon

Vibrant green veggies (green beans, snow peas and green peas to be exact), fragrant fresh tarragon, lemon zest, coriander and mustard seed-infused olive oil, red chiles, garlic, red onion and baby lettuce.  Therein lies the magic to a fresh, bright, scrumptious--and perfect for Spring--salad.


I fell in love with the gorgeous colors that makes this salad a stunner, as much as I did with the robust flavors.  Eating in season never tasted (or looked) so good.  So welcome this dish into your Spring eating arsenal.

Happy Eating!

Green Bean Salad with Mustard Seeds and Tarragon
Recipe courtesy of Refinery29
SHARE:

Monday, March 7, 2016

Pasta Primavera

This past weekend looked and felt like Spring.  And as much as I endeavor to enjoy each season fully, I can't deny that it made me wish for winter to hurry along so that the milder, sun-kissed days could settle in for good.

The infectious nature went beyond the weather and drifted into my kitchen--and the result was my favorite rendition of Pasta Primavera ("Spring Pasta" in Italian).  My take abandons the typical cream-laden dish and instead serves up bountiful fresh, vibrant vegetables that stand deliciously on their own.  Accents of Italian dried herbs, sun dried tomatoes and Parmesan infuse extra decadence--and robust flavor--that makes for a dish you'll want to savor throughout Spring--and beyond.


This dish was a hit at my Spring Pop-Up Cooking School last year--and I trust you'll find it to be a welcomed addition to your spring eating repertoire.

Happy Eating!

Pasta Primavera
Ingredients:
1 lb. linguine (or pasta of choice)
3 garlic cloves, minced
1 onion, diced
1 tablespoon Herbs de Provence
1 bunch of asparagus tips
1 zucchini, sliced
1 yellow squash, sliced
3 carrots, peeled and chopped
1/3 cup sun dried tomatoes in oil, chopped
1 red bell pepper, sliced
1 yellow bell pepper, sliced
1 pint cherry tomatoes
Kosher salt
Freshly ground black pepper
1/4 cup olive oil
Grated Parmesan, to taste

Method:
Heat olive oil over medium-high heat in a large skillet or saute pan.  Add onions to the pan and season lightly with salt and pepper.  Saute until they begin to soften and become translucent, about 4 minutes.  Add in garlic and herbs an saute for another minute.  Add in vegetables, except the cherry and sun dried tomatoes, and season lightly with a sprinkling of salt and pepper.  Cook until the vegetables begin to soften and become tender, about 7-10 minutesRemove mixture from pan and pour into a large bowl.  Stir in sun dried and cherry tomatoes and set aside.

Meanwhile, as the vegetables are cooking, bring a large pot of water to a boil and season liberally with salt.  Add in pasta to boiling, salted water and cook according to package instructions.  Drain pasta and reserve pasta water.

Pour pasta into bowl with vegetables and toss to combine, adding in reserved pasta water to moisten, as needed.  Taste for seasoning and garnish generously with Parmesan.  Serve and enjoy!    
Recipe adapted from Giada de Laurentiis 
SHARE:

Tuesday, September 22, 2015

Summer's Best: Heirloom Tomato Gazpacho with Toasted Breadcrumbs

The final day of Summer has arrived.  As we say farewell to the season that's served us well on the food, travel, entertaining and fashion fronts, I couldn't think of a more apropos dish to savor than a fresh, vibrant, chilled gazpacho.  And not just any gazpacho--but one with juicy, colorful, seasonal, creme dela creme, heirloom tomatoes.  It's all the goodness of a traditional tomato gazpacho--turned up a notch.

This soup couldn't be easier to bring together and delivers both rich flavor and great texture from the vegetables. (I consider it a vegetable garden in a bowl.)  And I'll add that it was a hit at last Summer's Pop-Up Cooking School, so you can't go wrong.

If you're looking for that one final taste of Summer that's worth savoring, this. is. it.

Happy Eating!

Heirloom Tomato Gazpacho with Toasted Breadcrumbs
Ingredients:

3-5 heirloom tomatoes
1 hothouse cucumber
1 sweet bell pepper, cored and seeded

½ red onion
1 jalapeno pepper, seeded
3 garlic cloves, minced
3 cups tomato juice
¼ cup red wine vinegar
¼ cup, plus two tablespoons, extra virgin olive oil
1 tablespoon Worcestershire sauce
Juice of ½ lime
2 teaspoons kosher salt, plus more for breadcrumbs
Freshly ground black pepper to taste
Baguette or other crusty bread (for breadcrumbs)

Method:
 
For the Gazpacho:
Roughly chop the cucumber, bell pepper, tomatoes, jalapeno and red onion into 1-inch cubes. Put each vegetable separately into a food processor fitted with a steel blade and pulse until it is coarsely chopped. Do not over process!

After each vegetable is processed, combine them in a large bowl and add the garlic, tomato juice, vinegar, oil, salt, pepper, lime and Worcestershire. Mix well and chill before serving.  


For the Breadcrumbs:
Slice bread into 1-inch cubes.  Heat two tablespoons of oil in a medium skillet.   Toss in cubes and begin to sauté until golden brown and season with salt and pepper. 

Before serving, garnish the gazpacho with the toasted breadcrumbs.  Enjoy!

 
SHARE:

Sunday, May 24, 2015

Roasted Tomatillo Salsa


There are some flavors that I simply cannot get enough of.  And such are the flavors of one of my absolute favorite sauces: Roasted Tomatillo Salsa.  I began making this bold, tangy, bright and ever-so-scrumptious treat years ago as my go-to accompaniment to fish tacos--perfect for drizzling over crispy or grilled fish and for dipping with tortilla chips.  But, I soon realized that this treasure could be enjoyed on just about anything, from eggs, to steak, to enchiladas, to any way you please.

Tomatillos are used heavily throughout Mexican and Central American Cuisine


I especially savor this recipe because it yields a warm salsa that's somehow more delectable--a byproduct of the roasted vegetables.  Effortless to bring together, there is every reason for this to become a part of your condiment repertoire forever.  Forever. 

Happy Eating!

Roasted Tomatillo Salsa
Recipe adapted from Tyler Florence

Ingredients:
1 lb. tomatillos, husked and rinsed
1 large white onion, quartered
4 garlic cloves
2 jalapeno peppers
1/2 cup cilantro
1.5 teaspoons kosher salt
2 teaspoons ground cumin
Juice of 1 lime
1 tablespoon white wine vinegar 

Method:
Pre-heat oven to 400 degrees F.

Place vegetables on a baking sheet and roast in pre-heated oven for 12-15 minutes.  Remove vegetables from oven and add to blender or food processor, along with salt, cumin, lime juice, vinegar and cilantro.  

Using the pulse function, blend to desired chunky texture.  Check for seasoning, serve and enjoy!
(Cook's Note: If a mild salsa is preferred, halve the jalapeno peppers and remove the ribs and seeds before using.) 
 
SHARE:

Tuesday, May 12, 2015

Chilled Red Pepper Soup

So there I was recently--in my kitchen and trying to decide what to cook for dinner.  Oftentimes my taste for something will steer me right away, but on this occasion it wasn't happening.  So I did what any card-carrying food lover would do next--I reached for my sources of inspiration, specifically my Ottolenghi cookbook.  I hadn't cooked from it yet, so I decided that it was time that I finally break it in.

As soon as I could tear myself away from all the glorious dessert recipes (that's honestly what drew me in most when I considered buying this book), I stumbled upon a perfect, warm weather recipe--a chilled version of Red Pepper Soup.


 I'm quite the fan of Red Pepper Soup and my usual preparation, until now, had been a warm, roasted red pepper version.  But hey, it's Spring and the temperatures are rising, so a chilled fresh red pepper version sounded like the refreshing fare I especially crave this time of the year.

Peppers, herbs, aromatics, spices and seasonings combine for a beautiful puree accented with the texture of fresh vegetables stirred in at the end.  Finished off with a garnish of more fresh herbs--and my special addition of a scrumptious, flaky puff pastry crouton--rounded out this simple, yet satisfying, soup.

Happy Eating!

Chilled Red Pepper Soup
Recipe adapted from Ottolenghi The Cookbook

Ingredients:
1 large onion
3 tablespoons olive oil
8 sage leaves, finely chopped
4 large red peppers
2 bay leaves
2 teaspoons ground cumin
3/4 teaspoon salt
1 teaspoon sugar
1/2 teaspoon red pepper flakes
2 cups chicken or vegetable stock
Grated zest of 1/2 lemon
1 clove garlic, crushed
Fresh basil leaves, chopped
Fresh parsley, chopped
Puff pastry dough
1 egg

Method:
Peel the onion and chop it coarsely.  Heat the oil in a large saucepan.  Add the onion and sage and saute over medium heat for 5 minutes, until the onion is translucent.

While the onion is cooking, halve the peppers lengthwise.  Take a pepper half, remove the seeds and white flesh, and cut it into 2/3-inch/1.5 cm dice.  Set aside.

Remove the sees from the rest of the peppers, coarsely chop them, and stir into the saucepan with the onions.  Add the salt, bay leaves, cumin, sugar and red pepper flakes.  Saute for another 5 minutes.  Add the stock and bring it to a gentle simmer.  Cover the pot and cook over very low heat for 15 minutes.

Once the peppers are soft, remove the bay leaves from the soup.  While still hot, use a regular blender or an immersion blender to puree the soup until it is totally smooth.  Leave to cool down a little.

Once the soup is just warm, stir in the diced red pepper, lemon zest, and garlic.  Leave until it becomes room temperature and then refrigerate for a few hours or overnight.  Remove soup from the fridge half an hour before serving.  Stir well, taste and adjust seasoning as needed.  Sprinkle over a generous amount of chopped basil and parsley and top with a crouton.  Serve and enjoy!

Flaky Croutons
Preheat oven to 400 degrees F.

Roll out, thawed (but chilled) dough on a lightly floured surface.  Use a biscuit or cookie cutter for desired shape and cut dough into individual croutons.  

Place dough on a parchment lined baking sheet and using a fork, prick holes into the dough.  Brush with egg wash (1 egg beaten) and sprinkle with salt and pepper.

Bake in oven until golden brown on top, about 8-10 minutes.  Remove from oven, serve and enjoy! 


SHARE:
© D.M.R. Fine Foods. All rights reserved.
MINIMAL BLOGGER TEMPLATES BY pipdig