Friday, December 18, 2020

Holiday Eats: Sugar and Spice Straws with Orange and Walnuts


I can barely think 'holidays' without thinking sugar and spice and everything nice.  So when I stumbled upon a sugar and spice rendition of classic cheese straws, you can guess my elation--and equal determination to bring them to life in my kitchen.

This past weekend, I made good on that promise and spent a sunlit Sunday afternoon baking these delicacies, while singing and bopping along to tunes from my Christmas playlists, while relishing the fragrant wafts that filled my kitchen.  (And because you know how seriously I take self care, creating moments of happy and bliss, like this, are a priority.  And even more so against the backdrop of 2020.  So remember to take time to be good to you.)


Back to the recipe, it marries the warmth of five spice and cinnamon to bright citrus--and sugar, of course. :) As an added bonus, walnuts give great texture, along with nutty goodness, and flaky puff pastry brings it all together.  So as you're warming your oven in the days ahead, add this easy recipe to your repertoire.  The results are gorgeous, to boot, so no one has to know what a cinch they were to make.  It'll be our little secret.

And if I haven't raved enough already, you can serve them any number of ways, from cocktail party bites, as a part of a cheese board, paired with bubbly, or as an anytime snack.  


However you indulge, you're in for...Happy Eating!

Sugar and Spice Straws with Orange and Walnuts

Ingredients:

3/4 cup sugar

2 tablespoons five spice powder

1 teaspoon cinnamon

Zest of an orange

1/2 cup walnuts, finely chopped 

2 sheets frozen puff pastry, thawed


Method:

Preheat oven to 400 degrees F

In a small bowl, combine sugar, five spice and cinnamon.

Roll out each pastry sheet to approximately 11in. square (no need to stress; just do your best, like I did!) Sprinkle half the sugar mixture evenly on one sheet. Follow with walnuts and orange zest.

Take the second sheet and lay directly on top of the first sheet.  Sprinkle remaining sugar mixture on top. Use rolling pin and roll out further (you'll also be pressing the sugar into the pastry by doing this) in one direction to form a rectangle that's approximately 11in. x 13in. 

Cut into 1/2 in. strips and transfer to a parchment lined baking sheet. (I used two to space them out.) Hold both ends and twist 3-4 times to form a spiral.  Pinch ends tightly to avoid unraveling while in the oven.  Bake for 15-20 minutes, rotating sheet pan(s) once, until deep golden brown.

Allow to cool on sheet pan.  Serve and enjoy!

Recipe adapted from Peter Som


SHARE:

Tuesday, July 21, 2020

Grilled Shrimp Lettuce Wraps


Frozen shrimp has always been a go-to staple in my freezer--and especially so during the quarantine, shelter-in-place, days of late.  Besides going from frozen to thawed within minutes, there is something comforting about knowing that you've got seafood virtually on-demand and waiting to be transformed into as many delicious iterations as your imagination can muster.

So this past Sunday, after a morning walk, followed by an online worship service, and re-watching Hamilton (squeal!), my mind went to what's for dinner.  And in keeping with my already low-key Sunday vibes, I decided to keep it simple.

What resulted was simple in preparation, indeed, in that I had all of the ingredients on hand in my fridge, but by no means simple in final wow-appeal and delicious-ness.  Translation: it. was. so. good.


Grilled shrimp (I grilled my shrimp on my indoor smokeless grill for extra ease), lettuce leaves to serve as the bed and wrap, piquant scallions, juicy grape tomatoes, hothouse cucumber slices, and a punchy lime vinaigrette, made for one good 'til the last bite creation.  The lightness of the dish (perfect for Summer) x the big flavors made this an instant favorite.  It's a gorgeous meal-in-one that can double as appetizers or a main course, depending on whether you're hungry or hangry. :)

Enjoy--and join me in finding delight in the simple pleasures of...

Happy Eating!

Grilled Shrimp Lettuce Wraps
Ingredients:
Shrimp, peeled and deveined
Kosher Salt
Freshly Ground Pepper
Old Bay Seasoning
Worcestershire Sauce
Tabasco
Olive Oil
Lettuce leaves (Boston or Bibb, recommended)
Grape tomatoes, halved
Scallions, chopped (white and green parts)
Hothouse cucumber, thinly sliced
Lime Vinaigrette (recipe follows)
Flaked sea salt for garnish (optional)

Method:
Place shrimp in a bowl and season to taste with salt, pepper, Old Bay, Worcestershire, Tabasco and oil; toss ingredients to combine. Grill shrimp until just done about 2 minutes or so per side. While shrimp is grilling, prepare vinaigrette.  Once done, remove shrimp and drizzle with some of the vinaigrette.  Toss to coat and set aside.

Arrange lettuce, tomatoes, scallions, cucumber and shrimp on a platter.  Place remaining vinaigrette in a dish/bowl and add to platter.  Garnish with a light sprinkle of flaked sea salt to finish, if using.  To assemble, place cucumber, tomatoes, shrimp and scallions on lettuce leaf.  Garnish with a drizzle of vinaigrette to finish--and enjoy!

Lime Vinaigrette
Ingredients:
Juice of 1 lime
Teaspoon of Dijon mustard   
1/2 teaspoon of honey
Kosher salt and ground pepper to taste
1 Tablespoon of Extra Virgin Olive Oil  

Method:
Whisk together lime juice, mustard, honey, salt and pepper.  Drizzle in oil and whisk until emulsified and fully incorporated. (Cook's Note: I like my vinaigrette with a good acidic punch so I typically use less oil than is standard.  Feel free to modify with more oil, as desired.  And you can also double the original recipe for more vinaigrette. Store remaining vinaigrette in an airtight container in the refrigerator for up to a week.) 


SHARE:

Friday, October 16, 2015

Buffalo Hot Wings

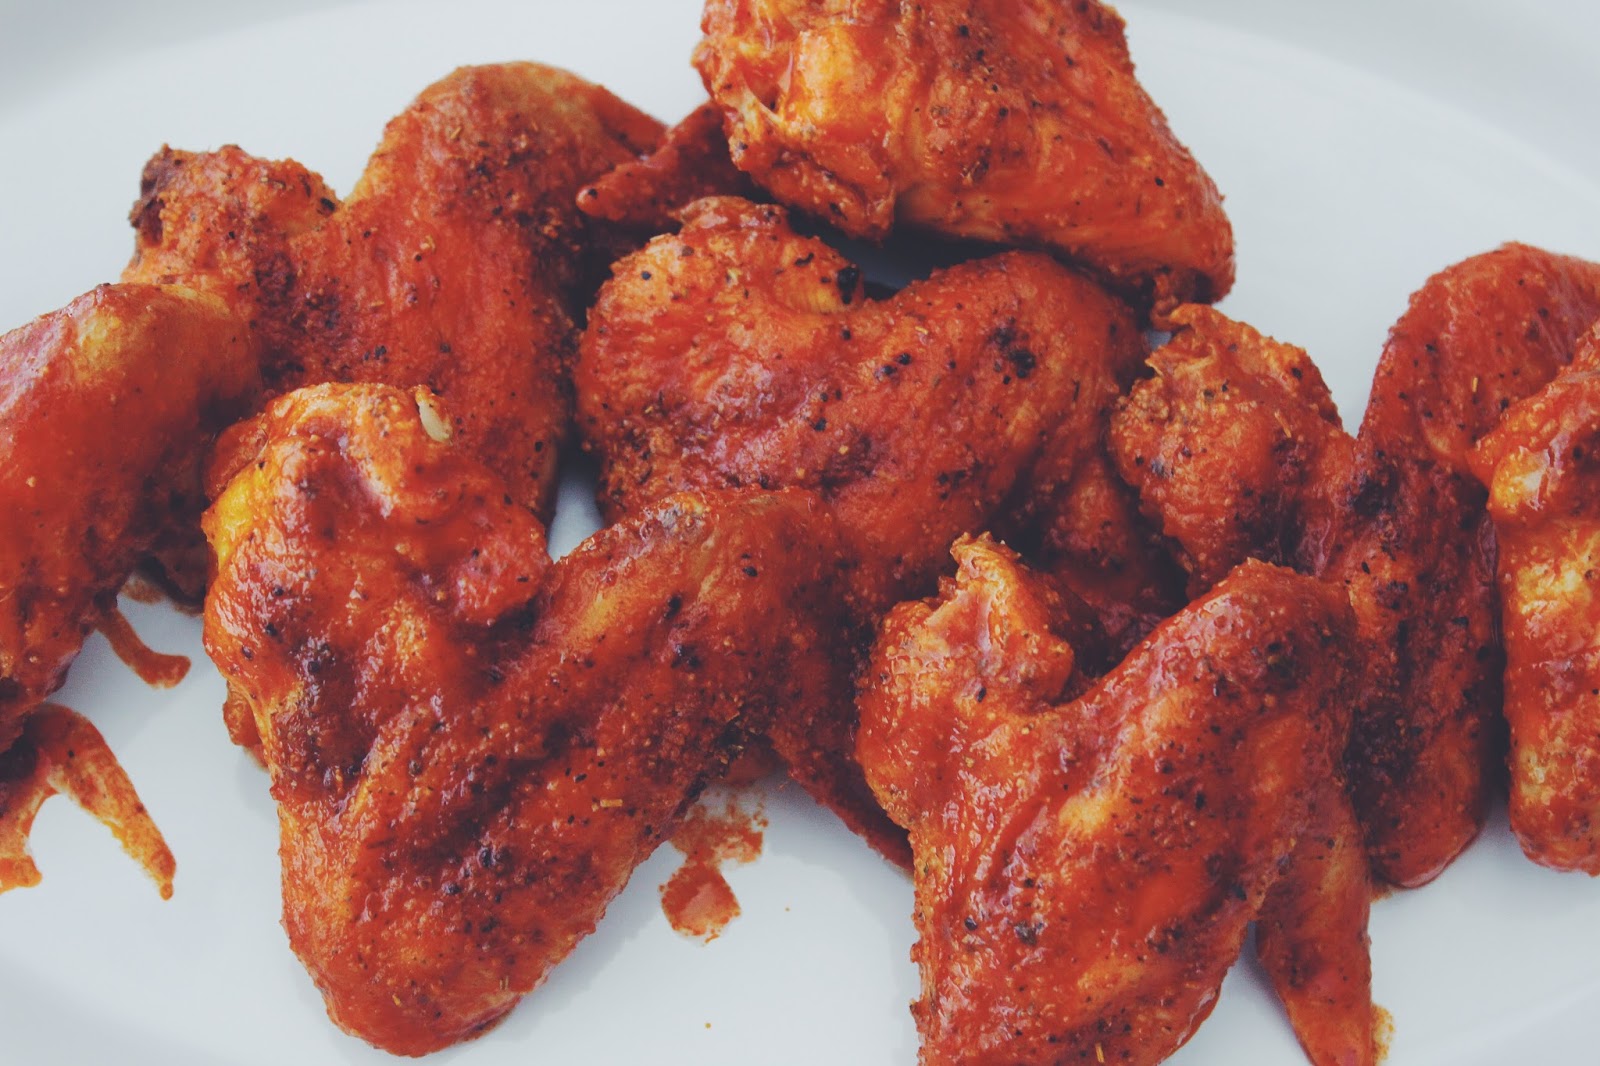
I wish there were adequate words to explain how so very seriously I take my hot wing indulgence.  And I have my mother to blame for this.  The day she began making hot wings for our family years ago was the day my obsession with the crispy, saucy, spicy guilty pleasure began.  Like a short-order cook, she achieved the perfect marriage of super crispy skin and the best buffalo sauce (translation: thick enough to coat the wing without separating into its respective hot sauce and butter parts, with a tangy kick to match.)

And so, from then until now, my quest for the perfect hot wing (besides my mama's) has always been about crispy skin and the perfect sauce.  And here enters my own fuss-free, scrumptious recipe that I began making a little while ago and can't rave about enough. 


First off, they're baked--not fried.  So for those who care, this is now a guilt-free indulgence! And the two ingredient sauce brings the tangy, vinegary, salty, spicy zip that all buffalo hot wings should be known for.  The perfect hot wing, in my kitchen, without the grease or the guilt, is euphoric.  It's the best winning combination I've come across in a while and when you make them, I'm sure you'll agree.

Happy Eating!

Buffalo Hot Wings
Ingredients:
2 lbs. chicken wings
Salt, pepper and garlic powder, to taste (or a poultry seasoning blend)
3/4 cup of hot sauce (recommended: Louisiana hot sauce)
1 tablespoon of butter
 
Method:
Preheat oven to 425 F.

Pat the skin of the wings dry with a paper towel to absorb any excess moisture.  Inside a large baking dish, season wings liberally with salt, pepper and garlic powder (or desired seasoning blend).  Place dish in preheated oven and bake for 40-45 minutes, or until skin reaches desired level of crispness.  

Remove wings from oven and set aside.  Melt butter into hot sauce, stirring occasionally, and bring sauce to a brief boil.  Lower heat slightly and allow sauce to continue to simmer, while reducing and thickening, about 5 minutes longer.  (Cook's note: adjust ratio of sauce to butter, as desired.  You may also add a squeeze of fresh lemon juice to reduce the spiciness.)  

Dip each wing in buffalo sauce to coat. Serve and enjoy! 

SHARE:

Friday, September 4, 2015

Summer's Best: Crispy Flatbread with Figs, Blue Cheese & Prosciutto

Holiday weekends call for good food, among other things.  Perfectly crisp and delicious homemade flatbread, topped with slightly warmed fresh figs, barely melted blue cheese and salty prosciutto is a party perfect bite--requiring little fuss--that should be on your menu agenda.

The freshly baked flatbread is probably the easiest homemade dough you'll ever make--and the rest is gravy from there, as you assemble the fig, cheese and prosciutto toppings.  Oh, and I can't forget that impeccable finishing touch of a drizzle of good quality honey.

With only a few days remaining in Summer, there's no time to waste in enjoying the remainder of the season's bounty.  And bringing sweet, juicy figs to the table is the perfect way to indulge!

Happy Eating!

Crispy Flatbread with Figs, Blue Cheese & Prosciutto
Ingredients:
  • 1 3/4 cups unbleached all-purpose flour
  • 1 teaspoon baking powder
  • 3/4 teaspoon salt
  • 1/2 cup water
  • 1/3 cup olive oil plus more for brushing
  • Flaky sea salt such as Maldon
  • Fresh figs, halved
  • Blue Cheese (Roquefort recommended)
  • Prosciutto, thinly sliced
  • Honey, for drizzling
Method:
Preheat oven to 450°F with a heavy baking sheet on rack in middle.

Stir together flour, baking powder, and salt in a medium bowl. Make a well in center, then add water and oil and gradually stir into flour with a wooden spoon until a dough forms. Knead dough gently on a work surface 4 or 5 times.

Divide dough into 3 pieces and roll out 1 piece (keep remaining pieces covered with plastic wrap) on a sheet of parchment paper into a 10-inch round (shape can be rustic; dough should be thin).

Lightly brush top with additional oil and sprinkle with sea salt. Slide round (still on parchment) onto preheated baking sheet and bake for about 6 minutes.  Remove from oven and top with blue cheese, prosciutto and figs. Return to oven and bake for an additional 5 minutes, until pale golden and browned in spots.

Transfer flatbread (discard parchment) to a rack to cool, then make 2 more rounds (1 at a time) on fresh parchment (do not oil or salt until just before baking).  Drizzle with honey to finish and enjoy!
Flatbread recipe adapted from Epicurious.com.


SHARE:

Saturday, February 7, 2015

Maple and Black Pepper Glazed Bacon


So everything's better with bacon?  Well, if that's really the truth (and it is), then what do you say for MAPLE AND BLACK PEPPER glazed bacon?!  I'll let you happily ponder that for a moment...and while you're at, go ahead and grab a baking pan and rack, the star ingredient, some maple syrup, and freshly ground black pepper--and get ready to indulge in the perfect bite (read: sweet-salty-spicy-all-in-one).  


I don't do (pork) bacon very often, admittedly, but when looking to bring an extra special touch to the table, this recipe is worth the extra indulgence.  Pair with pancakes, or any of your favorite breakfast and brunch bites--or even serve as an indulgent appetizer course for "can't get enough" noshing.  

No matter how you slice serve it, it's guaranteed to please and evoke...Happy Eating!

Maple and Black Pepper Glazed Bacon

Ingredients: 
1/2 lb. thick cut bacon
Maple Syrup
Freshly Ground Black Pepper

Method:
Preheat oven to 400 degrees F.

Place a baking rack over a baking pan and place bacon on rack in a single layer.  Roast bacon in preheated oven for 15-20 minutes, until it begins to crisp. 

Remove pan from oven and brush bacon on each side with the syrup and sprinkle with pepper.  Return pan to oven and continue to roast for another 3-5 minutes until crisped through.  Remove from oven and serve immediately.  Enjoy!

(Cook's Note: If you don't have a baking rack, place bacon on a baking pan in a single layer.  Before adding the syrup and pepper, remove bacon and drain the excess fat from the pan.  Also allow bacon to drain on paper towels for a couple of minutes before serving to blot any additional fat.)

   
SHARE:

Tuesday, May 13, 2014

The Best Guacamole


If you've never tried your hand at homemade guacamole, today's post will give you just what you need to finally check it off your bucket list--and remove any excuses for doing otherwise.  How can I be so sure?  Because beyond the fulfillment of making it (or anything, really) from scratch, is the realization that it's truly quite easy to create amazing "guac". 

The essentials?  Buttery, ripened avocados. Fresh tomatoes. Onion. Garlic. Jalapeno. Cilantro. Salt. Freshly squeezed lime juice. 

  
Got it?  Then you're ready to make the freshest, most delicious, "they keep asking me to bring the 'guac'", guacamole you've ever tasted.  Within minutes of assembling your ingredients, you will have a creamy, decadent bite that's worthy of your favorite tortilla chips, atop chili or soups, slathered on toast, piled on tacos--or whatever your pleasure! 

Happy Eating!

The Best Guacamole

printable recipe

Ingredients:
3 softened, ripened avocados
2 roma tomatoes, diced with seeds removed
1 jalapeno, minced (remove seeds to reduce heat)
1-2 garlic cloves, minced
1/2 onion or medium shallot, finely diced
Juice of 1-2 limes
Kosher salt to taste
Bunch of cilantro, roughly chopped

Method:
Peel avocados, place in a medium bowl and roughly chop or mash.  Add in tomatoes, jalapeno, onion, garlic, lime juice and salt.  Mix to combine and taste for seasoning.  Sprinkle in cilantro and give a final stir to combine.  Enjoy!


SHARE:

Friday, April 4, 2014

Shaved Vegetable Salad

Spring on a Plate: Shaved Vegetable Salad
With Spring finally making its arrival, one of things I relish most is the lighter touch I can give to dishes.   With this inspiration in mind, and with the kinder weather in tow, I plan to ramp up my visits to local farmers markets to enjoy more of the fresh, vibrant produce that’s perfect for spring eating.

I got a slight head start recently with this simple, yet elegant and delicious, Shaved Vegetable Salad.  Driven by the vegetables’ vibrant colors, I love bringing this dish together, in a matter of minutes, and enjoying it as an appetizer or light lunch course.  Oozing with the vibrancy of this season, it is nothing short of Spring on a plate.

Happy Eating!

Shaved Vegetable Salad with Classic Vinaigrette

Ingredients:
Zucchini
Yellow Squash
Asparagus
Brussels Sprouts
3 tablespoons red wine vinegar
½ cup extra virgin olive oil
½ teaspoon Dijon mustard
Generous pinch of sugar
Salt and pepper, to taste
Sprinkling of fresh herbs (optional)

Method:
For Salad: Using a vegetable peeler, shave raw zucchini, squash, asparagus and brussels sprouts. Stack the zucchini and squash shavings and roll into small circles.  Stand the circles up on the serving dish and adorn with the asparagus and brussels sprout shavings.  Drizzle with the vinaigrette (recipe follows) and garnish with a sprinkling of fresh herbs. 

For Vinaigrette: Combine the vinegar, mustard, sugar, salt and pepper and whisk to combine.  Slowly drizzle the olive oil into the vinegar mixture and continue whisking until the dressing thickens.  Store refrigerated in an airtight container.


SHARE:

Friday, February 28, 2014

Mini Sausage Rolls

Puff pastry has been in my life a lot recently.  You may recall these chocolate croissants that served up a bit of sweet goodness not too long ago.  And now--just a little while later--I'm back again with a savory rendition of this most loved star ingredient.  A small, elegant, scrumptious rendition that makes for the perfect appetizer, snack or cocktail bite--sausage in puff pastry, to be exact.  


I started with my favorite Italian sausage and encased it in the flaky, buttery puff pastry dough, accented with a smear of dijon mustard (for extra kick) and a sprinkling of fresh herbs (for extra joie de vivre--and color!).  Sealed and crowned with flaked sea salt and freshly ground pepper, they were baked off to golden, succulent perfection and soon devoured--I mean savored bite by bite. :)

Great things often come in simple and small packages, and these mini sausage rolls more than measure up. 

Happy Eating!

Mini Sausage Rolls

Recipe courtesy of Lorraine Pascale

(Cook's Note: I "free-styled" a bit by using my sausage of choice, adding dijon, using herbs I had on hand, etc., and didn't stress too much about the exact measurements of the dough.  It's an easy recipe that lends itself to your creativity, so have fun, and I'm sure the results will show!)


SHARE:

Wednesday, December 18, 2013

Savory Thyme-Parmesan Cookies

Over the weekend I dropped into one of my favorite stores for everything girly, girl, Anthropologie.  As these things usually happen, I saw (and couldn't resist) adorable little 'extras' like this that I love to bring into my kitchen.  One of my favorites, however, was a clever cookie stamp, replete with a fun recipe and message that resonates through all of my cooking: Made With Love.  And I was sold (again!).  


Rather than the sweet cookie variety (that we all love), the recipe serves up a savory, crispy cookie-cracker of sorts that's perfect for serving as an appetizer or paired with either fruit, cheese, fondue, or along with a great sip.  To add a bit more savory flair, I tossed in some freshly grated Parmigiano Reggiano and within the hour I had homemade crackers for the noshing.

Happy Eating!

Savory Thyme-Parmesan Cookies 

Ingredients:
3/4 cup flour
3 tablespoons butter, semi-cold
1 teaspoon salt
1 tablespoon fresh thyme leaves
2 tablespoons grated Parmesan

Method:
Combine flour, butter, salt and cheese in a bowl.  Mix quickly with your hands, adding drops of ice water as you go to bring the dough together and make it smooth.  Wrap dough in plastic wrap and refrigerate for at least 30 minutes.

Pre-heat oven to 350 degrees F.

On a well floured surface, roll out the dough to 1/4 inch thickness, cut out the cookies (and stamp them if using a cookie stamp).  Bake the cookies for 25 minutes in the pre-heated oven and enjoy!
Recipe adapted from Yvette Van Boven, Copyright 2013


SHARE:

Monday, November 25, 2013

Sweet Potato Crostini

I have few entertaining rules, generally, but there are a handful that will serve any host or hostess well when looking to keep your guests satisfied as your time together unfolds.   And when a big meal is involved, having a little nibble or two on hand for noshing, until dinner is ready to be served, is one such rule and a great way to go.  Your guests will be able to eat just enough to keep growling stomachs at bay, while you're free to apply finishing touches on the details of the gathering--without the guilt of holding out.

Easy appetizers and finger-foods are my favorites to serve and a savory crostini can always be counted on for a scrumptious first bite.  (And an even better one when it's sweet potato crostini!)  Tender sweet potatoes seasoned with cinnamon, sugar, cayenne, salt and maple, then blended to a luscious puree and spread on warm, toasted baguette slices, will leave everyone happily wanting more and eager for what comes next. 

Now that's how I like to entertain.  What about you?

Happy Eating!

Sweet Potato Crostini

Ingredients:
2 medium sweet potatoes
3/4 teaspoon ground cinnamon
1/4 teaspoon cayenne
1 1/2 teaspoons sugar
1/2 teaspoon Kosher salt
1 tablespoon maple syrup
1 baguette, sliced

Method:
Preheat the oven to 350 F.  Place baguette slices on a baking sheet and bake for 6-8 minutes, until toasted through.  Set aside.

While the baguette is toasting, score the sweet potatoes with a knife, making several slits in the skin.  Place in the microwave and cook on high heat until tender (about 6-8 minutes, per potato).

Peel the potatoes and place the flesh in a medium sized bowl. Add in the cinnamon, cayenne, sugar, salt and maple and blend with a hand-mixer until thoroughly mixed and smooth in texture.  Taste for seasoning and adjust as needed.  Blend again if more seasonings added.  

Using a spoon or pallet knife, spread the sweet potato puree onto the baguette slices.  Serve and enjoy!

 
SHARE:

Thursday, September 12, 2013

Toast with Lemony Pea Mash


I love it when one good thing leads to another.  You may recall my excitement over preserving lemons a while back (one scrumptiously good thing).  The next step in my preserving adventures has been to find ways to indulge in these delicacies.  And as it often happens, while reading through an issue of Bon Appetit magazine, I discovered the recipe for Toast with Lemony Pea Mash, which calls for, among other things, preserved lemons (another good thing).

So now, I'm happily on the way to discovering and devouring recipes that will bring this star ingredient into my cooking and noshing.  And I couldn't think of a better (or more satisfying taste) to lead the way than warm toast slathered with a sweet, lemony, herbaceous and garlicky "mash". 

As a quick bite, hors d'ouevres, late nite snack, or whatever, take the time to relish this simple recipe whose flavors are anything but.

Happy Eating!

Toast with Lemony Pea Mash

Ingredients:  
1 garlic clove, quartered 
1/4 cup fresh flat-leaf parsley leaves 
3 tablespoons extra-virgin olive oil, divided, plus more for toast
Kosher salt 
2 cups shelled fresh peas (from about 2 pounds pods) or frozen peas, thawed 
2 tablespoons chopped fresh chives 
1 tablespoon finely chopped preserved lemon peel (from 1/2 preserved lemon), divided 
1 tablespoon (or more) fresh lemon juice 
1/2 teaspoon crushed red pepper flakes plus more for serving 
Freshly ground black pepper
Slices of ciabatta or other rustic bread, toasted


Method: 
Combine garlic, parsley, 1 tablespoon oil, a pinch of salt, and 1/2 cup water in a small saucepan. Add peas and cook over medium heat, stirring occasionally, until peas are tender, about 5 minutes for fresh peas, about 2 minutes for frozen. Drain, reserving cooking liquid.
Transfer pea mixture to a food processor; pulse until a coarse paste forms. Transfer to a medium bowl; mix in chives, 1/2 tablespoon preserved lemon peel, 1 tablespoon lemon juice, 1/2 tsp. red pepper flakes, and 2 tablespoons oil. Stir in reserved cooking liquid by tablespoonfuls until mixture is still thick but spreadable. Season pea mash with salt, black pepper, and more lemon juice, if desired.
Drizzle toast with oil; top with pea mash, sprinkle with remaining 1/2 tablespoon preserved lemon peel and more red pepper flakes, and drizzle with more oil.
DO AHEAD: Pea mash can be made 1 day ahead. Cover and chill. 
Recipe courtesy of Bon Appetit

 
SHARE:

Saturday, February 23, 2013

And the Oscar Goes To...

Who doesn't love an occasion (big or small) to celebrate and nosh on delectable bites?  With the Oscars airing this weekend, many are taking their cues for yet another occasion to entertain and bring some fun into the kitchen. 

If you're planning your own fete, check out these "Oscar worthy" offerings that can add a delicious flair to your affair!

1. Smoked salmon dip, mini lobster rolls, and a whole lot of other goodness, are included in this list of 10 easy appetizers (Bon Appetit)

2. Toast to your favorite nominees with this fun mocktail (Martha Stewart)

3.  Enjoy a scrumptious dessert for a sweet finish (Epicurious)

Happy Eating!

*Photo Credit


SHARE:

Thursday, February 16, 2012

The Perfect Bite: Roasted Shrimp Cocktail

When I think of a versatile bite, shrimp definitely tops the list.  Whether it's shrimp-n-grits, shrimp scampi, classic fried shrimp, shrimp gumbo, or some other favorite preparation, there is seemingly no end to the many interpretations that this succulent ingredient can take on.  In fact, one of the most universal shrimp dishes would have to be the beloved shrimp cocktail.  

Perfect for entertaining and feasting, alike, shrimp cocktail needs no introduction, but my slightly rustic spin just might.  Departing from the traditional preparation, this rendition serves up what we love most about cooking: an easier method (if that's possible!) that's laden with even more flavor possibilities.  Roasted shrimp--served cocktail style--is a delicious revelation that you'll relish again and again.  And when something is this simple and good, why not?

Happy Eating!

Roasted Shrimp Cocktail

Ingredients:
Raw shrimp, peeled and deveined (but with tail intact)
Olive oil
Seasoned salt or kosher salt
Freshly ground black pepper
Garlic powder
Freshly squeezed lemon juice
Cocktail sauce
Lemon wedges for serving

Preheat oven to 425 degrees F.

Line a rimmed baking sheet with foil.  Place shrimp on baking sheet, drizzle with oil and season to taste with salt, pepper and garlic.  Toss together to coat well and roast in heated oven for 5-6 minutes.  Remove shrimp from oven and dress with lemon juice.  Serve warm or at room temperature, accompanied with cocktail sauce for dipping and lemon wedges.  Enjoy!

*Cook's Note: Experiment with different spice and flavor combinations such as paprika, cumin, cayenne pepper, or whatever tastes you especially enjoy.  Just remember to go lightly so that the flavors don't overpower the delicate shrimp. 
Image  
SHARE:

Friday, August 19, 2011

The Perfect Nibble: Blue Cheese and Walnut Crackers

Blue Cheese and Walnut Crackers
The other day I decided to shop my refrigerator.  Translation:  I did (a rather quick) once-over for inspiration and ideas for using up the myriad ingredients that were in store.  Almost instantly, my eyes fell on the blue cheese I had bought a little while back and the walnuts that I typically keep on hand.  And what happened next was pure decadence.

Marrying these two ingredients into a simple, yet indulgent, recipe was about to become a fete accompli--and the spawn of some satiating snacking.  I had been wanting to bake these crackers since I discovered the recipe way back when, and now, with the star ingredients on hand, the time had come.  In a matter of sheer minutes, I had the beautiful, sky blue, walnut-encrusted dough ready for its chill down.  And since it was a late-night start, I baked them off the next day.

I've been trying to pace myself with each salty, tangy, nutty, buttery bite.  While simple to make, these crackers carry a delicious intermix of flavors that makes each bite somehow more delectable than the last.  And to add to their grandness, I serve them with a perfectly sweet offset of fig jam.  It's the salty-sweet, crumbly-smooth, heavenly contrast that yields the perfect nibble.

Easily their own 'cheese and cracker' plate, they are a great addition for cocktail and tea parties, appetizer courses, or my own personal favorite--anytime indulgence.

Happy Eating!

Blue Cheese and Walnut Crackers

Ingredients:
1/4 pound (1 stick) unsalted butter, at room temperature
8 ounces blue cheese, crumbled, at room temperature
1 1/2 cups all-purpose flour
1 teaspoon freshly ground black pepper
1 extra-large egg beaten with 1 tablespoon water for egg wash
1/2 cup roughly chopped walnuts

Instructions:
In the bowl of an electric mixer fitted with the paddle attachment, cream the butter and blue cheese together for 1 minute, or until smooth. With the mixer on low speed, add the flour, salt and pepper and mix until it's in large crumbles, about 1 minute. Add 1 tablespoon of water and mix until combined. 


Dump the dough onto a floured board, press it into a ball, and roll into a 12-inch long log. Brush the log completely with the egg wash. Spread the walnuts in a square on a cutting board and roll the log back and forth in the walnuts, pressing lightly, and distributing them evenly on the outside of the log. Wrap in plastic and refrigerate for at least 30 minutes or for up to 4 days.


Meanwhile, preheat the oven to 350 degrees F.


Cut the log 3/8ths-inch thick with a small, sharp knife and place the crackers on a sheet pan lined with parchment paper. Bake for 22 minutes until very lightly browned. Rotate the pan once during baking. Cool and serve at room temperature. Store in an air-tight container to maintain freshness.

Recipe courtesy of Ina Garten 


SHARE:

Tuesday, April 5, 2011

Foodie Vocabulary: Crostini vs. Bruschetta (Know the Difference?)

Photo Credit: Martha Stewart
In the world of food, there's no shortage of 'foodie jargon'--language that belongs squarely within the culinary spectrum.  But even still, there are times when some of these words get tossed around so loosely, that it can leave even the most devoted foodie with question marks.  One such example is my encounters with the use of the terms crostini and bruschetta.  Seeing them used in what appeared to be almost identical applications, I couldn't quite discern the real difference.  So, while I continued making the delightful bites, the question mark still remained.  Until recently, that is, when I decided to slow down and answer this question once and for all.

Crostini (translated "little toasts" in Italian) is made from thin slices of grilled or toasted bread with toppings.  They are served as appetizers and even as garnishes for soups.  They can be dressed simply with olive oil, salt and pepper and/or herbs or a variety of meats, cheeses, vegetables. 

Bruschetta, on the other hand, is made from thicker slices of bread that are grilled or heated over coals, first being rubbed with garlic cloves and often served charred.  Like crostini, its most basic preparation includes a simple dressing of olive oil and seasonings, but more traditionally it's served with toppings of tomato and basil, and/or a host of other toppings.

So you can see that they really are much more alike than they are different, but alas subtle differences do exist justifying their individuality.  And no matter how you slice it (literally), I love these great bites.

For the road.....

Crostini with Lemon and Oregano 
My favorite way to enjoy crostini is simply toasting or grilling some bread and seasoning with olive oil, salt and pepper.  When I want to "take it up a notch", with no additional fuss, I add a squirt of fresh lemon juice and a sprinkle of dried oregano.  So good!

Ingredients:
Baguette, or other thin bread slices
Olive oil
Salt
Pepper
Juice of a lemon
Dried oregano

Preheat the oven to 350 degrees F.

Slice baguette into thin slices.   Drizzle with olive oil and sprinkle with salt and pepper.  Bake in the preheated oven for 6-8 minutes until crispy and golden.  Remove from oven, spritz with lemon juice and sprinkle with dried oregano.  Serve warm and enjoy!  

P.S.  What toppings do you like to use?
   
SHARE:

Monday, January 31, 2011

Potato and Kale Cakes

Potato and Kale Cakes
I started the New Year off with some specific intentions about food.  For the month of January, I have fasted from meats, sweets and bread.  And while this commitment required some adjustment, it was definitely made easier as I came across a great recipe or inspiration, like this one for Potato and Kale Cakes from Bon Appetit.

The promise of a crispy exterior married to a creamy interior, while delivering a delicious flavor profile of hearty greens, potato, herbs and spices, drew me in.  I had little doubt that this recipe would be a keeper.  And so it turned out to be.  I served them for dinner, but they could be equally great served as a lunch entree or appetizer course. 

Yes there are a few extra pans to wash now, but a satisfying bite in keeping with my "meatless-sweetless-breadless" January fare, is worth it.

Happy Eating!

Potato and Kale Cakes

Ingredients:
1 1/2 pounds unpeeled russet potatoes, scrubbed,
cut into 1-inch cubes
1/4 cup whole milk
2 tablespoons (1/4 stick) unsalted butter
1 teaspoon coarse kosher salt, divided
3 1/2 tablespoons extra-virgin olive oil, divided
1 cup chopped onion
1 large garlic clove, finely chopped
1/2 pound kale, center rib and stem cut from
each leaf, leaves coarsely chopped
1 tablespoon chopped fresh thyme
1/8 teaspoon ground nutmeg


Cook potatoes in a large saucepan of boiling, salted water until tender, about 25 minutes.  Drain; return potatoes to same saucepan.  Add milk and butter.  Mash potatoes (with peel) until smooth.  Season with 1/2 teaspoon coarse salt and 1/2 teaspoon pepper.  Transfer 3 cups mashed potatoes to large bowl and cool (reserve any remaining potatoes for another use).

Heat 1 1/2 tablespoons oil in large deep skillet over medium heat.  Add onion and garlic.  Saute until onion softens, about 5 minutes.  Increase heat to medium-high.  Add kale and thyme.  Toss until kale wilts, about 5 minutes.  Add kale mixture, 1/2 teaspoon coarse salt, 1/2 teaspoon pepper, and nutmeg to potatoes; blend.  Cool potato mixture 30 minutes.

Shape potato mixture by 1/4 cupfuls into 1/2-inch-thick patties.  Arrange on rimmed baking sheet.  [Do Ahead: Can be made up to 2 hours ahead.  Let stand at room temperature.]

Heat 2 tablespoons oil in large nonstick skillet over medium-high heat.  Add cakes and cook, without moving, until cakes are brown and crispy on bottom, 3 to 4 minutes.  Carefully turn cakes over.  Cook until brown on bottom, 2 to 3 minutes longer.  Transfer to plates, serve and enjoy.
SHARE:

Saturday, January 15, 2011

Mussels in White Wine

Mussels in White Wine

On a night in several Sundays back, I whipped up a delicious bowl of mussels steamed in a white wine broth.  I love seafood of (almost) every variety.  And mussels have become a favorite in recent years.  I enjoy grilling them, adding them to savory tarts--and oh yes, steaming them in flavorful, bread-sopping broths.

This recipe combines such robust flavors as saffron, tomatoes, thyme and garlic (just to name a few).  All together, they create a spicy broth that serves as the perfect "bath" for the mussels--and makes for the perfect excuse to dip warm, crusty bread, which is a not-to-be-forgotten plus of making and enjoying this meal.

Versatile enough to be served as an appetizer course or main entree, this dish serves up one delicious bite after another and kept me coming back for more until the bowl was literally clean!

Happy Eating!

Mussels in White Wine
Recipe adapted from Barefoot In Paris

 *Cook's Note:  The recipe was prepared to serve 2 and can be easily adapted to the original recipe which serves 6.

2.5 pounds mussels
1/3 cup all-purpose flour
1/2 teaspoon saffron threads
2 tablespoons unsalted butter
1 tablespoon olive oil
2 shallots, chopped
4 to 5 garlic cloves, minced 
1/2 cup chopped canned tomatoes, drained (4 ounces)
1/4 cup chopped flat-leaf parsley
2 tablespoons fresh thyme leaves
1 cup white wine
1 1/2 teaspoons kosher salt
3/4 teaspoon freshly ground black pepper  

Clean the mussels by putting them in a large bowl and covering with ~1.5 to 2 quarts of water and the flour and soak for 30 minutes.  Drain the mussels and remove the "beard" from each.  If they're dirty, scrub them with a brush under running water.  Discard any mussels whose shells aren't tightly shut.  Soak the saffron in 1/4 cup hot tap water for 15 minutes and set aside.

In a large dutch oven or stockpot, heat the butter and olive oil over medium heat.  Add the shallots and cook for 3 minutes; then add the garlic and cook for 1 minute more, or until the shallots are translucent.  Add the saffron with the soaking water, the tomatoes, parsley, thyme, wine, salt and pepper.  Bring to a boil.

Add the mussels, stir well, then cover the pot and cook over medium heat for 6 to 8 minutes, until all the mussels are opened (discard any that do not open).  With the lid on, shake the pot once or twice to be sure the mussels don't burn on the bottom.  Pour the mussels and the sauce into a large bowl and serve hot.
SHARE:
© D.M.R. Fine Foods. All rights reserved.
MINIMAL BLOGGER TEMPLATES BY pipdig