Saturday, January 22, 2022

Vegetable and Bacon Frittata


If raiding your fridge and bringing a meal together easily is your kind of thing, then a frittata is just what the home chef ordered.  I’ve always appreciated the easy touch and elegant finish that goes into making this Italian variation on an omelette.  

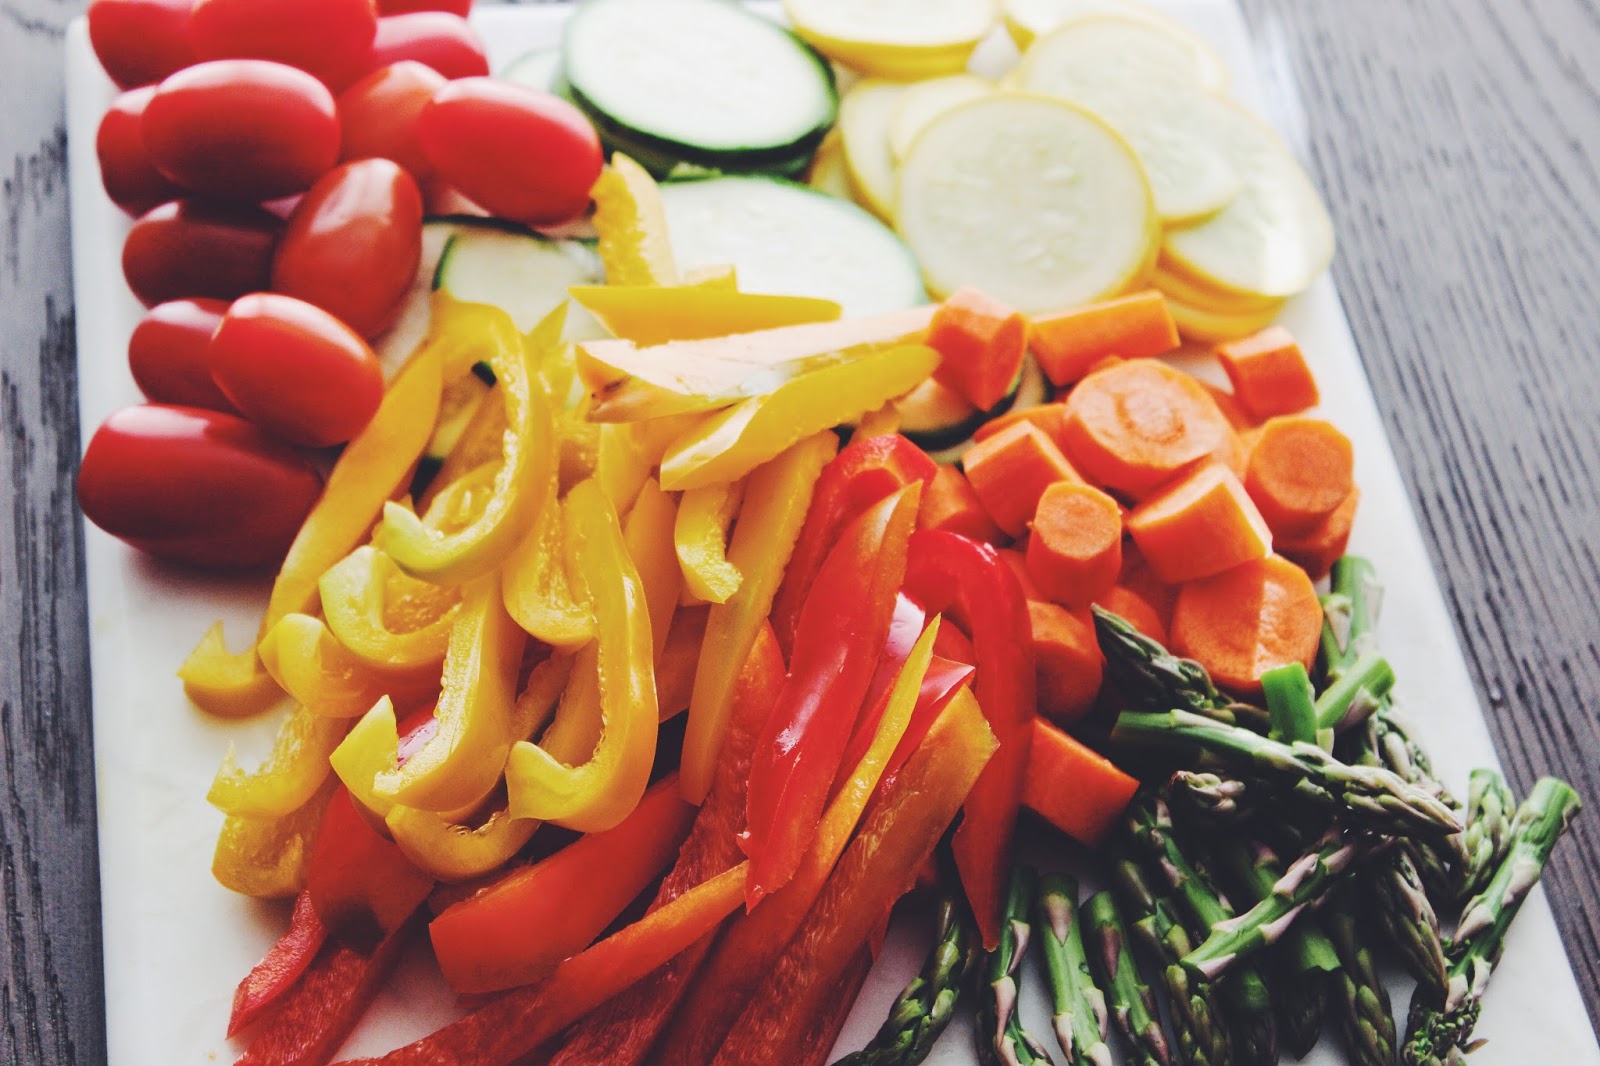
And while deciding what to make this past Sunday—that would match the ingredients I had on had (yes, I raided my fridge for this) and also yield a healthy, delectable bite—a frittata seemed to be the perfect fit.  Reminiscent of a crust-less quiche (or mini quiches), it is adaptable to whatever you want to toss into the skillet.


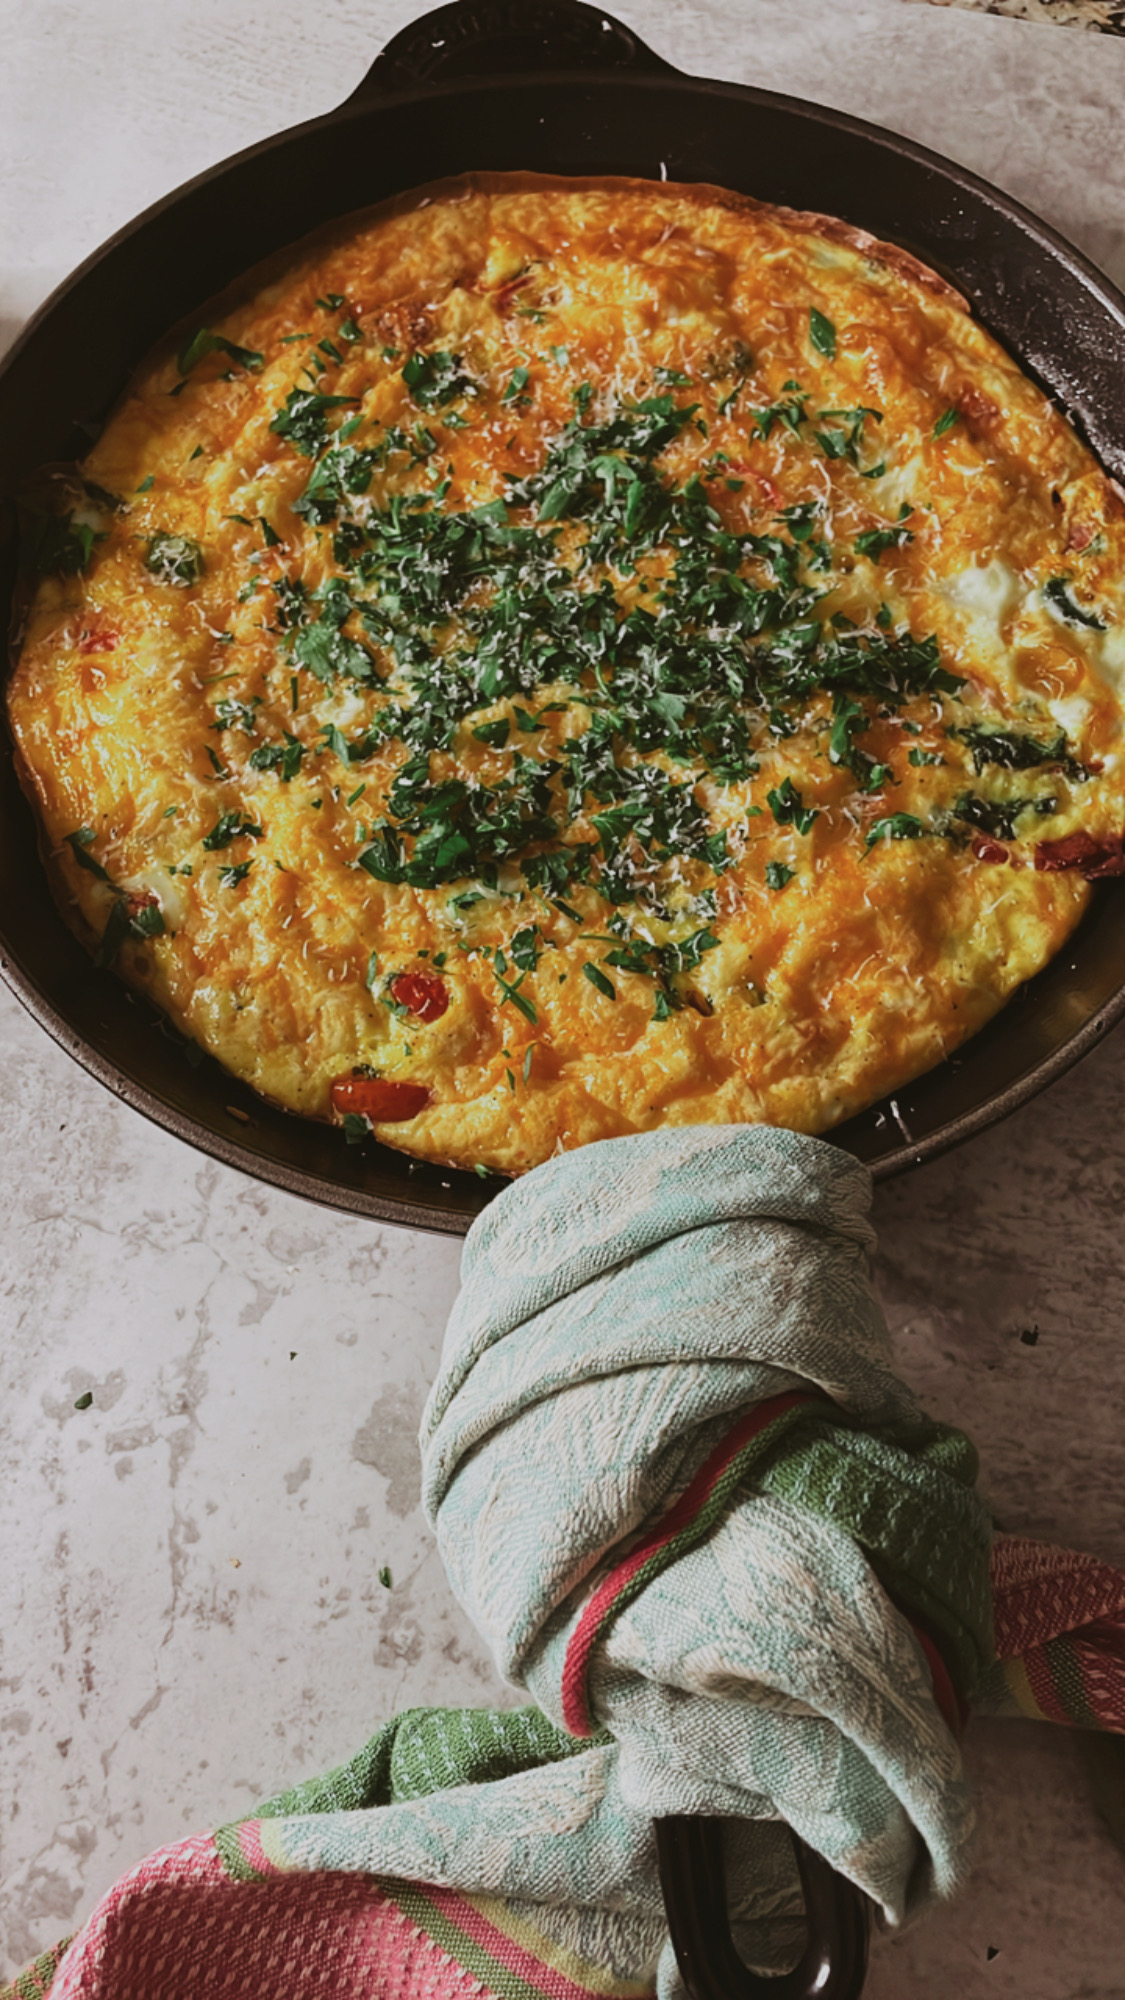
From a prep perspective, I cooked my turkey bacon and sautéed my vegetables before pouring in my cheese and egg mixture.  From there it was off to the oven to bake and set-up into a beautiful, golden finish.  And whether you’re indulging for breakfast, brunch, or anytime, it’s a superb dish to serve when feeding a crowd or a party of one.  Bonus? If you find yourself with leftovers, the individual slices make for the best ready-made breakfast in the days that follow.  


So now that I’ve hopefully piqued your desire to bring this dish to life (or a variation matching what you have on hand), let’s get on with what’s most important….


Happy Eating!


Vegetable and Bacon Frittata


Ingredients:

9 large eggs

3 scallions

1 sweet bell pepper

1 Chile pepper

5-6 strips of turkey bacon (cooked)

1 tbs. Olive oil

4 oz. Shredded cheese

1/4 cup milk

Cherry tomatoes, halved

A bunch (a couple of handfuls or so) of raw kale greens

Italian parsley, finely chopped

Parmigiano Reggiano

Kosher salt and freshly ground black pepper, to taste


Method:


Preheat oven to 400 degrees F.


Whisk together eggs, milk, cheese, salt and pepper in a large bowl.  Set aside.


Add oil to an oven-safe skillet and heat over medium-high heat (cast iron recommended, if pre-seasoned or enameled). Add in scallions, bell pepper, and Chile pepper and sauté until softened, about 2-3 minutes.  Add in the cherry tomatoes, kale and bacon and continue sautéing for another 2-3 minutes.  Pour in the egg mixture and place skillet in the pre-heated oven.


Bake for 18-20 minutes or until the top is set and golden-ish in color.  Remove from the oven (remember to use oven mitts!) and garnish with parsley and grated Parmigiano Reggiano. Serve and enjoy!


SHARE:

Thursday, April 5, 2018

Pretty in Pink: NYC's Pietro Nolita


I discovered Pietro Nolita, the all pink, intimately chic, yet casual, Italian eatery in New York City, on Instagram, amidst all the rave.

So when my travels landed me back in my favorite of cities during the recent Christmas holidays, there was no question that I would be making its acquaintance.  Had I considered its cuisine or food worthiness?  Not really.  Just the fact that it was ALL PINK and a girly girl's dream.

Pietro NoLita's Jewel Box Exterior
And so my plan of action began: decide on the day and time, find something pink to wear...because photos, and paint the town...red pink.  On the last night of my stay, we arrived for an early dinner before heading off to see the Rockettes Christmas Spectacular.  And those who know me best, know that an obligatory photo shoot ensued.  Despite the nightfall and blustery weather, I had to get photos of (and with) the adorable pink exterior before heading inside to settle in.

Once inside, more photos were in order, in between placing our orders and chatting up the staff.  And then there was the food.  Oh yes, food.  The reason you ultimately go out to dinner, no?  Now I was remembering the 'why' behind the 'what' of it all.  And I'm happy to say that my dish (a pan-seared sea bass) was delicious and my return is imminent to take in some of the house pasta.  So see, you really can go for the design thrills and leave satiated and...tickled pink. :)

Make it a place to dine whenever you find yourself in NYC looking for a quaint spot to sip and nosh--and it's okay if you don't want to mimic my all-pink enthusiasm.  I'm certain that you'll be enamored all the same by the cozy space and good eats.

Located in Soho (one of my favorite Manhattan districts), the kitchen opens daily from 11am and goes into the wee hours, serving lunch, brunch, and dinner.  There are no reservations, just loads of atmosphere and...

Happy Eating!

Pietro NoLita
174 Elizabeth Street
New York, New York 10012


SHARE:

Friday, May 12, 2017

Homemade Marinara and Meatballs with Creamy Polenta

Sundays and homemade comfort food go way back in my family.  From my youngest memories, I can recall coming together for Sunday dinner (whether with the extended village at my grandparents' home or the more intimate connection of my immediate family) and relishing the delight of a homemade feast of some sort.  And while the tradition isn't observed every Sunday (or even every other Sunday, if I'm being completely honest), I have carried the awe and ode to Sunday dinner, made up of good ole' comfort food, with me into my own adult world.

Last Sunday was one such instance.  Making my favorite homemade meatballs and marinara sauce was the highlight of my cooking foray.  And it was all things comforting--the relative ease of bringing the dish together, the anticipation of enjoying the finished product, memories of sharing this beloved dish in days gone by, and the welcomed twist I decided to add.

I broke with my tradition of serving my meatballs and marinara with pasta (linguine, to be exact) and recalled my desire to serve them over polenta one day, as inspired by Chef, Michael Chiarello.  And one day had come.  It was exactly the beautiful, finished dish that I was aiming for--and no less scrumptious.  (The Italians know their stuff!)  A big family style platter of the best comfort food you could imagine was the takeaway for happy mouths and satisfied tummies. 

I must add that this recipe doesn't require a Sunday, or a crowd, to make and enjoy.  It comes together easily enough to match a fast-paced weeknight equally as well as a lazy, indulgent weekend. 

So you choose when and where to indulge and savor....Happy Eating!

Recipe: Homemade Marinara and Meatballs with Creamy Polenta (simply substitute pasta for quick cooking polenta and enjoy!)
 
SHARE:

Monday, March 7, 2016

Pasta Primavera

This past weekend looked and felt like Spring.  And as much as I endeavor to enjoy each season fully, I can't deny that it made me wish for winter to hurry along so that the milder, sun-kissed days could settle in for good.

The infectious nature went beyond the weather and drifted into my kitchen--and the result was my favorite rendition of Pasta Primavera ("Spring Pasta" in Italian).  My take abandons the typical cream-laden dish and instead serves up bountiful fresh, vibrant vegetables that stand deliciously on their own.  Accents of Italian dried herbs, sun dried tomatoes and Parmesan infuse extra decadence--and robust flavor--that makes for a dish you'll want to savor throughout Spring--and beyond.


This dish was a hit at my Spring Pop-Up Cooking School last year--and I trust you'll find it to be a welcomed addition to your spring eating repertoire.

Happy Eating!

Pasta Primavera
Ingredients:
1 lb. linguine (or pasta of choice)
3 garlic cloves, minced
1 onion, diced
1 tablespoon Herbs de Provence
1 bunch of asparagus tips
1 zucchini, sliced
1 yellow squash, sliced
3 carrots, peeled and chopped
1/3 cup sun dried tomatoes in oil, chopped
1 red bell pepper, sliced
1 yellow bell pepper, sliced
1 pint cherry tomatoes
Kosher salt
Freshly ground black pepper
1/4 cup olive oil
Grated Parmesan, to taste

Method:
Heat olive oil over medium-high heat in a large skillet or saute pan.  Add onions to the pan and season lightly with salt and pepper.  Saute until they begin to soften and become translucent, about 4 minutes.  Add in garlic and herbs an saute for another minute.  Add in vegetables, except the cherry and sun dried tomatoes, and season lightly with a sprinkling of salt and pepper.  Cook until the vegetables begin to soften and become tender, about 7-10 minutesRemove mixture from pan and pour into a large bowl.  Stir in sun dried and cherry tomatoes and set aside.

Meanwhile, as the vegetables are cooking, bring a large pot of water to a boil and season liberally with salt.  Add in pasta to boiling, salted water and cook according to package instructions.  Drain pasta and reserve pasta water.

Pour pasta into bowl with vegetables and toss to combine, adding in reserved pasta water to moisten, as needed.  Taste for seasoning and garnish generously with Parmesan.  Serve and enjoy!    
Recipe adapted from Giada de Laurentiis 
SHARE:

Tuesday, September 2, 2014

{Savor the Season}: Summer Fruit Crostata

Summer Fruit Crostata
Now that Labor Day has passed, the official wind-down of Summer has begun.  But before bidding it a formal farewell, I plan to savor it a bit longer.  After all, the tastes of Summer are some of the brightest and most refreshing--and deserve to linger for as long as absolutely possible.

Stone fruits and berries happen to be some of my favorite summer indulgences.  Known to frequently devour them on their very own, I had no qualms recently in taking things up a notch by bringing them together with homemade, buttery pastry to yield one scrumptious dessert (and next day breakfast).  Summer Fruit Crostata, to be exact.


Perfectly ripened and sweet peaches and plums, along with sweet-tart blackberries, were my fruits of choice for this scrumptious, yet amazingly simple and rustic, treat.  I love crostatas and this time around decided to substitute my go-to apple version with what's freshest and in season now.  Summer. Fruit. Pastry.  Three little words that yielded delight with each bite--and made this Summer one that I'll always savor.

Happy Eating!

Summer Fruit Crostata

Ingredients:
For the pastry (makes 2 crostatas):
2 cups all-purpose flour
1/4 cup granulated or superfine sugar
1/2 teaspoon kosher salt
1/2 pound (2 sticks) cold unsalted butter, diced
6 tablespoons (3 ounces) ice water
 
For the filling (makes 1 crostata):
1 pound firm ripe peaches, peeled
1/2 pound firm ripe black plums, unpeeled
1/2 pint fresh blackberries
1 tablespoon all-purpose flour
1 tablespoon granulated sugar
1/4 teaspoon grated orange zest
2 tablespoons freshly squeezed orange juice

Method:
For the pastry:

Place the flour, sugar, and salt in the bowl of a food processor fitted with a steel blade. Pulse a few times to combine. Add the butter and toss quickly (and carefully!) with your fingers to coat each cube of butter with the flour. Pulse 12 to 15 times, or until the butter is the size of peas. With the motor running, add the ice water all at once through the feed tube. Keep hitting the pulse button to combine, but stop the machine just before the dough comes together. Turn the dough out onto a well-floured board, roll it into a ball, cut in half, and form into 2 flat disks. Wrap the disks in plastic and refrigerate for at least 1 hour. If you only need 1 disk of dough, the other disk of dough can be frozen.

Preheat the oven to 450 degrees F. Line a baking sheet with parchment paper.

Roll the pastry into an 11-inch circle on a lightly floured surface. Transfer it to the baking sheet.
 
For the filling:

Cut the peaches and plums in wedges and place them in a bowl with the blackberries. Toss them with the tablespoon of flour, tablespoon of sugar, the orange zest, and the orange juice. Place the mixed fruit on the dough circle, leaving a 1 1/2-inch border.  Gently fold the border of the pastry over the fruit, pleating it to make an edge.

Bake the crostata for 20 to 25 minutes, until the crust is golden and the fruit is tender. Let the crostata cool for 5 minutes, then use 2 large spatulas to transfer it to a wire rack. Serve warm or at room temperature. 
Recipe adapted from Ina Garten
SHARE:

Tuesday, December 24, 2013

Hazelnut and Cranberry Biscotti

The holiday season and baking go hand-in-hand.  I started baking (and catering) quite a bit during this time of year several years ago, and it has never gone out of style.  It's a wonderful time of year, indeed, for creating and sharing delicious, festive bites like Biscotti.  

Biscotti means "twice-baked" in Italian and the technique of baking them twice yields the crunchy, delectable cookie we all know and love.  Toasted hazelnuts, dried cranberries and orange zest combine to form a truly scrumptious cookie that's perfect for breakfast (dunking in coffee and tea, preferred -:)), snacking, or as a light dessert course.  

However you decide to indulge, you're sure to enjoy this sweet creation and loads of...Happy Eating! 

Hazelnut and Cranberry Biscotti
Ingredients:
1/2 cup (4 oz.) unsalted butter, at room temperature
3/4 cup sugar
2 large eggs
2 teaspoons vanilla extract
1 3/4 cup all-purpose flour
1/2 teaspoon baking powder
1/2 teaspoon ground cinnamon
1/4 teaspoon salt
1 cup hazelnuts, toasted, skinned and coarsely chopped
1/2 cup dried cranberries
1 teaspoon grated orange zest

Method:
Preheat oven to 350 F. 

Place hazelnuts on a baking sheet and toast in the preheated oven for 8 to 10 minutes.  If still in the skin, remove the skin, chop and set aside.

In a large bowl, using an electric mixer on high speed, cream the butter until fluffy and pale yellow.  Add the sugar and continue beating to combine.  Add the eggs one at a time, beating well on low speed after each addition.  Beat in the vanilla on low speed until blended.

Sift together the flour, baking powder, cinnamon, and salt.  Gradually add the flour mixture to the egg mixture and mix on low speed.  Mix or stir in the hazelnuts, cranberries, and orange zest until evenly distributed.  The batter should be very soft.

Turn the batter out onto a generously floured work surface and divide in half.  With well-floured hands, transfer one-half onto a parchment lined baking sheet and shape into a log about 12 inches long and 1 1/2 inches thick.  Place on one side of the baking sheet and repeat with the remaining batter, leaving at least 4 inches between the logs.  (They'll spread as they bake.)

Bake the logs until the edges are golden, about 25-30 minutes.  Transfer the pan to a wire rack and let the logs cool for 10 minutes.  Using a serrated knife, cut the logs, still on the pan, on the diagonal into slices 1/2 wide.  Carefully turn the slices on their sides and return them to the oven.  (If you run out of room, use an additional baking sheet.)

Bake until the edges are golden, about 10 minutes longer.  Let cool completely on the pans on wire racks.  Store in an airtight container.
Recipe adapted from Williams-Sonoma 

SHARE:

Saturday, August 17, 2013

Panzanella Salad


Summer is on the wind-down, but I'm determined to relish the fresh and vibrant tastes it offers until the very end.  Scrumptious, juicy tomatoes, currently in season, play a star role in everything from soups to sauces to salads and makes Summer especially delicious.

Combined with perfectly toasted, golden homemade croutons (what could be better?) and a host of fresh vegetables, herbs and other special touches, a beautiful and classic Italian tomato bread salad, known as Panzanella, is born.

Panzanella is a cinch to make and transports well, making it an ideal dish for al fresco dining, picnics, beach outings and more.  Or, in my case, right in the comfort of my home kitchen.  And it's one more reminder of how delicious Summer can truly be.

Happy Eating!


Panzanella Salad

Ingredients:
Small Ciabatta or other loaf bread, cut into 1-inch cubes
1 hothouse cucumber, sliced
2 tomatoes, chopped
1 bell pepper, chopped
Fresh mint, shredded or torn
Fresh basil, shredded or torn
Red onion, sliced
3 tablespoons olive oil
Salt
Freshly ground black pepper
Capers, drained
Champagne Vinaigrette

Method:
Heat olive oil in large skillet over medium-high heat.  Toss in bread cubes and sprinkle with salt and pepper.  Saute bread until golden and crispy in texture.  

In a large bowl, combine croutons, vegetables, herbs, onion and vinaigrette to taste.  Toss to mix thoroughly.  Serve and enjoy!
Recipe adapted from Ina Garten

   
SHARE:

Thursday, June 13, 2013

Lunch Bite: Panini with Chicken, Basil and Sun-Dried Tomatoes

Today is a leisurely day--of sorts.  I dedicated the first half to running errands in preparation for an upcoming getaway.  Now, back home, I wanted a delicious bite that would come together easily and quickly and allow me to get on with the second (and more relaxing) half of my day. 

So it seemed like a perfect opportunity for a sandwich bite.  With Ciabatta bread, leftover Rotisserie chicken, fresh basil, Parmigiano Reggiano cheese and sun dried tomatoes on hand, it was shaping up to be quite the sandwich indeed.  What could make it even greater?  Turning it into a hot, toasty, melted goodness of a sandwich--i.e. a Panini.


I don't make sandwiches very often these days, but since I took the time to do so today, I decided to make it extra special.  And the simple act of tossing it on my Panini maker did the trick.  (Note: If you don't have a Panini maker handy, you can still get the same results by placing your sandwich in a hot skillet and pressing it with a heavy lid.)

Duly satisfied, now I'm looking forward to a great second half!

Happy Eating!
SHARE:

Wednesday, March 6, 2013

{Delectable Discovery}: New Italian Pantry

I've had the pleasure of tasting my way through some parts of Italy, beginning North in Milan, and finishing South on the surreal Amalfi Coast, with stays in Venice, Florence and Rome along the way.  I know what it means to be captivated by a cuisine that is as exciting as it is decadent, and my love for the often surprisingly simple, yet layered and indulgent, flavors of Italy spurs me to recreate similar dishes in my own kitchen.  From homemade pizza to white bean soup to tiramisu, gelato, pasta and more, the tastes, smells--and memories--will always have a place in my home and cooking regimen.

Sooo...when I came across a certain food app recently, it didn't take long to realize that I had uncovered another gem in the world of Italian eats.  If you have a remote affinity for Italian cuisine, or are just curious to explore more, then Chef Sara Jenkins' New Italian Pantry app is one to have.

Beautifully designed around the essentials she keeps in her pantry (from the basics of extra-virgin olive oil and dried pastas to the more obscure of salt-packed capers and Aleppo chile pepper), you can gather featured recipes around the items you have in your pantry (love this!) or create a custom list based on what looks good at the market that day--or what your craving is saying to you (my normal). :)

Beyond a recipe app--and more akin to an Italian cookbook--it's another foray into the delicious tastes of Italy; tastes that I will always love to explore.

Happy Eating!

Tell Me: Do you use any food-related/cooking apps?


SHARE:

Sunday, October 14, 2012

Dessert Course: Affogato


When you're looking for an easy, yet elegant, dessert, the Italian delight, affogato, tops the list.  Coffee and cream elevated, affogato is the perfect finish for rounding out a gourmet meal or amping up simpler cuisine.  Requiring little more thought than having your favorite ice cream and coffee brew on hand, it comes together easily to satisfy a crowd or a party of one.

The rich, hearty espresso (traditional for affogato, although regular coffee will work), paired with the luscious cream, could almost be likened to a decadent after-dinner coffee.  And because you're working with only two main ingredients, be sure to make them the best coffee and ice cream you can muster.

Simple and easy, yet indulgent and special, affogato is always a good idea for a fabulous dessert course.

Happy Eating!

Affogato

Ingredients:
Freshly brewed espresso 
Ice cream of choice

Method:
Scoop individual servings of ice cream in dessert bowls or cups.  Pour espresso over the ice cream.  Serve and enjoy!   
SHARE:

Friday, March 23, 2012

Homemade Pizza

I still remember the first time I made pizza at home--aside from tossing a frozen pie into the oven.  I excitedly purchased fresh pizza dough, gathered a variety of toppings and the assembly fun ensued.  I was a proud cook as the resulting pizzas (one red and one white) were admired and consumed by family.  It was a good day, and I knew a tradition had been born.  

That was just the beginning, however, because just when I thought it couldn't get any easier or more gratifying--it did.  A short while after that first homemade revelry, I became a culinary instructor at one of my favorite homes away from home, Williams-Sonoma.  And shortly after that, I was scheduled to teach a technique class on all things pizza, which included homemade--as in from scratch--pizza dough. Before teaching this class, I hadn't considered making my own dough, and after it, I've never considered not making it.  Reason being, as most devoted foodies will attest, the thrill of actually making something homemade--and making it well--somehow always trumps the alternative.

There are few recipes that are simpler and yield themselves to multiple interpretations as this pizza dough recipe.  With a few basic ingredients, and the kitchen work horse known as the food processor, you'll be set to enjoy as many varieties of this Italian classic as your creative tastes will allow.  Savory. Sweet. Grilled. Baked. The possibilities are endless--and that's just the way I like it.  I think you will, too.

Happy Eating!


Food Processor Pizza Dough
Williams-Sonoma Kitchens
Mixed in a food processor, this dough comes together quickly.  Be sure to check the expiration date on the yeast; if it is outdated, the dough will not rise properly.

Ingredients:
1 tablespoon active dry yeast
1 teaspoon sugar 
1 cup warm water (105 degrees to 115 degrees F)
3 cups all-purpose flour
1 teaspoon salt
2 tablespoons extra-virgin olive oil

Method:
In a small bowl, dissolve the yeast and sugar in the warm water and let stand until foamy, about 5 minutes.  

In the bowl of a food processor fitted with the dough blade, combine the flour and salt and process with 3 or 4 pulses.  With the motor running on the dough speed, slowly add the yeast mixture, allowing each addition to be absorbed before adding more.  Continue processing until the dough forms a ball and cleans the sides of the bowl, about 1 minute, then process for 1 minute more.  

Coat the inside of a large bowl with the olive oil and place the dough in the bowl.  Cover with a clean kitchen towel and let the dough rise in a warm place until doubled in size, about 1.5 hours.  Divide the dough in half and roll out on a floured surface.  Makes two 12-inch rounds.


SHARE:

Thursday, December 29, 2011

Panettone Bread Pudding!

Panettone Bread Pudding with Amaretto Sauce
I discovered a light, airy, buttery, fruit-studded bread/cake-of-sorts several years ago, known the world round as Panettone.  An Italian staple and delicacy, it happened upon my food scene in a memorable way--and has never left.  

Panettone becomes readily available as the holiday season unfolds, almost like the perfect harbinger to all the delectable bites that lie ahead during this time of the year.  It's so wonderful that it needs no extra handling to enjoy its sweet goodness, and I typically start off the season on this note, enjoying mini-sized Panettone for snacking and toast, as I anticipate the sure-to-come ultimate indulgence of this treasure: my Panettone bread pudding.

I began serving this bread pudding during holiday gatherings years ago, and it has become a favorite tradition of mine to share with friends and family.  (I've even gifted Panettone loaves with recipe cards to hard-core fans.)  And with the typical ease that comes with making a bread pudding, the payoff is huge: wow appeal coupled with truly good eating.  I like that kind of return in any endeavor, especially one so near to my heart--and taste buds.  

Now, I'm excited to share my tradition with you.  Enjoy & Happy Eating!

P.S. I'd love to know what makes your holidays special.

Panettone Bread Pudding

Ingredients:
1 pound Panettone, cut into 1-inch cubes
5 eggs
3/4 cup light brown sugar, firmly packed
1 teaspoon vanilla extract
1 teaspoon almond extract
2 cups milk
2 cups heavy cream
1/3 cup almond slices

Preheat oven to 350 degrees F.  Butter a 9-by-13 inch baking dish.

Spread the bread cubes out on a large baking sheet and toast in the oven until golden, about 10 minutes.

In a large bowl, whisk together the eggs, brown sugar, vanilla and almond extracts.  Slowly whisk in the milk and cream until well blended.  Stir in the bread cubes and let stand to absorb the custard, 10-15 minutes.  Stir again, then transfer the bread mixture to the prepared baking dish.  Sprinkle almond slices on top.

Bake until a knife inserted into the center of the pudding comes out clean, 45 to 50 minutes.  Transfer the pan to a wire rack and let cool for at least 5 minutes.  Serve warm or at room temperature.
Recipe adapted from Williams-Sonoma  
SHARE:

Tuesday, April 5, 2011

Foodie Vocabulary: Crostini vs. Bruschetta (Know the Difference?)

Photo Credit: Martha Stewart
In the world of food, there's no shortage of 'foodie jargon'--language that belongs squarely within the culinary spectrum.  But even still, there are times when some of these words get tossed around so loosely, that it can leave even the most devoted foodie with question marks.  One such example is my encounters with the use of the terms crostini and bruschetta.  Seeing them used in what appeared to be almost identical applications, I couldn't quite discern the real difference.  So, while I continued making the delightful bites, the question mark still remained.  Until recently, that is, when I decided to slow down and answer this question once and for all.

Crostini (translated "little toasts" in Italian) is made from thin slices of grilled or toasted bread with toppings.  They are served as appetizers and even as garnishes for soups.  They can be dressed simply with olive oil, salt and pepper and/or herbs or a variety of meats, cheeses, vegetables. 

Bruschetta, on the other hand, is made from thicker slices of bread that are grilled or heated over coals, first being rubbed with garlic cloves and often served charred.  Like crostini, its most basic preparation includes a simple dressing of olive oil and seasonings, but more traditionally it's served with toppings of tomato and basil, and/or a host of other toppings.

So you can see that they really are much more alike than they are different, but alas subtle differences do exist justifying their individuality.  And no matter how you slice it (literally), I love these great bites.

For the road.....

Crostini with Lemon and Oregano 
My favorite way to enjoy crostini is simply toasting or grilling some bread and seasoning with olive oil, salt and pepper.  When I want to "take it up a notch", with no additional fuss, I add a squirt of fresh lemon juice and a sprinkle of dried oregano.  So good!

Ingredients:
Baguette, or other thin bread slices
Olive oil
Salt
Pepper
Juice of a lemon
Dried oregano

Preheat the oven to 350 degrees F.

Slice baguette into thin slices.   Drizzle with olive oil and sprinkle with salt and pepper.  Bake in the preheated oven for 6-8 minutes until crispy and golden.  Remove from oven, spritz with lemon juice and sprinkle with dried oregano.  Serve warm and enjoy!  

P.S.  What toppings do you like to use?
   
SHARE:
© D.M.R. Fine Foods. All rights reserved.
MINIMAL BLOGGER TEMPLATES BY pipdig