Sunday, April 30, 2023

Chocolate Hazelnut Bark


Few things tantalize me like chocolate and nuts, combined.  Peanuts, almonds, cashews, hazelnuts--you name it!  It's a forever combination made in heaven for me.

But there's something especially scrumptious about chocolate and hazelnuts.  So when I recently came across a video touting the two in a delicious bark, I knew I had to bring the goodness to life in my own kitchen.  

Following church today, I made good on that promise and a three-ingredient star was born (I added sea salt to finish, in case you're wondering).  It takes sheers minutes to bring together, followed by an hour or so to set in the freezer--and you've got the best noshing at your fingertips.

Whether it's a casual (healthy-ish) sweet fix or a dessert course, it eats (and satiates) all the same.  

Here's to your own batch in your kitchen and guaranteed...Happy Eating!

Chocolate Hazelnut Bark

Ingredients:

6 oz. semi-sweet chocolate

8 oz. hazelnuts

Sea salt to finish (optional)

Method:

Preheat oven to 350 degrees F.  Place hazelnuts in preheated oven and roast for 10-12 min.

Remove roasted hazelnuts and place them in a clean kitchen towel. Using towel, rub skins off of the hazelnuts (don't worry if they don't all come off) and set hazelnuts aside.

Melt chocolate in a double boiler (place a heat-proof bowl over a pot of simmering water, being careful not to allow the bottom of the bowl to touch the water) and stir chocolate until completely melted.  Remove chocolate from heat and stir in hazelnuts.

Pour chocolate-hazelnut mixture onto a parchment lined baking tray.  Sprinkle with sea salt, if using.

Place tray in freezer and allow bark to set, 1-2 hours.

Remove from freezer and enjoy!


SHARE:

Saturday, July 30, 2022

Zucchini Muffins


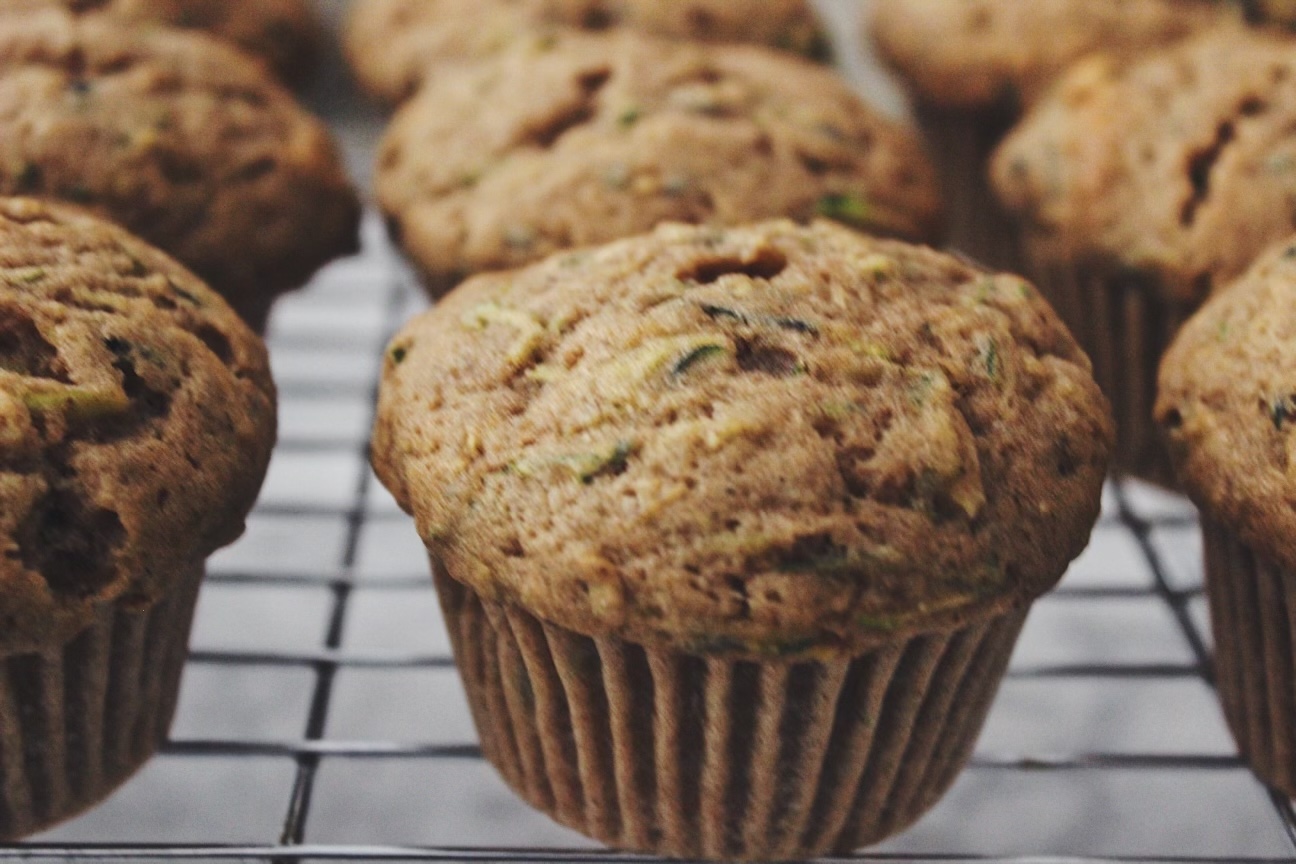
Summer squash and zucchini have made their way back to center stage in my kitchen of late, showing up to the table in mostly savory preparations, as I endeavor to enjoy more of the season’s bounty.  But my fondness for the scrumptious zucchini muffins and zucchini bread I enjoy on occasion turned my affections in that direction recently—and moist, delicious zucchini muffins finally came to life in my kitchen.


It was the perfect way to indulge a weekend morning.  Grating the fresh zucchini, bringing the ingredients together with a few flicks of the wrist, filing the muffin tins, baking them off in the hot oven, reminding myself to be patient while they cooled, and finally—finally—enjoying the fruit of my labor.  Simple pleasures that never get old in my world.


So if you don’t have a garden with zucchini sprouting up (I don’t), grab a few the next time you’re at the market and bake a batch or two.  Bonus: zucchini are in season and cooking and baking with the freshest, seasonal ingredients always yield the best (read: tastiest) results.  Not to mention that they’re more economical in-season, too. 


They’re perfect as a quick breakfast, a snack, for dessert, or any way you want to enjoy them.  Vegetables never tasted so good :), or yielded more…


Happy Eating!


Zucchini Muffins


Ingredients:

2  large eggs, room temperature

1 1/3 cup sugar

2 teaspoons vanilla extract

3 cups grated zucchini

1 cup vegetable oil

2 3/4 cups all-purpose flour

1 teaspoon baking soda

1 teaspoon baking powder

1/4 teaspoon kosher salt

2 teaspoons cinnamon

1 teaspoon ground ginger

1/2 teaspoon nutmeg


Method:

Preheat the oven to 350 degrees F.


In a large bowl, beat the eggs.  Mix in the sugar and vanilla extract. Stir in the grated zucchini and the oil. In a separate bowl, mix together the flour, baking soda, baking powder, spices and salt.


Stir the dry ingredients into the zucchini mixture (be careful not to overmix!)


Prep your muffin pan with paper muffin cups or grease generously.  Use a spoon, ice cream scooper or small measuring cup to fill the cups up completely.


Bake until the muffins are golden brown or a tester comes out clean (about 20-30 minutes, depending on the oven). Remove from the oven and cool in the pan on a wire rack for about five minutes.  Remove from the muffins from the muffin pan and cool them another 20 minutes on the rack.  Eat and enjoy!


P.S. Muffins can be stored in the freezer for up to two months. 


Recipe adapted from Simply Recipes  

SHARE:

Thursday, June 30, 2022

The Creamiest, Dreamiest Classic Cheesecake


When you’ve been away from one of your happy places, even for great reasons like celebrating family milestones and traveling, such as my recent hiatuses away from home two weekends in a row, it feels oh so good when you’re back—in full force.


I speak of me and my kitchen.  Specifically, creating beautiful, scrumptious food in my kitchen.


So taking several hours last Sunday to indulge in baking was a welcomed return.  The recipe of choice was a dreamy cheesecake recipe by Dorie Greenspan, that I happened upon in the New York Times Cooking archives, during my search for inspiration.  And not only did I thrill and delight myself with the finished masterpiece—I finally checked baking a cheesecake off of my epicurean ‘to do’ list.


Can you believe it?! I’d never made a cheesecake before then.  


I grew up eating my mom’s beloved cheesecake pie (a lighter version of full-on cheesecake) and have otherwise eaten my fair share of cheesecakes over the years.  But baking one myself?  Not until last Sunday.  And I’m so glad I did.  In fact, I’m already dreaming up other flavor variations and nuances for future baking escapades.  


Nothing was spared with this all-in, high crust (humble brag), cream cheese x heavy cream, delicacy.  (I opted for all heavy cream for my first go ‘round, but sour cream and heavy cream, or all sour cream, can also work beautifully, I’m sure.)  Still, my instincts were spot on for me and the creamy, cheese-cakey bite after bite I was seeking.


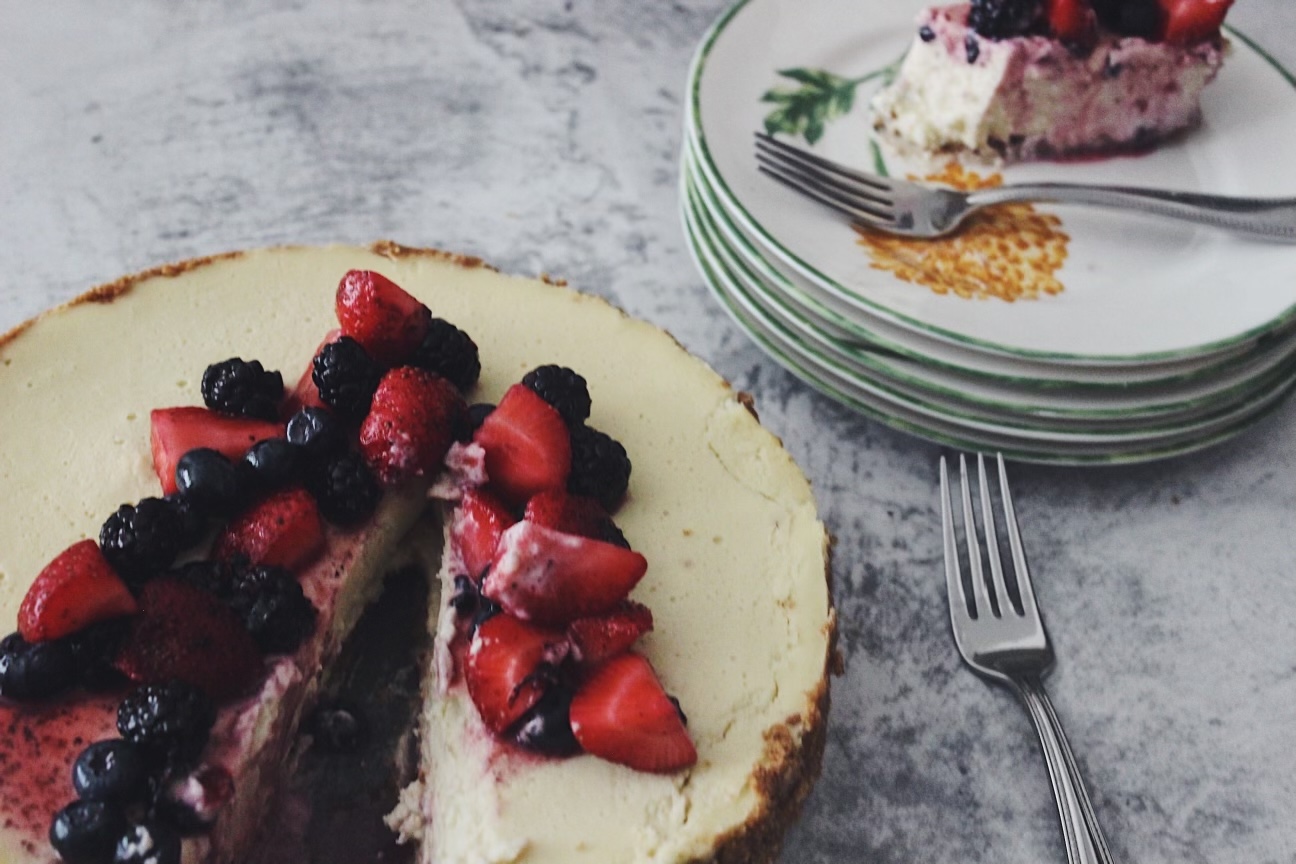
For a final finish, a.k.a garnish, I decided to add some macerated summer berries for a bit of color and extra goodness. (Totally optional, however, because this baby stands very well on her lonesome.)


I have to admit that I was so proud of my labor of love when I finally went in for the ‘unfolding’ from the springform pan and to take my first bite.  Did I mention, you’ve got to be ready to commit, because it’s a 7.5 hour endeavor—at minimum (chill down time, included.)  Mine was longer because I took the overnight chill down route. But It. Was. Worth. It.  The technique is evident as you go through the recipe—but when you’re in pursuit of unforgettable, too good to be true, results, don’t sweat the technique. ;)


I invite you to make it for yourself, family, friends, enemies that you want to convert to friends, lol!, and anyone else you want to delight (or impress) and spread the joy of baking that’s guaranteed to indulge…


Happy Eating!


Classic Cheesecake

Ingredients:

Crust:

1 3/4 cups graham cracker crumbs

3 tablespoons sugar

Pinch of salt

1/2 stick unsalted butter, melted


Cheesecake:

2 lbs. cream cheese, room temperature

1 1/3 cups sugar

1/2 teaspoon salt

2 teaspoons vanilla extract

4 large eggs, room temperature

1 1/3 cups heavy cream


Method:

  1. To make the crust: Butter a 9-inch springform pan — choose one that has sides that are 2 3/4 inches high (if the sides are lower, you will have cheesecake batter left over) — and wrap the bottom of the pan in a double layer of aluminum foil.
  2. Stir the crumbs, sugar and salt together in a medium bowl. Pour over the melted butter and stir until all of the dry ingredients are uniformly moist. (You can do this with your fingers.) Turn the ingredients into the springform pan and use your fingers to pat an even layer of crumbs along the bottom of the pan and about halfway up the sides. Don’t worry if the sides are not perfectly even or if the crumbs reach above or below the midway point on the sides. Put the pan in the freezer while you heat the oven. (The crust can be covered and frozen for up to 2 months.)
  3. Center a rack in the oven. Heat the oven to 350 degrees and place the springform on a baking sheet. Bake for 10 minutes. Set the crust aside to cool on a rack while you make the cheesecake.
  4. Reduce the oven temperature to 325 degrees.
  5. To make the cheesecake: Put a kettle of water on to boil.
  6. Working with a stand mixer, preferably fitted with the paddle attachment, or with a hand mixer in a large bowl, beat the cream cheese at medium speed until it is soft and creamy, about 4 minutes. With the mixer running, add the sugar and salt and continue to beat for another 4 minutes or so, until the cream cheese is light. Beat in the vanilla. Add the eggs, one by one, beating for 1 full minute after each addition — you want a well-aerated batter. Reduce the mixer speed to low and stir in the sour cream and/or heavy cream.
  7. Put the foil-wrapped springform pan in a roasting pan that is large enough to hold the pan with some space around it.
  8. Give the batter a few stirs with a rubber spatula, just to make sure that nothing has been left unmixed at the bottom of the bowl, and scrape the batter into the springform pan. The batter will reach the rim of the pan. (If you have a pan with lower sides and have leftover batter, you can bake the batter in a buttered ramekin or small soufflé mold.) Put the roasting pan in the oven and pour enough boiling water into the roaster to come halfway up the sides of the springform pan.
  9. Bake the cheesecake for 1 hour 30 minutes, at which point the top will be browned (and perhaps cracked) and may have risen just a little above the rim of the pan. Turn off the oven’s heat and prop the oven door open with a wooden spoon. Allow the cheesecake to luxuriate in its water bath for another hour.
  10. After 1 hour, carefully pull the setup out of the oven, lift the springform pan out of the roaster — be careful, there may be some hot water in the aluminum foil — and remove the foil. Let the cheesecake come to room temperature on a cooling rack.
  11. When the cake is cool, cover the top lightly and refrigerate for at least 4 hours, although overnight is better.
  12. {Baker's Tips}:
  13. At serving time, remove the sides of the springform pan — you can use a hairdryer to do this — and set the cake on a serving platter.
  • Serving: The easiest way to cut cheesecake is to use a long, thin knife that has been run under hot water and lightly wiped. Keep warming the knife as you cut slices of the cake.
  • Storing: Wrapped well, the cake will keep for up to 1 week in the refrigerator or for up to 2 months in the freezer. It’s best to defrost the still-wrapped cheesecake overnight in the refrigerator.

Recipe courtesy of NYT Cooking 


SHARE:

Friday, September 17, 2021

Peach Shortcakes


With Summer officially on its way out in less than a week, I thought one last hoorah was in order on the seasonal eating front.  With everything happening in our world currently, sometimes a bit of happy eating is a welcomed respite from the chaos.


And this season’s eating couldn’t have been any happier than when I was taking in (and taking down -:)) my favorite stone fruits.  As if it was a kiss from above, I’ve had the good fortune of landing on the sweetest, most delicious peaches over the last while.


Mostly I’ve indulged in them in their natural, ‘perfect as is’ state, but considering how easy it would be to throw together a classic favorite with only a bit of extra effort, I went all out last weekend and baked my homemade shortcakes, whipped my sweet, vanilla cream, and sealed the deal with slightly macerated, gorgeously hued, peaches.  


And just like that, happy eating was once again reborn in my kitchen.  So now I’m spreading the happy with my easy recipe, adapted from my Berry and Balsamic Shortcakes, and invite you to indulge once again in the season’s bounty before we turn the page and embrace a new season.


I’m counting on you to do it and I know you, like me, will know the supreme joy of…


Happy Eating!


P.S. If you’ve got extra peaches on hand, indulge further with my Peach CobblerPeach Crisp and Peach Caprese Bites for even more goodness!


Peach Shortcakes


Ingredients:

Fresh peaches, thinly sliced with peel on (*optionally, you can peel your peaches if desired)

2 tablespoons of sugar

1 recipe for shortcakes

1 recipe for whipped cream


Method:

Combine sliced peaches and 2 tablespoons of sugar in a bowl.  Toss to combine and set aside to allow the peaches to macerate and develop sweet peach juices.


Preheat oven to 425 degrees F.


Prepare shortcakes according to recipe instructions.


Prepare whipped cream according to recipe instructions.


Assemble shortcakes layering the peaches and cream on top of the halved shortcakes (in as many layers as you like!).


Enjoy!


SHARE:

Thursday, July 8, 2021

Peach Crisp


I feel as if I blinked and we entered a whole new season—and the second half of 2021.  In the words of the gifted songstress, Anita Baker, “It’s been so long…I’m missing you baby.” And it’s good to be back. 


As seasons go, I’m also glad to be back to one of my favorites—for seasonal produce.  And as the 2nd half of this year goes, I’m believing it will be better, healthier, calmer, safer and more of what we all need (individually and collectively.). My faith remains on ‘go’ and my gratitude remains in flow. (Did I just rhyme?!)


Speaking of produce, few compare to Summer’s bounty.  From (my favorite) stone fruit—bring on all the peaches, plums, cherries, and more!—to luscious watermelon, sweet corn and perfect tomatoes, I can never get enough.  Until the Fall season forces me to do so, at least.  And as one who’s tried indulging my passion out of season, I don’t recommend it.  So while we have Summer, we should definitely make the most of it and indulge.  Deal?


If you’re with me, even slightly, then I have a dessert that’s sure to please and become a recurring favorite in your Summer baking repertoire.  While you know my love for apple crisp, making it with peaches (still in awe that last Summer was my first time doing it) is as delicious and satisfying, with the bonus of coming together easily, as a Summer dessert should.


So without further adieu, take your Summer to new heights with a dessert that's guaranteed to induce...


Happy Eating!


Peach Crisp


Ingredients: 

¾ cup flour

¼ cup light brown sugar

½ teaspoon salt

½ cup plus 2 tablespoons granulated sugar

8 tablespoons (1 stick) unsalted butter, cold, and diced into cubes

1 cup old-fashioned rolled oats 

5-6 peaches

2 tablespoons lemon juice

1/2 teaspoons cinnamon


Method: 

Preheat oven to 375° F.


In a large bowl, mix together the flour, brown sugar, salt,  cinnamon, and 2 tablespoons granulated sugar.  Cut butter into flour, using a pastry blender or two knives, until mixture is the texture of coarse meal.  Add oats and use your hands to toss and squeeze mixture until large, moist clumps form. Place in freezer to chill while you prepare the peaches.


In another large bowl, toss peaches with lemon juice and ½ cup granulated sugar. Transfer to a 2-quart baking dish and sprinkle with the oat topping mixture.  Place in preheated oven and bake until golden and bubbling, 55 to 65 minutes.  Let cool slightly before serving—and enjoy!


SHARE:

Thursday, November 19, 2020

Pumpkin Spiced Bundt Cake


So my recent baking spree continues.  And this time I’m leaning into an uber moist and scrumptious (truly, truly) Pumpkin Spiced Bundt Cake.  Honestly speaking, if calories and such were simply a figment of the imagination, I’d be baking around the clock.  Because…dessert! :)  But alas, reality bites at times, so I try to do myself the favor of not having too many sweet, homemade delicacies on hand.


Still, the desire to bake (for the first time this year, I realized) a pound cake in my beautiful bundt pan outweighed any aforementioned caution. ;)  And last Sunday made way for joyous moments dedicated to baking (and relishing) this delicious confection.


While I take my pumpkin spice indulgences on the lighter side, the pumpkin helps to make this one of the moistest cakes you’ll ever taste, with a gorgeous color, to boot, and coupled with the warm, flavor-full spices, it goes down nice and easy, bite after bite after bite.  And maybe a little too easily in my case; but hey, we have to take our pleasures as they come, no?


So not one to keep a great thing (especially a great recipe) to myself, I’m sharing this in time for your very own baking indulgence to celebrate Fall, the holidays, or simply continuing to survive the “wonder” that is 2020.  No matter the reason, you’ll be so glad you baked this cake.  And you’ll be overwhelmed with….


Happy Eating!


Pumpkin Spiced Bundt Cake


Ingredients:

3 cups all-purpose flour

2 ¼ cups of sugar

1 can (15 oz.) pumpkin

3 eggs, room temperature

2 teaspoons baking soda

1 cup canola oil

½ teaspoon salt

1 teaspoon cinnamon

1 teaspoon allspice

1 teaspoon pumpkin pie spice

¼ teaspoon ground nutmeg

1 teaspoon vanilla extract

Confectioner’s sugar


Method:

Preheat oven to 350° F.


Grease cake pan liberally (I used cooking spray) and set aside.


In a medium bowl, whisk together flour, salt, baking soda, and spices.  Set aside.


In a stand-mixer, combine the sugar and oil until well blended (2-3 minutes).  Blend in eggs one at a time, incorporating each fully, before adding the next.  Add in vanilla and blend further.  Add in flour mixture, alternating in batches with the pumpkin until all ingredients are blended in.


Pour batter into prepared cake pan and bake in heated oven for 60-65 minutes, or until a cake tester inserted in the center comes out clean, with no crumbs.


Let the cake rest and cool for 10-15 minutes before inverting onto a plate or wire rack.  Dust (I used a small mesh strainer) the cake with as much confectioner’s sugar as desired—and enjoy!

SHARE:

Sunday, November 8, 2020

{Easy Fall Baking}: Apple Crisp


There’s something about Fall that turns up my love for baking.  If I had to put a pulse on it, I’d say it’s the cooler, crisp weather coupled with warm and cozy fare that gets me every time.  Oh, and apple season.

Since forever, apples have been one of my favorite fruits, so it’s a no-brainer that combining them with scrumptious flavors like fragrant spices and citrus make them a star-ingredient in my kitchen.  From tarts, to crostatas, apples and baking are a winning combination for me.


As much as that is true, it was somewhat ironic that I had never baked an apple crisp until this past weekend.  I say ironic because it was a favorite dessert treat growing up.  In fact, I was introduced to apple crisp as a part of the occasional dessert round-up for my school lunches, and although I found most of the lunches to be not so great, and happily farmed mine off to my eager classmates (my mom didn’t appreciate that, lol!), apple crisp was one of the few dishes (along with peanut butter cookies, pizza and burgers) that elicited excitement.  Sounds like a child’s palette, no?


Despite having a grandmother who turned the apples from the apple tree in my grandparents' backyard into decadent homemade apple pies that food dreams are made of, I still fell for those little servings of apple crisp on the lunch trays. And this past weekend, I revived those childhood memories and tastes in my own kitchen, discovering, to my delight, that apple crisp will always do it for me.  (I baked a peach crisp over the summer that was addictively good, so I was biding my time for apple season to finally arrive, so I could recreate the goodness all over again.)


Beyond the memories and delicious indulgence, the ease in which this dessert comes together makes it star-worthy.  With the toss of a few ingredients, it’s oven-ready and primed to be baked to perfection with the bonus of that “something delicious is baking aroma” wafting through your kitchen. 


Served hot from the oven, topped with ice cream for extra decadence (yes, please!), it’s baked perfection in a dish and the best kind of…


Happy Eating!


Apple Crisp


Ingredients:

¾ cup flour

¼ cup light brown sugar

½ teaspoon salt

½ cup plus 2 tablespoons granulated sugar

8 tablespoons (1 stick) unsalted butter, cold, and diced into cubes

1 cup old-fashioned rolled oats

3 lbs. apples (I prefer Granny Smith)

2 tablespoons lemon juice

2 teaspoons cinnamon


Method:

Preheat oven to 375° F.


In a large bowl, mix together the flour, brown sugar, salt, 1 teaspoon cinnamon, and 2 tablespoons granulated sugar.  Cut butter into flour, using a pastry blender or two knives, until mixture is the texture of coarse meal.  Add oats and use your hands to toss and squeeze mixture until large, moist clumps form.  Place in freezer to chill while you prepare the apples.


In another large bowl, toss apples with lemon juice, 1 teaspoon cinnamon, and ½ cup granulated sugar.  Transfer to a 2-quart baking dish and sprinkle with the oat topping mixture.  Place in preheated oven and bake until golden and bubbling, 55 to 65 minutes.  Let cool slightly before serving—and enjoy!


Recipe adapted from Martha Stewart

SHARE:

Friday, September 11, 2020

Baked Doughnuts, Two Ways: Cinnamon Sugar and Vanilla Glazed

Don't ask, because I don't have a good answer. And if you're wondering, yes, I'm referring to the question I've posed to myself many times over as many years: how have I not made doughnuts yet?  Despite my continual cooking and baking for years, somehow this confectionery delight had escaped my kitchen.

Until last weekend.

I finally added doughnut pans to my kitchen arsenal (a part of the original dilemma) and determined that baking homemade doughnuts would make for a leisurely Sunday afternoon in the kitchen.  And so this doughnut story was born.

And like the other things I make with love, these did not disappoint and left me doing the happy dance we all have been known to do when good eats are involved and your vision comes to life.  Not only was I thrilled with how easy they were to whip up (all of the ingredients are pretty much kitchen staples), but I genuinely found them delicious and very much able to hold their own against the more popular (and unquestionably scrumptious) fried variety. 


Because who could dare argue with cinnamon and nutmeg infused doughnuts crowned with cinnamon sugar and vanilla glaze coatings?  Who? :)  Not I--and I'm pretty sure not you, either, once you make these.  In fact, I'm counting on you baking the wheels off of your newly crowned favorite dessert.

Although I recommend consuming them when they're still warm (we all know the obsession hot doughnuts have been known to stoke) for the ultimate in homemade doughnut revelry, you can store them in an airtight container for a day or two and still enjoy them all the same.  If you need more reassuring, I took a dozen-plus to a gathering the following day and they were received with happy mouths and tummies. 


So while there's no suitable answer to my original question of what took me so long, now that I've taken the plunge, there's no turning back.  I'm counting on you joining me, because friends don't let friends bake (and eat) alone. 😉

Happy Eating!

Baked Doughnuts

Ingredients:

2 cups of all-purpose flour

1 1/2 cups of sugar

2 eggs, beaten

1 1/4 cups of milk

2 tablespoons melted brown butter

2 teaspoons baking powder

1/2 teaspoon salt

1 teaspoon ground cinnamon

1/2 teaspoon ground nutmeg

2 teaspoons vanilla extract  


For the Toppings:

Cinnamon Sugar

4 tablespoons butter, melted 

1/2 cup sugar

1/2 teaspoon cinnamon

Vanilla Glaze

1/2 cup confectioner's sugar

1-2 tablespoons milk

1/2 teaspoon vanilla extract

Special Equipment:

2 doughnut baking pans 

Method:

Preheat the oven to 350 degrees F.  Spray baking pans and set aside. Melt 2 tablespoons of butter until golden brown and let cool. (Cook's Note: it will go quickly so be careful not to burn it!)

Combine the flour, sugar, baking powder, cinnamon, nutmeg and salt in a bowl.  In a separate bowl, whisk together the milk, melted butter, eggs and vanilla extract.  Stir the wet ingredients into the dry ingredients until they are combined.

Spoon the batter into the prepared baking pans and bake for 15-18 minutes, or until a tester comes out clean.  Allow the doughnuts to cool for five minutes, then tap the pan to loosen, and turn them out onto a baking rack set over a lined sheet tray.

Cinnamon Sugar Coating: Melt the 4 tablespoons of butter while the doughnuts are cooling. Combine the cinnamon and sugar into a small bowl. Make a half dozen cinnamon sugar doughnuts by dipping the doughnuts in the butter and then coating with the cinnamon sugar. Set on the baking rack to set.

Vanilla Glazed Coating: Whisk together the confectioner's sugar, milk and vanilla extract.  Dip the doughnuts in the glaze to coat and set on the baking rack to set. 

(If you have leftover batter like I did, repeat!)

Serve warm or store in an airtight container--and enjoy!


SHARE:

Monday, April 27, 2020

Toast With This!: Dalgona Coffee

As weekends go, this past one was a satisfying mixture of productivity and chill.  Mind you it didn't come without some internal coaching to remind myself that it's okay to just. chill. at times.  The type-A, achiever part of my makeup needs reminders on this sort, occasionally-- remembering that it's self-love in motion when we can be gentle and extend grace--to ourselves! 

So somewhere in between a few house chores, indulging in walks outdoors, a training course, Netflix, catching up with family, online worship, cooking, and so on, I decided to finally give a nod to the trending whipped coffee that I've been seeing on social media.  Known as Dalgona Coffee, with origins hailing from India, Pakistan and beyond, this simple, but stunning, drink is worth the hype.  My rendition included the addition of allspice and cinnamon for a warm, subtle Chai finish.  And considering my picky ways when it comes to coffee drinks, I'm glad to report that it's a keeper. :) 

Easy enough to bring together (we're talking sheer minutes) and beautifully delicious enough to feel like the special treat you didn't know you wanted, it was a fun Sunday afternoon indulgence that I think you should add to your stay-at-home, quarantine ticking and tocking.  Besides giving certain popular coffee shops that will rename nameless a run for their (over-priced) money for similar drinks, this makes for a perfect breakfast, afternoon or dessert indulgence.

So the next time you're looking to enjoy a cheers or two, toast with this!

Happy Sipping!

Dalgona Coffee
Ingredients:
Two tablespoons instant coffee
Two tablespoons sugar
Two tablespoons hot water
1/8 teaspoon allspice
1/8 teaspoon cinnamon
Milk of choice
Ice

Method:
Add coffee, sugar, spices and water to a mixing bowl.  Whisk ingredients together by hand or electric mixer until the coffee becomes frothy with a whipped texture.  Pour milk over ice and ladle in whipped coffee to top.  Enjoy!


SHARE:

Thursday, January 17, 2019

Apple Crostata

It's hard to argue that buttery, homemade pie crust, topped with apples coated in cinnamon, sugar, orange zest and more, isn't some of the best noshing around.  So much so, that when I prepared that delight, also known as an Apple Crostata, on Thanksgiving morning, it never made it to the Thanksgiving dinner dessert line-up!

Beyond being truly irresistible (you'll bear witness for yourself once you make it), the recipe scores bonus points for the ease in which it comes together, making it ideal for a last minute dessert option with major wow appeal.  It's no secret that fruit crostatas are some of my favorite things to bake (and devour!), and I've long loved this recipe, which hails from one of my biggest food inspirations, Ina Garten (aka The Barefoot Contessa). 

I shared the fruits of my Thanksgiving baking labor, along with some of the morning-of behind the scenes action, but decided it would only be truly fair if I also shared the recipe so that you can make it, too.  So, at last, here it is--in all of its can't-get-enough goodness and perfection for endless....

Happy Eating!

Apple Crostata

 
SHARE:

Sunday, January 28, 2018

Cinnamon Raisin Bread Pudding with Maple Glaze

History has it that bread pudding's origins date as far back as the 11th century.  And the refusal to waste leftover bread made it into a popular, frugal dish.  Fast forward to more modern times, the late 20th century to be exact, and that's where my personal history with bread pudding began.

I vividly remember the first time I tasted bread pudding.  I was a college freshman being treated to dinner by a Sorority big sister at a lovely local restaurant in our college town.  I'm sure I probably followed her lead in ordering it since I had never had it (and looked up to her immensely).  But that's where the following stopped.  Once I tasted the warm, perfectly spiced and comforting pudding, I knew we'd have a life long love affair.  And if my blog is any indication, you can probably guess how much of a fan I am.

Thinking back to that first taste, Cinnamon Raisin Bread Pudding with Bourbon Sauce, I'm thrilled to be recreating a dish that expanded my food horizons all those years ago and remains as a vivid reminder of the friendship and sisterhood that framed my first encounter.

And if that wasn't enough, bread pudding is the quintessential "bang for the buck", wow appeal, minus the requisite heavy lifting, dish that cooks and bakers everywhere love to bring to life.  Not to mention that its roots in frugality still makes it perfect for sharing without breaking the bank.


My version is served warm with a generous drizzle of maple glaze (sorry Bourbon), and perfectly proportioned in individual ramekins hearkening back to that personalized dessert course where we were first introduced. :)

If you're already a fan of this delicacy, then here's more to love.  If you're making it for the first time, I'm confident that, like me, you'll never look back.

Finally, what could make this even more special than including this recipe in the 2018 edition of the Black History Month Virtual Potluck?!  What began as an expose of 28 of the web's top black food bloggers in celebration of Black History Month continues again this year in similar, delicious fashion.  Each day of February will present a new recipe for you to explore and add to your personal repertoire.  See the full lineup following the recipe and be sure to join in on the fun.

Happy Eating!

Cinnamon Raisin Bread Pudding with Maple Glaze
Ingredients:
1 lb. cinnamon raisin bread, cubed into 1 in. pieces
1 quart half-n-half
4 large eggs
1/2 cup sugar
3 tablespoons butter, melted, plus more for greasing ramekins
1 teaspoon vanilla extract
1 teaspoon cinnamon
1 teaspoon salt
2 tablespoons maple syrup
4 tablespoons powdered sugar, plus more for dusting 


Method:
Preheat oven to 350 degrees F.  Grease individual ramekins and set aside.
Place cubed bread on a baking sheet and toast in the oven for 10 minutes. 
While bread is toasting, whisk together half-n-half, eggs, sugar, melted butter, salt, cinnamon and vanilla in a large bowl.  Add in toasted bread and push with hands to submerge in custard.  Let sit for 10 minutes.
Ladle bread custard into ramekins.  Place ramekins on a baking sheet and bake in oven for 30-40 minutes until cooked through (a tester inserted into the center should come out clean.)
Meanwhile, for the maple glaze, whisk together maple syrup and powdered sugar to desired consistency.  Add a few drops of water to loosen, if needed. 
Remove ramekins from the oven, allow to cool slightly, and dust puddings with powdered sugar.  Drizzle with maple glaze, serve and enjoy!

Black History Month Potluck 2018
Beautiful Eats & Things | Turkey Sausage Stuffed Collard Green Wraps
Better With Biscuits | Fresh Corn Pudding
Beyond The Bayou Food Blog | Creole Red Snapper Courtbouillon
Brandi’s Diary | Better than Jiffy Cornbread from Scratch
Butter Be Ready | Southern Style Mac and Cheese
Chef Kenneth | Fried Sweet Potato Hand Pie
Chocolate For Basil | Pilau and Kachumbari (Spiced Rice with Pico)
Cooks with Soul | Braised Short Rib Meatloaf
D.M.R. Fine Foods | Cinnamon Raisin Bread Pudding with Maple Glaze
Dash of Jazz | Nigerian Jollof Rice
Domestic Dee | Fried Peach Pies
Eat.Drink.Frolic. | Olive Oil Braised Collard Greens
Food Fidelity | Mofongo Relleno (Mashed Plantains with Garlic Shrimp)
Food is Love Made Edible | Buttermilk Biscuits with Fried Chicken and Tabasco Honey
High Heels and Good Meals | Crawfish Etouffee
HomeMadeZagat | Shrimp with Spicy Curry Cream Sauce
Houston Food Fetish | Sweet Almond Tea Cakes
In the Kitchen w/Kmarie | Pineapple Lemonade
Marisa Moore Nutrition | Bourbon Peach Glazed Salmon
Meiko and The Dish | Candied Bourbon Peach Cobbler
My Life Runs On Food | Lentil Soup and Roast Okra
Orchids + Sweet Tea | Carrot and Zucchini Noodles Stir Fry with Shrimp
Raised on Ramen | Orange Glazed Brussels Sprouts
Savory Spicerack | Creamy Seafood Stew
Simply LaKita | Blackberry Cobbler
The Hungry Hutch | Orange Bundt Cake with Vanilla Glaze
The Kitchenista Diaries | Smothered Turkey Wings
The Seasoning Bottle | Honey Turmeric Skillet Chicken
SHARE:
© D.M.R. Fine Foods. All rights reserved.
MINIMAL BLOGGER TEMPLATES BY pipdig