Sunday, February 26, 2023

The Perfect Fried Chicken


Over my years of living, it’s fair to say that I’ve relished my share of fried chicken.  Much of my experience came as I grew up and feasted on my grandmother’s and mother’s fried chicken—both exceptional.  


I have so many precious memories of my grandmother hosting a dinner replete with her fried chicken (expertly fried in her cast iron skillet) and whatever else she added to the menu.  It was always clear, to me at least, that the fried chicken was the main event—the star—of the meal.  And if I may go further back in my heritage, she inherited her skills honestly from her mother, my great-grandmother, who won awards and was written up in the local paper for her fried chicken way back in the early 20th century.  


So great, award-winning, exceptionally delicious—dare I say, perfect—fried chicken is in my genes.   I truly did get it from my mamas (great grandmama to grandmama to my mama.)  As I have a way of doing, I’ve slightly adapted my own approach to making “finger-licking good” fried chicken in the years since.  And because it’s not a dish that I make often these days, when I do, it has to be GREAT!  I mean, I can’t be bothered with the additional mess of frying, and the extra calories, for mediocre chicken.  Anybody?


So before I delve into what makes my chicken the fried chicken you never knew you needed, allow me to share the two elements to achieving the perfect fried chicken:


Moist, flavor-filled meat; and 

Crispy, crunchy (and flavor-laden) skin.


That’s it.  


Flavor, crunch, and juicy chicken is what we came for, no?


So without further ado, let’s get into it a few key techniques to make your next batch of fried chicken, your best batch yet.


Getting the Juiciest Meat:


If you’re familiar with my tips for the best turkey, then you know that brining is an essential in my arsenal.  The same applies for the juiciest fried chicken.  A quick (2-3 hours will work) brine in a salt, sugar solution is worth the payoff in making your chicken the most moist and tender bird.  (*Cook’s Note: if you prefer a buttermilk brine, be my guest.  It will work equally well, I just don’t prefer the strong buttermilk notes it infuses into the chicken.)


The Spice Is Right:


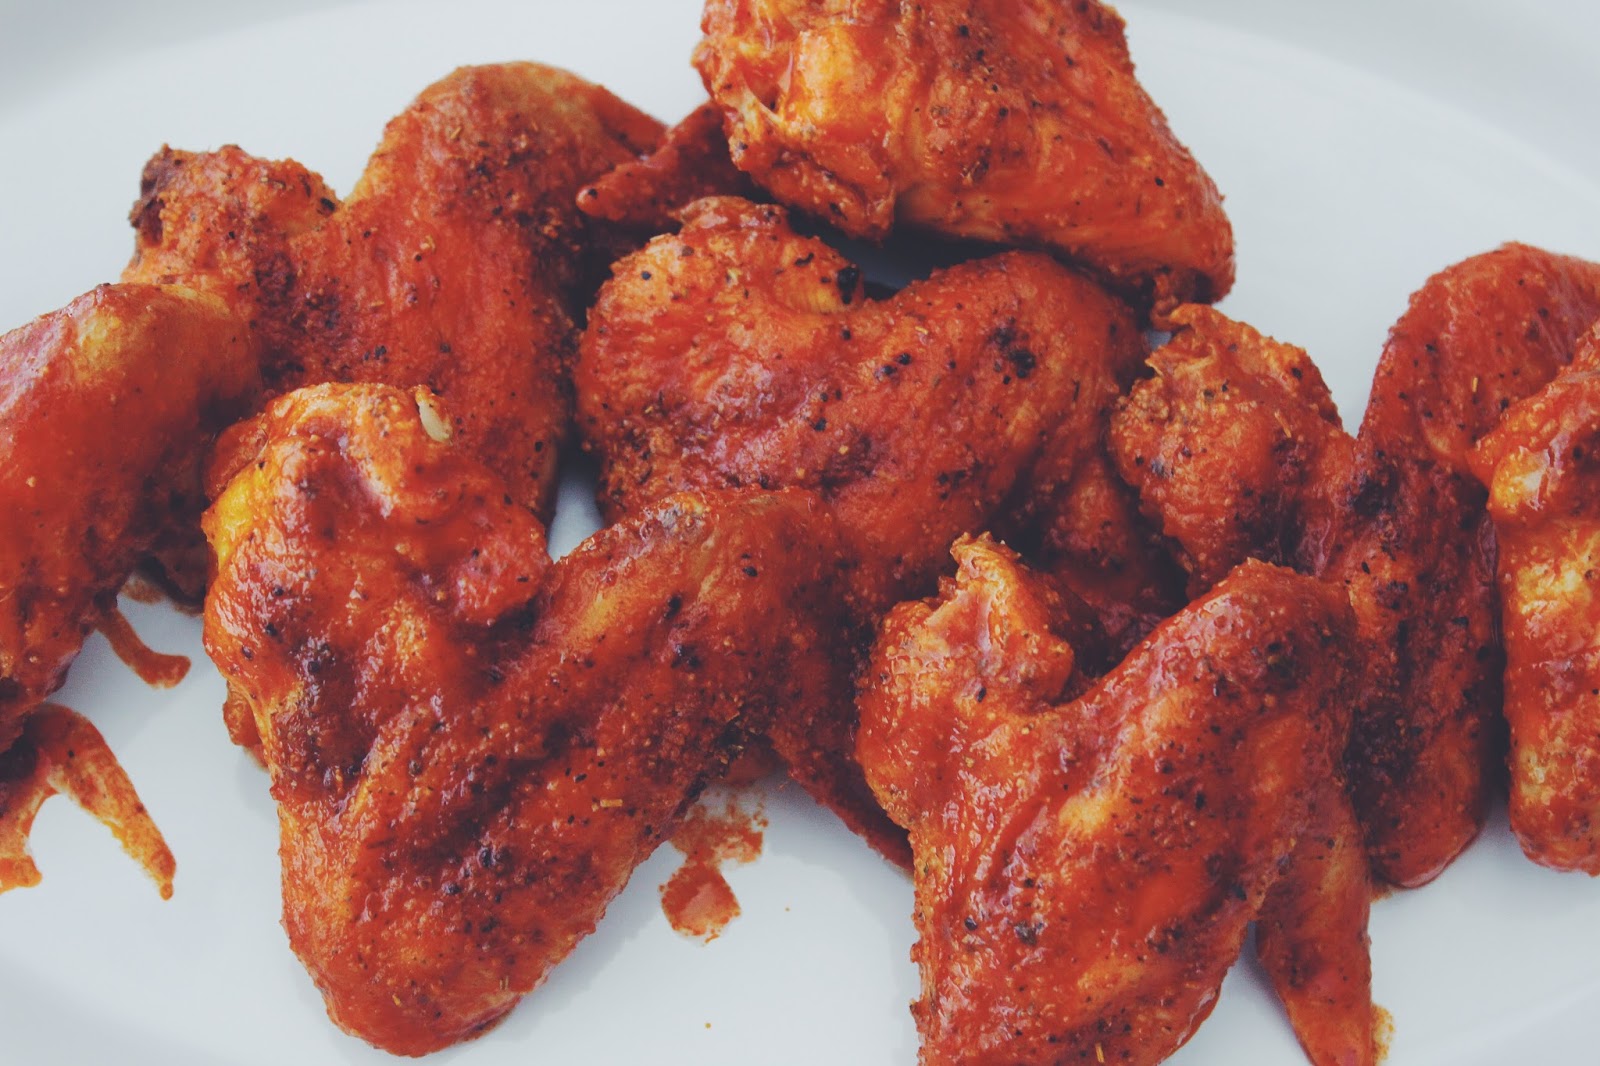
As a long-time spice girl, who must have flavor bite after bite, I use my custom fried chicken spice blend to make my chicken unforgettably scrumptious.  The key ingredients are kosher salt, freshly ground black pepper, celery salt, cayenne pepper,  garlic powder and smoked paprika. (*Cook’s Note: I use my spice blend to season both the chicken and the flour mixture for extra goodness.) 


The Perfect Frying Temperature:


For perfectly done, golden brown chicken, you want to fry it at a temperature of 350 degrees F.  To maintain this temperature and to ensure your chicken actually fries to a golden crisp, rather than steams or burns, in the oil, avoid over-crowding your frying pan/pot and keep an eye on the oil temperature throughout. This may require working in batches, but it will be worth it in the end!  Aim for 160 degrees F (dark meat) to 165 degrees (white meat) for perfect doneness.  


Tools to Have On Hand:


I recommend a deep-frying or candy thermometer to measure and monitor the temperature of the oil (sometimes it can cool down a bit as you add in new pieces or unexpectedly get too hot).  I additionally recommend an instant-read thermometer to test doneness.  A baking rack will also come in handy, if you have one available. 


For more of my tips and techniques, you can checkout my fried chicken tutorial where I walk you through all of the steps and show you my end results. Refer to it as often as needed.


Now that we’ve gotten all of that in place, let’s get on to what really matters…


Happy Eating!


The Perfect Fried Chicken


Ingredients:

Skin-on chicken legs (or whatever cuts you prefer)

Buttermilk

2 cups all-purpose flour or more, as needed

2 tablespoons cornstarch

Quart of canola, vegetable, or peanut oil for frying

1 teaspoon kosher salt

1/2 teaspoon freshly ground black pepper

1 teaspoon garlic powder

1 teaspoon celery salt

1/2 teaspoon cayenne pepper

1 teaspoon smoked paprika


For Brine:

1/4 cup salt

1/4 cup sugar

Water


*Gauge ingredient quantities based on the amount of chicken you’re frying and adjust accordingly.


Method:

Mix brine solution, add chicken, and brine in the refrigerator for two hours up to overnight.


Remove chicken from the refrigerator and the brine solution. Pat the chicken with paper towels until completely dry and set aside.


Mix salt, pepper, celery salt, garlic powder, cayenne and paprika together.  Mix flour and cornstarch together. Generously season chicken and flour mixture.


Dip chicken pieces in buttermilk, followed by the flour mixture, to coat.  Let chicken rest on a baking rack for 15-20 minutes before frying.


When ready to fry, heat oil to 350 degrees F in a heavy-bottomed pan (like a Dutch Oven) or deep-fryer.  Add chicken into oil and fry until done, approximately 8-10 minutes or so (use your thermometer to test doneness, however!).


Place fried chicken on a baking rack over a baking sheet/tray to drain any excess oil and lightly sprinkle the hot chicken with a bit of salt or more of the seasoning blend, if desired.  


Serve and enjoy!!


SHARE:

Thursday, November 4, 2021

Hot Skillet Cornbread


Food has always been a love language in my family. From my earliest memories, I recall the rallying call it represented to gather, nourish, strengthen bonds and demonstrate affection.  


My grandmother, in particular, would often call us and read off her dinner menu, ending with the invitation to come over and share in the bounty. It was code for, “I want to see you and spend time with you and share my love for you.”  And no few times, whether the menu was on the grander scale, or relatively modest, skillet cornbread was on the menu.  


I can still see her pulling a hot cast iron skillet from the oven with the same common touch that one might give to grabbing a pre-made dish from the fridge.  It was such a common occurrence that it’s forever etched in my memories—and heritage.  Similar scenes were recreated by my mom in our home, albeit on a less frequent rotation due to working mom life.)


There were other variations of cornbread that my grandmother served, like cracklin cornbread, prepared stovetop with cracklins mixed into the cornmeal batter that was fried in hot oil, yielding a savory pancake-esque bite, only crispier and more satiating.  Still, my favorite was the hot skillet cornbread that often stood, very well I might add, on its own as the bread course—making everything from collard greens and pot likker, to fried chicken, chili and more, that much better.  Hot, buttery, tender crumbs, with crispy a top and edges, have a way of doing that.


And then there was the reincarnation into phenomenal cornbread dressing, another family staple, served mostly during the holidays.  As traditions go, I've kept this one alive with my slightly adapted iteration of this forever family (and cultural) staple in my kitchen.  From stuffed cornbread, to cornbread dressing, to herbed cornbread madeleines, or on its savory, delicious lonesome, cornbread will always have a place in my heart and home.


I’m sharing this recipe with all the sentiments of love and togetherness that it represents for me, and I hope you take it, enjoy it, and create your own fond memories filled with…


Happy Eating!


Hot Skillet Cornbread


Ingredients:
1 stick (8 ounces) unsalted butter
1 1/2 cups cornmeal
1 cup flour
1/3 cup sugar
1 tablespoon baking powder
3/4 teaspoon kosher salt
1 1/2 cups milk
2 large eggs 

Heavy drizzle of honey (optional)

Instructions:

Preheat the oven to 400 degrees F.  Add butter to the skillet and place in the preheated oven for approx. 8 minutes, until butter is melted and golden.  

While the butter is melting and the skillet is heating through, in a medium bowl, add the cornmeal, flour, sugar, baking powder, and salt, and stir to combine. To the large bowl, add the milk, eggs and honey (if using). Toss in the dry ingredients into the wet ingredients and stir until just combined. 

Pour or spoon the batter into the skillet.  Bake for 20-22 minutes, until the cornbread is golden brown and the edges are browned (don't overbake!).  Remove from the oven, serve warm and enjoy! 


Baker's Note: Cornbread used for dressing can be made ahead and stored in the freezer for up to a month.


SHARE:

Sunday, October 8, 2017

Braised Short Ribs

There's something about this time of year that fuels my love for cooking and baking more than others.  Despite this year's trend towards sustained warmer temps into the early days of Fall, I decided to rev up my cooler weather repertoire last weekend.  And I couldn't think of a better way to launch into the land of seasonal eats than with my favorite braised short ribs.  So I grabbed my extra large dutch oven and let the fun unfold. 

Hearty beef short ribs, cooked to moist, tender, melt-in-your-mouth perfection, made for a Sunday supper that was loved by all (every cook's goal, right?).

I shared the behind-the-scenes action of bringing the dish together, so if you missed the fun, you can catch it here.

File this recipe in your "must have" warm and cozy fare because I'm certain that you'll want to make it again and again.  Served over creamy polenta, with pasta, mashed potatoes, as tacos, and more, makes this dish supremely versatile...and the gift that keeps on giving.

Happy Eating!

Braised Short Ribs 
Ingredients:
3 lbs beef short ribs 
1 large onion, diced
3 carrots, peeled and diced 
3 garlic cloves, minced
Kosher Salt
Freshly ground pepper
Garlic powder
1 tablespoon tomato paste
2 cups beef broth
1 bottle dry red wine
1 tablespoon brown sugar
Few dashes of Worcestershire sauce
Bundle of fresh thyme, tied together with kitchen twine
2 bay leaves
1 cup flour
1/4 cup olive oil   

Method:
Preheat oven to 350 degrees F.

Season flour with salt, pepper and garlic powder.  Separately, sprinkle salt and pepper on short ribs.  Dredge short ribs in flour to coat, dusting off excess.  Set aside on a baking sheet.

Heat oil over medium-high heat in a large dutch oven.  Add short ribs and sear on each side until golden brown (working in batches if necessary to prevent overcrowding the pot).  Remove seared ribs and return to the baking sheet.

Add onions, carrots and garlic and saute until tender, using same oil.  Stir in wine, broth, tomato paste, sugar, Worcestershire, and more salt and pepper to taste.  Add short ribs back to the dutch oven, toss in thyme and bay, and bring to a boil.  Lower heat and simmer until the liquid is reduced by almost half.  

Place covered dutch oven in the preheated oven and cook for 2 to 2.5 hours, until short ribs are fork tender.  Remove twine and bay leaves.  Transfer the ribs to a baking sheet.  Spoon fat off the top of the braising liquid. Taste for seasoning. Add ribs back in, serve and enjoy! 
 
SHARE:

Monday, January 30, 2017

Curry Chicken Pot Pie + BHM Virtual Potluck

Food, family and memories have always gone hand-in-hand for me.  From the earliest age, I can trace the family gatherings, sleepovers, holiday celebrations, and Sundays at my grandparents' home, in particular, to special meals and favorite dishes.

Chicken pot pie was one of those dishes that typically represented a quick weeknight meal (the frozen variety, to be clear) or, even more fun, a sleepover with my cousins at my grandparents, with my grandmother superbly strategizing on how to feed the lot.  It was an easy 'go-to' to satiate our hungry little bellies, and we loved it--largely because it represented family and love and shared memories.

Those memories continue to linger all these years later and recently inspired me to make a Curry Chicken Pot Pie (equally as perfect for a weeknight or feeding a crowd) that brings back all the comfort and delight that the little frozen pies, in the mini aluminum pans, provided years before.

In a similar spirit of personal history and tradition, this post is a part of a Black History Month Virtual Potluck among 28 black food bloggers from around the world, celebrating the undeniable place that food has always held within our culture and contributions to American history at large.  As Black History Month launches on February 1st, you can anticipate a new recipe from a participating blogger for each day of the month, culminating in a one-of-a-kind (and scrumptious) food journey!  See the full list of fellow bloggers below to take in the amazing recipes.

So here's to family, childhood memories, tradition...and Happy Eating!

Curry Chicken Pot Pie
Ingredients:
1 lb. boneless, skinless chicken breast, cubed
4 carrots, peeled and chopped
1 large onion, chopped
1 cup frozen green peas
1 3/4 cup chicken broth
2/3 cup coconut milk
2 teaspoons mild curry
1/3 cup unsalted butter
1/3 cup all-purpose flour
1 teaspoon kosher salt, plus more to taste as desired
1/2 teaspoon freshly ground black pepper, plus more for garnish
1 puff pastry sheet, thawed
1 egg, beaten
Flaked sea salt (optional)

Method:
Preheat oven to 425 degrees F.

Place chicken and carrots in a 2 quart saucepan and bring to a boil.  Cook for 12-13 minutes.  Add peas and cook for an additional 3 minutes.  Remove from heat, drain and set aside.

Melt butter in a large saucepan and saute onion over a medium-high heat until soft and translucent.  Stir in flour, kosher salt, 1/2 teaspoon pepper, curry, and cook to combine.  Stir in broth and coconut milk and simmer (stirring throughout to avoid sticking) until thickened.  Taste for seasoning and adjust, as needed.

Place chicken mixture in the bottom of a 2-quart round dish and pour curry mixture over the top.

Roll out pastry sheet and layer over the top of the baking dish.  Brush with egg wash and sprinkle with flaked sea salt (if using) and more ground pepper.  Make slits in the pastry to allow the steam to escape while baking.

Place baking dish in the oven and bake for 30-35 minutes until pastry is golden brown.  Remove, serve hot and enjoy!

BLACK HISTORY MONTH VIRTUAL POTLUCK


SHARE:

Friday, October 16, 2015

Buffalo Hot Wings

I wish there were adequate words to explain how so very seriously I take my hot wing indulgence.  And I have my mother to blame for this.  The day she began making hot wings for our family years ago was the day my obsession with the crispy, saucy, spicy guilty pleasure began.  Like a short-order cook, she achieved the perfect marriage of super crispy skin and the best buffalo sauce (translation: thick enough to coat the wing without separating into its respective hot sauce and butter parts, with a tangy kick to match.)

And so, from then until now, my quest for the perfect hot wing (besides my mama's) has always been about crispy skin and the perfect sauce.  And here enters my own fuss-free, scrumptious recipe that I began making a little while ago and can't rave about enough. 


First off, they're baked--not fried.  So for those who care, this is now a guilt-free indulgence! And the two ingredient sauce brings the tangy, vinegary, salty, spicy zip that all buffalo hot wings should be known for.  The perfect hot wing, in my kitchen, without the grease or the guilt, is euphoric.  It's the best winning combination I've come across in a while and when you make them, I'm sure you'll agree.

Happy Eating!

Buffalo Hot Wings
Ingredients:
2 lbs. chicken wings
Salt, pepper and garlic powder, to taste (or a poultry seasoning blend)
3/4 cup of hot sauce (recommended: Louisiana hot sauce)
1 tablespoon of butter
 
Method:
Preheat oven to 425 F.

Pat the skin of the wings dry with a paper towel to absorb any excess moisture.  Inside a large baking dish, season wings liberally with salt, pepper and garlic powder (or desired seasoning blend).  Place dish in preheated oven and bake for 40-45 minutes, or until skin reaches desired level of crispness.  

Remove wings from oven and set aside.  Melt butter into hot sauce, stirring occasionally, and bring sauce to a brief boil.  Lower heat slightly and allow sauce to continue to simmer, while reducing and thickening, about 5 minutes longer.  (Cook's note: adjust ratio of sauce to butter, as desired.  You may also add a squeeze of fresh lemon juice to reduce the spiciness.)  

Dip each wing in buffalo sauce to coat. Serve and enjoy! 

SHARE:

Wednesday, January 28, 2015

Chicken and Vegetable Soup


The Winter season is definitely alive and well, as evidenced by the recent snow storms and arctic-like chill taking place.  Right behind the priority of staying safe and warm, typically comes the desire for warm, comforting fare that will perfectly knock off the chill and make cabin-fever something to be relished rather than dreaded.  And here enters the perfect cold weather antidote to fit the bill:  my (no recipe) Chicken and Vegetable Soup.

The best things in life can sometimes, quite actually, be the easiest--and most delicious.  And this soup proves that with a bit of pantry and refrigerator foraging, that couldn't be any truer.  Gathering up staples that you've likely got on hand to assemble a quick, easy and satisfying soup, is just what the doctor ordered when good, fast, comfort food is on the agenda.  Canned beans, broth, fresh veggies, seasonings, spices, and a store-bought rotisserie chicken, combine to give you home-cooked goodness--without having much of anything to cook. 

A quick heat through to warm and flavor the broth and ingredients (I like my veg to remain crisp, so I don't simmer for very long) takes sheer minutes and you're off to "homemade" soup heaven to keep that winter chill at bay.

I chose a favorite pantry staple of cannellini beans and fresh vegetables including fennel, carrots, red bell pepper and jalapeno.  The shredded chicken, seasonings and spices (cumin, dried oregano, salt and pepper) rounded it out and made for a flavorful broth turned soup-base.  For the finish, I added a spritz of fresh lemon juice, fennel fronds and jalapeno peppers (optional).


Happy Eating!
SHARE:

Monday, January 12, 2015

Creole-Spiced Shrimp and Polenta


Some dishes are made to bring pure, unadulterated joy.  For me, that usually entails bold, unforgettable flavors and some measure of comfort-food-esque, homey goodness.  This past weekend, that joy was realized in my kitchen, as it has been so many times before, as I brought together two of my favorite things: bold, creole flavored shrimp and creamy polenta (a slight twist on the beloved shrimp and grits).  

So first about the shrimp (they deserve their own homage).  As the undisputed star of the dish, along with its natural, rich, dark, spice and flavor laden juices, it couldn't be easier to prepare.  A simple assembly and toss of the majority of the ingredients, followed by an oven-bake of 30 minutes, yields perfectly cooked, scrumptious, bread-sopping (with or without the polenta) noshing--and makes this dish perfect for when you're looking to get dinner on the table in under an hour (read: busy weeknights or lazy weekends) or equally when looking to serve up a bit of wow-appeal to guests and fellow diners.  Easy, quick, and oh so good.  Got it?

When I first started making this dish, it was just me, those irresistible shrimp, crusty bread for sopping up those must-have juices that form while they're baking in the oven and (possibly) a mixed greens salad here and there.  Then one day not so long ago, it dawned on me that this would make the perfect marriage with a base of creamy, luscious polenta, similar to our Southern classic of shrimp and grits.  And wah-la, the rest was history. 

So as you continue to brave the cold, wintery days ahead, be sure to infuse your eats with a bit of uncontainable goodness and joy with this simple, yet satisfying, recipe.

Happy Eating!

Creole-Spiced Shrimp and Polenta
(Cook's Note: For the shrimp, you can use as much (or as little) of the spicier ingredients as you like to suit your palate.) 
A bit of pre-dinner mise en place

Ingredients:
Creole-Spiced Shrimp
Instant Polenta
Water (milk or broth, optional)
Salt

Method:
When shrimp has about 10 minutes or so left in the oven, bring a large pot of water to a boil. (Cook's Note: Use a ration of 3-parts liquid to 1-part polenta).
Once water has reached a boil, add in salt to flavor and then stir in polenta and stir continually until done (also following package instructions, as needed).  

Remove shrimp pouch(es) from oven.  Serve over polenta in individual servings or in a large family style serving platter.  Enjoy!
   
SHARE:

Friday, February 7, 2014

{A Taste of Comfort}: Roasted Vegetable Soup


As the extremely wintry weather continues to make its rounds, I've been keeping the chill at bay with hearty, delicious and comforting bowls of goodness.  And there's nothing quite as warming and satisfying as a bowl of richly flavored and hearty soup to settle me in and make me forget that Jack Frost is just on the other side of the door.


So just in time for the weekend, I'm sharing my recipe for Roasted Vegetable Soup featured on POPSUGAR Food.  Now all that's left to do is kick back, relax, whip it up and enjoy the perfect taste of comfort.

Happy Eating!
SHARE:

Tuesday, February 4, 2014

Herb and Garlic Roasted Chicken with Root Vegetables


Herb-Garlic Roasted Chicken with Root Vegetables
When it comes to selecting a dish for all things delicious, hearty, comforting and crowd-pleasing, roasted chicken tops the list.  I count it as one of my favorite go-to bites when I’m looking for an unforgettable dish that comes together with ease--and often when I’m hosting dinner guests.

On a recent occasion, I decided to infuse some extra “love” into my recipe by flavoring the chicken with my Herb-Garlic butter.  Starting with my classic preparation of seasoning the cavity and stuffing it with herbs, citrus and aromatics, I then rubbed my compound butter on the skin (and tucked a little away underneath the skin to help the breast meat remain extra moist) before roasting the chicken over a bed of hearty root vegetables.  


And you can probably guess the results.  Within an hour and a half, a beautifully golden, crispy and succulent chicken, with tender root vegetables, emerged from the oven ready to be devoured. 

The next time you’re ready to wow your guests—and your palate—this easy and delicious recipe should top your list as the ultimate crowd pleaser.  

Happy Eating!

Herb and Garlic Roasted Chicken with Root Vegetables

Ingredients:
1 Whole Chicken (3 to 4 lbs.)
Herb–Garlic compound butter
1 large onion, quartered
1 lemon, quartered
1 head of garlic, halved with skin on
Fresh thyme
Fresh rosemary
Salt
Freshly ground black pepper
Root vegetables (parsnips, potatoes, and carrots), peeled and chopped

Method:

Preheat oven to 425 degrees F.

Place chicken in a roasting pan and sprinkle the cavity with salt and pepper.  Stuff the cavity with onion, lemon, garlic, thyme and rosemary.  Rub the chicken with the herb-garlic butter and gently lift the skin over the breast and tuck butter underneath.  (Be careful not to tear the skin.)  Season the chicken all over with salt and pepper.  Tuck the wings under and tie the legs together.

Spread the root vegetables in the roasting pan to form a bed around the chicken.  Place chicken in the preheated oven and roast for about an hour and fifteen minutes or until the juices run clear.  Remove the chicken from the oven, tent with foil and allow to rest for 10-20 minutes.  Carve and serve with the vegetables.  Enjoy!


SHARE:
© D.M.R. Fine Foods. All rights reserved.
MINIMAL BLOGGER TEMPLATES BY pipdig